Panzer Grenadier Battles on November 21st:
Desert Rats #16 - The Panzers Pull Back Desert Rats #19 - The Panzers Return
Desert Rats #17 - The Tomb Of Sidi Rezegh Jungle Fighting #7 - Line Of Departure
Desert Rats #18 - A Pibroch's Skirl South Africa's War #5 - Irish Eyes
Errors? Omissions? Report them!
As Fast As a Leopard
Waltzing Matilda #7
(Attacker) Japan vs Australia (Defender)
Formations Involved
Australia 4th Light Horse Regiment
Japan 4th Cavalry Brigade
Display
Balance:


Overall balance chart for WaMa007
Total
Side 1 0
Draw 0
Side 2 1
Overall Rating, 1 vote
5
4
3
2
1
4
Scenario Rank: --- of 940
Parent Game Waltzing Matilda
Historicity Alt-History
Date 1942-09-01
Start Time 08:00
Turn Count 26
Visibility Day
Counters 72
Net Morale 0
Net Initiative 2
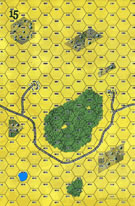
Maps 5: 1, 15, 5, 6, 7
Layout Dimensions 140 x 43 cm
55 x 17 in
Play Bounty 183
AAR Bounty 171
Total Plays 1
Total AARs 1
Battle Types
Delaying Action
Exit the Battle Area
Road Control
Scenario Requirements & Playability
Afrika Korps Counters
Eastern Front Maps
Guadalcanal Counters
Road to Berlin Maps
Secret Weapons Counters
Waltzing Matilda Base Game
Introduction

The Japanese conquest of Malaya relied on rapid movement through and around Allied positions, using bicycles, trucks and simple rapid marching. An invasion of Australia would likewise depend on rapid movement to isolate Australian forces and obtain local superiority - while the continent's garrison wasn't very large, the Japanese estimated they could at best land ten divisions. Even that, with hindsight, appears a fantastic stretch.

Conclusion

Japan possessed a cavalry tradition as vain as any Western power's, but the large cavalry units spent the war in China. Transporting them to Australia would have given the invaders a mobile force able to fuel itself from local resources, but like all Japanese units they would have faced determined resistance.


Display Relevant AFV Rules

AFV Rules Pertaining to this Scenario's Order of Battle
  • Vulnerable to results on the Assault Combat Chart (7.25, 7.63, ACC), and may be attacked by Anti-Tank fire (11.2, DFT). Anti-Tank fire only affects the individual unit fired upon (7.62, 11.0).
  • AFV's are activated by tank leaders (3.2, 3.3, 5.42, 6.8). They may also be activated as part of an initial activating stack, but if activated in this way would need a tank leader in order to carry out combat movement.
  • AFV's do not block Direct Fire (10.1).
  • Full-strength AFV's with "armor efficiency" may make two anti-tank (AT) fire attacks per turn (either in their action segment or during opportunity fire) if they have AT fire values of 0 or more (11.2).
  • Each unit with an AT fire value of 2 or more may fire at targets at a distance of between 100% and 150% of its printed AT range. It does so at half its AT fire value. (11.3)
  • Efficient and non-efficient AFV's may conduct two opportunity fires per turn if using direct fire (7.44, 7.64). Units with both Direct and AT Fire values may use either type of fire in the same turn as their opportunity fire, but not both (7.22, 13.0). Units which can take opportunity fire twice per turn do not have to target the same unit both times (13.0).
  • Demoralized AFV's are not required to flee from units that do not have AT fire values (14.3).
  • Place a Wreck marker when an AFV is eliminated in a bridge or town hex (16.3).
  • AFV's do not benefit from Entrenchments (16.42).
  • AFV's may Dig In (16.2).
  • Armored Transports: These are not combat units and are therefore not APC's, and they can transport all types of transportable units (5.6) so they are not Prime Movers. They suffer the same vulnerabilities in combat as open-top AFV's (7.61). All are mechanized. (SB)

Display Order of Battle

Australia Order of Battle
Army
  • Motorized
  • Towed
Japan Order of Battle
Imperial Japanese Army
  • Mechanized
  • Misc
  • Motorized
  • Towed

Display Errata (1)

1 Errata Item
Scen 7

The Note section should mention that a piece from Secret Weapons is required.

(rerathbun on 2011 Dec 26)

Display AARs (1)

As Fast As a Leopard, and Just As Fragile
Author rerathbun
Method Solo
Victor Australia
Play Date 2012-01-04
Language English
Scenario WaMa007

The Japanese objectives are to control the road and exit off the south edge. The Australians must try to prevent them, while inflicting as many step losses as possible.

The Australian cavalry sets up as far north as possible, using the extensive woods on Map 6 to anchor their line. The line is reinforced by two HMGs and backed by mortars. The artillery the rest of the HMGs set up behind the river further back.

The Japanese cavalry enters the north edge and advances in line, while their HMGs and artillery are transported up the road.

The Japanese cavalry advances to within four hundred yards of the Australian line east of the woods, and the Australians slowly retire, staying just out of range. The Japanese approach and assault the Australian Light Horse and HMGs holding in the woods. The assaults go poorly for the Japanese; They suffer disruptions and a demoralization while doing no damage to the Aussies. In the meantime, the Australian artillery and mortars' shooting is outstanding. They destroy several squadrons of Japanese cavalry and kill the Colonel in command of the whole force.

The Japanese advance slowly over the next few hours, but are unable to break the Australian line. Their effort costs them too many casualties, as the Australian shooting and bombardment continue to be excellent. The result is an Australian Major Victory.

This is a good cavalry versus cavalry scenario, and is closer than the score indicates. The Australians were extremely lucky with their die rolls, while the Japanese die rolling was below average.

0 Comments
You must be a registered member and logged-in to post a comment.
Errors? Omissions? Report them!
Page generated in 0.474 seconds.