Panzer Grenadier Battles on January 27th:
Cassino '44 #4 - Red Bull at the Barracks Again Road to Berlin #24 - Second Kinersdorf
Jungle Fighting #37 - The Withdrawal
Errors? Omissions? Report them!
Abu Agheila
Sword of Israel #8
(Attacker) State of Israel vs Arab Republic of Egypt (Defender)
Formations Involved
Display
Balance:


Overall balance chart for SwIs008
Total
Side 1 3
Draw 0
Side 2 0
Overall Rating, 3 votes
5
4
3
2
1
3.67
Scenario Rank: --- of 948
Parent Game Sword of Israel
Historicity Historical
Date 1967-06-05
Start Time 16:00
Turn Count 12
Visibility Day
Counters 119
Net Morale 1
Net Initiative 5
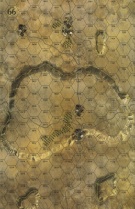
Maps 1: 66
Layout Dimensions 43 x 28 cm
17 x 11 in
Play Bounty 163
AAR Bounty 166
Total Plays 3
Total AARs 1
Battle Types
Inflict Enemy Casualties
Road Control
Urban Assault
Conditions
Anti-infantry Wire
Minefields
Scenario Requirements & Playability
Sword of Israel Base Game
Introduction

In the late afternoon of June 5th, Sgan Aluf "Natke" Nir's Centurion 226th Tank Battalion of Aluf Mishne Zippori's 14th Armored Brigade sighted the critical road junction at Abu Agheila. It did not look heavily defended, so he requested and received permission to press the attack, though he was ordered not to sacrifice his unit in the attempt. Zippori was wise to include that cautionary order.

Conclusion

Natke was surprised by the stiff resistance, though he should not have been. Abu Agheila had been the site of fierce fighting in 1956, and the Egyptians had spent the past 11 years fortifying the area. The Israelis had spent the same period studying the crossroads and wargaming how to capture it - never assuming the Egyptians would leave it undefended. Natke's battalion fell back into the dunes for cover, to await nightfall and try again.


Display Relevant AFV Rules

AFV Rules Pertaining to this Scenario's Order of Battle
  • Vulnerable to results on the Assault Combat Chart (7.25, 7.63, ACC), and may be attacked by Anti-Tank fire (11.2, DFT). Anti-Tank fire only affects the individual unit fired upon (7.62, 11.0).
  • AFV's are activated by tank leaders (3.2, 3.3, 5.42, 6.8). They may also be activated as part of an initial activating stack, but if activated in this way would need a tank leader in order to carry out combat movement.
  • AFV's do not block Direct Fire (10.1).
  • Full-strength AFV's with "armor efficiency" may make two anti-tank (AT) fire attacks per turn (either in their action segment or during opportunity fire) if they have AT fire values of 0 or more (11.2).
  • Each unit with an AT fire value of 2 or more may fire at targets at a distance of between 100% and 150% of its printed AT range. It does so at half its AT fire value. (11.3)
  • Efficient and non-efficient AFV's may conduct two opportunity fires per turn if using direct fire (7.44, 7.64). Units with both Direct and AT Fire values may use either type of fire in the same turn as their opportunity fire, but not both (7.22, 13.0). Units which can take opportunity fire twice per turn do not have to target the same unit both times (13.0).
  • Demoralized AFV's are not required to flee from units that do not have AT fire values (14.3).
  • Place a Wreck marker when an AFV is eliminated in a bridge or town hex (16.3).
  • AFV's do not benefit from Entrenchments (16.42).
  • AFV's may Dig In (16.2).
  • Open-top AFV's: Immune to M, M1 and M2 results on Direct and Bombardment Fire Tables, but DO take step losses from X and #X results (7.25, 7.41, 7.61, BT, DFT). If a "2X" or "3X" result is rolled, at least one of the step losses must be taken by an open-top AFV if present.
  • Closed-top AFV's: Immune to M, M1 and M2 results on Direct and Bombardment Fire Tables. Do not take step losses from Direct or Bombardment Fire. If X or #X result on Fire Table, make M morale check instead (7.25, 7.41, 7.61, BT, DFT).
  • Closed-top AFV's: Provide the +1 modifier on the Assault Table when combined with infantry. (Modifier only applies to Germans in all scenarios; Soviet Guards in scenarios taking place after 1942; Polish, US and Commonwealth in scenarios taking place after 1943.) (ACC)
  • Tank: all are closed-top and provide the +1 Assault bonus, when applicable
  • Assault Gun: if closed-top, provide the +1 Assault bonus, when applicable
  • Anti-Aircraft Weapon Carrier: apply a -1 modifier to an air attack if within three hexes of the targeted hex (15.14).
  • APC – Armored Personnel Carrier: These are Combat Units, but stack like Transports. They can transport personnel units or towed units. They are not counted as combat units for the +1 stacking modifier on the Direct Fire and Bombardment Tables (4.4). They may be activated by regular leaders and tank leaders (1.2, 3.34, 4.3, 5.43). They do not provide the +1 Assault bonus (ACC).
  • Unarmored Weapon Carriers: These are unarmored halftracks (Bufla and Sk7/2) or fully-tracked vehicles (Karl siege mortar) with mounted weapons. All are mechanized, except the BM-13 (Katyusha rocket launcher mounted on a truck). They are weapon units, not AFV's, so they are never efficient and cannot be activated by tank leaders. (SB)

Display Order of Battle

Arab Republic of Egypt Order of Battle
El Geish el Masry
  • Mechanized
  • Motorized
State of Israel Order of Battle
Israeli Defense Forces
  • Motorized

Display AARs (1)

How not to defend in PG Modern
Author J6A
Method Solo
Victor State of Israel
Play Date 2019-11-24
Language English
Scenario SwIs008

This was my first foray into PG (Modern), so I decided to go with a small scenario. One map, about 50 Egyptian units and 20 Israeli. 12 of the Israeli units are Centurions, and there is only a small infantry force. They are assaulting a heavily dug-in Egyptian infantry force, backed with 57mm and 85mm AT guns, a couple of mortars, and some WW2 era T34/85s and SU-100s. The Israelis are trying to take a town on the back of a large hill from the Egyptians, and to hopefully clear a road off the map from the town.

I set up what I thought was a strong Egyptian defense, with units (mostly infantry) on a small hill in front of the Israelis and in 2 small towns in front of the large hill. Minefields would make a direct assault on the hill difficult. I set up a substantial reserve near the town itself.

And that's when things went terribly wrong. As it turns out, nothing the Egyptians had was a match for the Centurions. Ignoring the 57mm AA guns, the Egyptians were attacking Centurions with 7 or 8 AT factors. The Centurions have an armor of 10. So, an 8 needs a 12 to hit, or a 10 (1 in 6 shot) while the 7s couldn't hit without a crossfire or being adjacent. And the Israelis had no need to be adjacent, because the Centurions 12 AT fire could shred the 3 armor of the SU-100s and the 5 armor of the T-34s. For instance, at one point, I rolled up a Centurion next to a T-34 and rolled snake-eyes. Okay, 2 (die roll) + 12 (AT factor) + 1 adjacent = 15 - 5 armor for the T-34 = 10. So, yes, snake-eyes was still a kill. And it only took at 6 at range (6+12-5 = 13) to eliminate 2 steps. And the Centurions are efficient, so they get 2 shots per activation. Suffice it to say that all of the armor I put in the Egyptian front line was shredded. The AT guns were tougher to kill, and most of them survived, however they were still just praying for high rolls to do anything. And eventually, 4 steps of Centurions did die. However, with the Egyptian AFVs virtually all destroyed, and a good number of infantry surrendering, the Israelis didn't even have to take the town or road to have a decisive victory. When I called it after 9 turns, the Israelis were ahead something like 69-40. And all of that 69 came from step losses (tank losses count double). They could just pull back and savor the victory.

So, what could I have done differently as the Egyptians? Here are a few thoughts.

  1. Hide the armor. Keep it well away from the front, and unleash it en masse to try to overwhelm scattered Israeli units. There aren't enough Israelis to sustain high losses.
  2. Don't defend as heavily on the crest of the ridge. Make the Israelis come to the Egyptians, even if it means giving up the column shift for being uphill.
  3. Change the layout of the defenses. I had a string of mines and wire that discouraged the Israelis from coming up the main road, so most of them just went around the Egyptian defenses because the Egyptians couldn't set up within 2 hexes of one of the map edges. I should have put the mines in a tighter ring around the objective town. Wire does nothing to tanks, and there wasn't enough infantry in the scenario (3 INF platoons and one HMG platoon) for it to be a major factor.
  4. Assault whenever possible. I actually tried to do this. 2 Egyptians give 10 FP, and will always get 1 shift for INF vs. unescorted AFVs (a big change from regular PG here) so they are firing on a decent column. Sure, 2 Centurions is 20 factors, and a leader and morale will kick them up to the top column, and lots of Egyptians will die, however the Egyptians have plenty of units, and should be just fine with a 2-1 loss ratio. I tried to do this in the scenario, realizing how badly outclassed the Egyptian armor was, and the loss of a couple of leaders made that difficult. Plus, infantry losses are only 1 VP, while tanks are 2, and the Israelis only have 24 steps of tanks.

Fog of War hurt the Egyptians in this one with several turns ending quickly (the +1 to the FoW when a side passes makes a big difference, as with the big initiative difference, the Israelis could finish their moves before more than a handful of Egyptians had moved) so they couldn't maneuver their bigger force into better positions.

So, why did I rate this a 4? Because I think with a better defensive plan, the Egyptians have a good chance of forcing the Israelis to withdraw and try again when they had more forces, as they did historically.

1 Comment
2022-06-22 13:29

When the armor values are that uneven, I sometimes use a house rule that a natural two is always a miss and a natural twelve is always a hit.

You must be a registered member and logged-in to post a comment.
Errors? Omissions? Report them!
Page generated in 0.179 seconds.