
|
Diepenlinchen Spearhead Division #6 |
||
|---|---|---|
| (Defender) Germany | vs | United States (Attacker) |
| Formations Involved | ||
|---|---|---|
| Germany |  |
12th Infantry Division |
| United States |  |
1st "Big Red One" Infantry Division |
| United States |  |
3rd "Spearhead" Armored Division |

|


| Overall Rating, 4 votes |
|---|
|
4.25
|
| Scenario Rank: --- of 964 |
| Parent Game | Spearhead Division |
|---|---|
| Historicity | Historical |
| Date | 1944-09-18 |
| Start Time | 15:00 |
| Turn Count | 12 |
| Visibility | Day |
| Counters | 44 |
| Net Morale | 0 |
| Net Initiative | 1 |
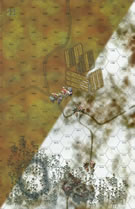
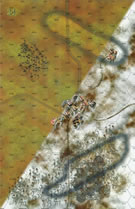
| Maps | 2: 22, 24 |
| Layout Dimensions | 56 x 43 cm 22 x 17 in |
| Play Bounty | 143 |
| AAR Bounty | 167 |
| Total Plays | 5 |
| Total AARs | 1 |
| Battle Types |
|---|
| Inflict Enemy Casualties |
| Urban Assault |
| Conditions |
|---|
| Anti-infantry Wire |
| Minefields |
| Off-board Artillery |
| Reinforcements |
| Smoke |
| Scenario Requirements & Playability | |
|---|---|
| Elsenborn Ridge | Maps + Counters |
| Spearhead Division | Base Game |
| Introduction |
|---|
|
With both sides trying to buy time to recover from the heavy fighting, neither planned much aggressive action. Whether by design or due to overzealous local commanders, the heaviest fighting in the sector took place in and around a small hamlet named Diepenlinchen. The Germans started the day off by driving off the infantry company holding Diepenlinchen and quickly setting up their defenses. |
| Conclusion |
|---|
|
The afternoon was growing short when the Americans had gathered enough troops for a go at Diepenlinchen. The first effort was repulsed but a second effort was able to drive the Germans out of the town. This enabled a number of men from C Company of the 26th Infantry’s First Battalion who had been captured in the earlier fighting to not have to spend the night in captivity. Shortly after dark the German launched a fair-sized effort to regain the town but it was turned back after some anxious moments for the defenders. |

|
|
|---|
| AFV Rules Pertaining to this Scenario's Order of Battle |
|---|
|
| Heer |
|---|
|


| Army |
|---|
|


| 4 Errata Items | |
|---|---|
| Scen 6 |
Two items of concern: 1) the Special Rules section in the setup instructions specify that ONLY US 1st Infantry Div leaders may spot for 1st Infantry Div OBA and Mortars, and that 3rd Armored Div leaders may ONLY spot for 3rd Armored OBA and Mortars. In other words, only leaders from the correct US division may spot for THAT division's supporting artillery & mortars. Unfortunately, the instructions do not identify which of the two US outfits controls the OBA. I imagine that the pair of 18 OBA artillery increments belong to the 1st Infantry Div (olive green increments) and not the 3rd Armored DIv (armor gold increments). These OBA increments were probably organic to the 1st Infantry Div. 2) NO 81mm Mortars are included in the setup instructions for the 3rd Armored Division. I suggest that players ADD a unit of 81mm Mortars to the counter mix for the 3rd Armored contingent in the setup. (treadasaurusrex
on 2025 Apr 01)
|

|
The reduced direct fire value of the Heer HMG became 5-5 starting with Fall of France. (plloyd1010
on 2015 Jul 31)
|

|
The morale and combat modifiers of German Sergeant #1614 should be "0", not "8". (Shad
on 2010 Dec 15)
|

|
The movement allowance on the counters in Airborne is misprinted. It should be "3." (rerathbun
on 2012 Jan 30)
|
| Take the Town & Rescue the POWs. | ||||||||||||||
|---|---|---|---|---|---|---|---|---|---|---|---|---|---|---|
This was a 2-session play through with the tenacious & stimulating goosebrown leading defending elements of the German 12th Infantry Division. I led attacking elements of the US 3rd Spearhead Armored Division along with elements of the US 1st Big Red One Infantry division. While the entire town was not taken, the American POWs of the 1st BN, 26th Infantry were located and freed. We played using the FOW, consolidation, smoke/illum, excess initiative, strategic movement and extended assault, optional rules. Also used were these 2 house rules: 1) Road Movement for Mechanized & Foot Units - All FOOT & MECHANIZED units may move on roads at the rate of 1/2 of a Movement Point (MP) per road hex, just like MOTORIZED units, and 2) Standardized Movement for Mechanized Units — All mechanized units may move through clear hexes at a movement cost of only 1 movement point (MP) per hex, instead of 1 1/2. Add one to this cost if moving up, across, or down slopes hexes. Our exciting, first session (game turns 1-4) featured a rapid American movement to contact covered by intermittent smokescreens. A single US step was lost, when an engineer unit ran into a minefield and was hit by accurate opfire on the SE margins of Diepenlinchen. Probing US tanks move diagonally across the town but were initially unable to locate the POWs from the 1-26th US Infantry. Leaving the relative safety of Diepenlinchen, a company of counter attacking German grenadiers, was cutoff and surrounded as it moved SW onto the western, 20-meter ridge. A reinforcing Wehrmacht assault gun platoon arrived to strengthen the remaining garrison on the 3rd game turn. Limited artillery ammunition supplies plagued the American long-range artillery throughout this session. At session’s end, the victory point tally was 11 for the Germans, and 0 for the struggling GIs. The second & final session (game turns 5-9) featured an unexpected reversal of fortune, with the defending Germans abruptly conceding at the start of the 9th game turn when the results of the match became a foregone conclusion. However, this was preceded by fierce fighting in the gathering gloom as night fell. There were multiple close assaults in the town and on the 20-meter ridge to the west. A handful of these resulted in local German tactical successes, including the loss of a platoon of US Sherman tanks, and a number of American demoralizations & disruptions in critical situations. Also lost in a close range AT crossfire was the Jerry’s only StUG IV assault gun platoon. The final victory point tally indicated a minor American victory by a score of 22-16. This was a slightly flawed, but fun-to-play scenario, with many decision points and the opportunity for rapid maneuver by the American player. I give it a solid 4, and recommend it for both SHARED and SOLO play. |
||||||||||||||
| 0 Comments |