
 Sap2005

|
Punishment on Yellow Beach Saipan 2 #6 |
||
|---|---|---|
| (Defender) Japan | vs | United States (Attacker) |
| Formations Involved | ||
|---|---|---|
| Japan |  |
47th Independent Mixed Brigade |
| United States |  |
25th Marine Regiment |

|


| Overall Rating, 0 votes |
|---|
|
0
|
| Scenario Rank: --- of 1094 |
| Parent Game | Saipan 2 |
|---|---|
| Historicity | Historical |
| Date | 1944-06-15 |
| Start Time | 09:00 |
| Turn Count | 18 |
| Visibility | Day |
| Counters | 67 |
| Net Morale | 0 |
| Net Initiative | 1 |
| Maps | 1: 81 |
| Layout Dimensions | 43 x 28 cm 17 x 11 in |
| Play Bounty | 169 |
| AAR Bounty | 168 |
| Total Plays | 1 |
| Total AARs | 1 |
| Duplicates | Saip005 |
| Battle Types |
|---|
| Hill Control |
| Inflict Enemy Casualties |
| Conditions |
|---|
| Entrenchments |
| Off-board Artillery |
| Randomly-drawn Aircraft |
| Scenario Requirements & Playability | |
|---|---|
| Saipan 2 | Base Game |
| Introduction |
|---|
|
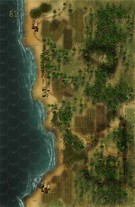
Lt. Col. Lewis C. Hudson’s 2/25 Marines landed on Beach Yellow 1, the next-to-last American beach. Here the Marines faced enemy fire from the front, where Japanese guns had been dug in behind a railroad embankment, and from their right flank, where Japanese guns on Agingan Point, the south-west tip of Saipan, poured fire into the slowly-moving amphibious tractors. The Japanese infantry gave way, allowing the artillery, anti-aircraft guns and mortars to wreak slaughter on the invaders. The embankment would have to be taken. |
| Conclusion |
|---|
|
Where the Marine-crewed LVT(A)’s on other beaches refused to engage the enemy, the Army crews of the 708th Amphibian Tank Battalion spearheaded the assault and even deliberately sought to draw enemy fire away from the Marines. Despite the bravery of the Army amphibians, the Japanese held out until Navy carrier planes blasted their positions and destroyed many of their heavy weapons. |

|
|
|---|
| AFV Rules Pertaining to this Scenario's Order of Battle |
|---|
|
| Imperial Japanese Army |
|---|
|


| Imperial Japanese Navy |
|---|
|


| Army |
|---|
|
| Marine Corps |
|---|
|


| 3 Errata Items | |
|---|---|

|
The A1 has an inherent leader and two combat steps. Its counter should have been given an amphibious armor symbol. (Shad
on 2013 May 06)
|

|
The A4 has an inherent leader and two combat steps. Its counter should have been given an amphibious armor symbol. (Shad
on 2013 May 06)
|

|
The 8-3 Marine Infantry counter appears in most of the Saipan 1944 and Marianas 1944 scenarios, replacing the 10-3 DF valued Marine counters for those scenarios and is currently published in the most recent Saipan printing. (JayTownsend
on 2015 Dec 26)
|
| Saipan 2nd Edition, scenario #6: Punishment on Yellow Beach | ||||||||||||
|---|---|---|---|---|---|---|---|---|---|---|---|---|
Saipan 2nd Edition, scenario #6: Punishment on Yellow Beach This scenario for its medium size, was one of the bloodiest Marine scenarios I have ever fought. The Japanese have a ton of nasty naval and army guns in entrenchments to go along with their Infantry and mortars. The Americans have their LVT 4s to carry the Marines forward to a point and will need these to follow, both for direct fire and assault added value/fire. They also have Army LVT A-1s & LVT A-4s to lead the way but all three types of LVTs have very weak armor protection and the loses stack up fast to the approached on Japanese positions. There are three victory objectives for the American to try to achieve and I didn’t read them in detail, as Hill 1114 is only for that hex and Hill 1005 is for the whole hill that encompasses Hill 1005, or I would have setup the Japanese defenses more around the hill mass of 1005 then the lone hill hex of 1114 and the Japanese would have won this game. But as it was the Marines conquered the hill mass of 1005 and the hill of 1114 but lost too many casualties. The Marines won a very minor victory, as they lost a staggering 40 steps and 4 leaders, to the Japanese losses of 15 steps and 3 leaders. Those Amphibious tank and transport get shredded and fortunately most were not loaded. So a hollow victory and if the Japanese setup as I mentioned, they would probably have won this one. With that said, one of the funnier scenario to play. |
||||||||||||
| 0 Comments |