
 PoCr027

|
Efthymi Parachutes Over Crete #28 |
||
|---|---|---|
| (Attacker) Germany | vs | New Zealand (Defender) |
| Formations Involved | ||
|---|---|---|
| Germany |  |
1st Air Landing Assault Regiment |

|


| Overall Rating, 2 votes |
|---|
|
3
|
| Scenario Rank: --- of 1094 |
| Parent Game | Parachutes Over Crete |
|---|---|
| Historicity | Historical |
| Date | 1941-05-26 |
| Start Time | 09:00 |
| Turn Count | 20 |
| Visibility | Day |
| Counters | 107 |
| Net Morale | 0 |
| Net Initiative | 2 |
| Maps | 2: 96, 99 |
| Layout Dimensions | 56 x 43 cm 22 x 17 in |
| Play Bounty | 166 |
| AAR Bounty | 168 |
| Total Plays | 1 |
| Total AARs | 1 |
| Battle Types |
|---|
| Road Control |
| Urban Assault |
| Entrenchment Control |
| Conditions |
|---|
| Off-board Artillery |
| Randomly-drawn Aircraft |
| Terrain Mods |
| Scenario Requirements & Playability | |
|---|---|
| Parachutes Over Crete | Base Game |
| Introduction |
|---|
|
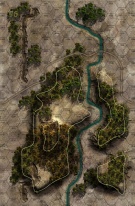
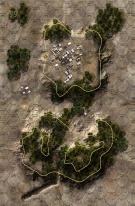
On the left flank of the German advance, Ringel had placed the battered remnants of the Assault Regiment. The paratroopers drove up the coast road from Maleme toward Canea with little opposition until they reached the re-formed New Zealand line at the coastal village of Efthymi. |
| Conclusion |
|---|
|
The paratroopers' initial assault drove the New Zealand Divisional Cavalry out of their positions and looked to be the start of a substantial advance. But the Kiwi senior leadership, now seeming to recover their competence, organized a prompt counter-attack that restored the original positions. The Germans continued to probe the defenses, but did not make another major attack. Had the New Zealand commanders acted in this fashion on 20 May, the defenders might have repelled the invasion. |

|
|
|---|
| AFV Rules Pertaining to this Scenario's Order of Battle |
|---|
|
| Luftwaffe |
|---|
|


| New Zealand Army |
|---|
|


| 1 Errata Item | |
|---|---|

|
Reduce strength direct fire value be came 5-5 in Army at Dawn. (plloyd1010
on 2015 Jul 31)
|
| Relatively Quick & Rather Bloody | ||||||||||||||
|---|---|---|---|---|---|---|---|---|---|---|---|---|---|---|
This was a 4-session playthrough with the indomitable & bold Reconquista leading the assaulting German glidermen in this 20-turn episode. I had the defending Kiwis in what was a costly -- no armor -- shoot 'em up in hilly Cretan terrain. The ancient fates were kind to the New Zealanders on King Minos' island most of this game, but especially after the senior German commander was eliminated on the 12th game turn. German air support was relatively ineffective as was OBA, and the Kiwis has surprisingly accurate mortar support thoughout this episode. The Jerries could just not secure the road and the entrenchments, in spite of repeated, costly attempts. Gamely, they just kept coming, until they basically ran out of undisrupted or demoralized troops. Very heavy casualties for both sides in this one, including 3 New Zealand & 5 German leaders. We give this relatively balanced fight a solid rating 3 in shared, online play, with an able opponent. However, it is better suited for SOLO play, IMHO. |
||||||||||||||
| 1 Comment |

My hard-fighting opponent forgot to mention that we used these TWO house rules to simplify and improve our play:
Road Movement for Mechanized & Foot Units All FOOT & MECHANIZED units may move on roads at the rate of 1/2 of a Movement Point (MP) per road hex, just like MOTORIZED units.
Voluntary Unit Reduction Players may voluntarily reduce 2-step personnel units to 1-step (halved) units if they have at least one leader of Major or higher rank among their side’s assigned force. To do so, the unit to be halved must begin the player’s activation phase in the same hex or in an adjacent hex to a Captain or higher rank. The full-strength unit to be halved must be in good order and this action costs all the reduced unit’s movement points. Remove the full-strength unit and replace it with 2 reduced strength units. Mark both — and the leader — as activated.