
 PACA018

|
Abrupt Meeting in the Central Valley Pacific Armor #19 |
||
|---|---|---|
| (Attacker) Japan | vs | United States (Defender) |
| Formations Involved | ||
|---|---|---|
| Japan |  |
2nd 'Geki' Tank Division |
| United States |  |
6th Infantry Division |

|


| Overall Rating, 0 votes |
|---|
|
0
|
| Scenario Rank: --- of 1093 |
| Parent Game | Pacific Armor |
|---|---|
| Historicity | Alt-History |
| Date | 1945-01-01 |
| Start Time | 09:00 |
| Turn Count | 28 |
| Visibility | Day |
| Counters | 152 |
| Net Morale | 0 |
| Net Initiative | 0 |
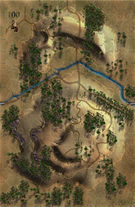
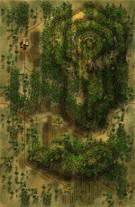
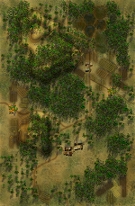
| Maps | 3: 100, 82, 83 |
| Layout Dimensions | 84 x 43 cm 33 x 17 in |
| Play Bounty | 204 |
| AAR Bounty | 168 |
| Total Plays | 1 |
| Total AARs | 1 |
| Battle Types |
|---|
| Inflict Enemy Casualties |
| Meeting Engagement |
| Road Control |
| Urban Assault |
| Conditions |
|---|
| Off-board Artillery |
| Randomly-drawn Aircraft |
| Terrain Mods |
| Scenario Requirements & Playability | |
|---|---|
| Elsenborn Revised | Counters |
| Leyte '44 | Counters |
| Marianas 1944 | Maps |
| Pacific Armor | Base Game |
| Saipan 1944 | Maps + Counters |
| Introduction |
|---|
|
American air reconnaissance reported the presence of tanks behind the Lingayen Gulf beaches; signal intelligence made the 2nd Tank Division's primary equipment to be the Type 97 Shinhoto Chi-Ha. The fighting on Saipan had already shown Japan's best tank to be small, under-armed and thoroughly outdated. The separate tank destroyer battalions attached to the American infantry divisions should be sufficient to deal with any Japanese armor. |
| Conclusion |
|---|
|
While the new Japanese tanks were far more capable than the Type 97 (even with its improved turret), the best of them (the Type 4 Chi-To) still only barely matched the American Sherman tank. Were the Japanese to have success, they would need to overwhelm with numbers. The Americans did not deploy an armored division to the Pacific Theater; the shipping burden made this nearly impossible. The Japanese would therefore face only the separate tank and tank destroyer battalions assigned for infantry support. |
| Additional Notes |
|---|
|
The Japanese player will need INF, HMG, Ho-Ha, and aircraft from Saipan; all the rest of the vehicles are from Pacific Armor. The American player would be best served by using leaders and FLM from Saipan, a Scott, 4.2 in mortar, and 1 INF from Leyte, and everything else from Elsenborn Ridge. |

|
|
|---|
| AFV Rules Pertaining to this Scenario's Order of Battle |
|---|
|
| Imperial Japanese Army |
|---|
|


| Army |
|---|
|


| 1 Errata Item | |
|---|---|

|
The M18 has a special rule in Battle of the Bulge but it applies globally: "A two-step M18 unit can fire one anti-tank shot and move half its movement allowance (retain fractions) in a single impulse. The order in which it does these two actions is the player's choice." (Shad
on 2010 Dec 15)
|
| Pacific Armor, scenario #19: Abrupt Meeting in the Central Valley | ||||||||||||
|---|---|---|---|---|---|---|---|---|---|---|---|---|
Pacific Armor, scenario #19: Abrupt Meeting in the Central Valley Normally I prefer historical scenarios but every once in a while, it’s nice to try a hypothetical scenario and I had to try one of Mike’s 4 add on scenarios to this supplement packages with the upgraded armor. Since the Japanese enter from the south, naturally they will get to and control the two town hexes on map 83, as they are located closer to the southern edge, and the Americans entering from the Northern edge will get to the towns on map 82 & 100 first, as they are located closer to the north. So, with the victory conditions as they are the Japanese will need one more town hex and control of the north-south road, so all three maps will have to be fought over. About 10 turns in, I realized even though the Japanese bring a lot of armor to the table, 23 counters to the Americans 18 counters, the Americans have Armor Efficiency and the Japanese do not, so with the two to one shot advantage, it’s like the Americans have a 36 to 23 advantage in armor. Also, for some reason the Japanese don’t have a lot of Infantry types, the Americans have about a 3 to 1 advantage. So, once I burned through most of my Japanese armor, the Japanese were losing by a ton on the casualties lost and there was no way to take another town hex or clear the north-south road, the Americans win a major victory. I see scenario #20 having the same problem, not enough Japanese Infantry for them to win but scenarios 21 & 22 look promising with more Infantry and maybe more balanced, which I will play someday for sure but for now, back to the first 18 historical scenarios in this supplement. |
||||||||||||
| 0 Comments |