Panzer Grenadier Battles on October 24th:
Afrika 1944 #22 - PAKfront Leyte '44 #12 - Flying Wedge
Fronte Russo #9 - Potemkin Village Leyte '44 #13 - Failure at Buri Airfield
Red & White #28 - Bastion
Errors? Omissions? Report them!
Roadblock at Muñoz
Pacific Armor #16
(Defender) Japan vs United States (Attacker)
Formations Involved
Japan 2nd 'Geki' Tank Division
United States 20th Infantry Regiment
Display
Balance:


Overall balance chart for PACA016
Total
Side 1 1
Draw 0
Side 2 0
Overall Rating, 0 votes
5
4
3
2
1
0
Scenario Rank: --- of 1094
Parent Game Pacific Armor
Historicity Historical
Date 1945-02-01
Start Time 11:00
Turn Count 26
Visibility Day
Counters 143
Net Morale 0
Net Initiative 0
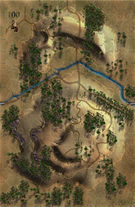
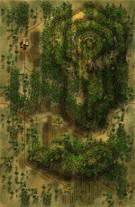
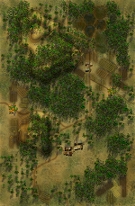
Maps 3: 100, 82, 83
Layout Dimensions 84 x 43 cm
33 x 17 in
Play Bounty 202
AAR Bounty 168
Total Plays 1
Total AARs 1
Battle Types
Inflict Enemy Casualties
Road Control
Urban Assault
Conditions
Entrenchments
Off-board Artillery
Randomly-drawn Aircraft
Terrain Mods
Scenario Requirements & Playability
Elsenborn Revised Counters
Marianas 1944 Maps
Pacific Armor Base Game
Saipan 1944 Maps + Counters
Introduction

The Japanese defended Muñoz with a strong force of infantry, armor, and anti-tank guns. As had been the case at Lupao, they gave much less attention to guarding their flanks - and as at Lupao, the Americans obliged them by coming straight at their defenses. The ground around the town offered little cover, and the Japanese had prepared their defenses well for both tanks and infantry.

Conclusion

A rain of Japanese fire, including the rarely seen howitzer batteries, kept the Americans from even reaching the outskirts of town. The open ground provided little cover, an the Japanese had dug in their tanks so that only the turret showed above ground. The swift capture of Muñoz demanded by division commander Edward Patrick (who would, six weeks later, become the second of three American division commanders killed in action during the war) would not become reality.

Additional Notes

The Japanese player will need ENG, 47mm, Ho-Ni, Shin, and Type 92 counters from Pacific Armor. The American player will need additional INF, ENG, HMG, M4, and 81mm from Elsenborn Ridge, the 4.2 in mortar from Pacific Armor


Display Relevant AFV Rules

AFV Rules Pertaining to this Scenario's Order of Battle
  • Vulnerable to results on the Assault Combat Chart (7.25, 7.63, ACC), and may be attacked by Anti-Tank fire (11.2, DFT). Anti-Tank fire only affects the individual unit fired upon (7.62, 11.0).
  • AFV's are activated by tank leaders (3.2, 3.3, 5.42, 6.8). They may also be activated as part of an initial activating stack, but if activated in this way would need a tank leader in order to carry out combat movement.
  • AFV's do not block Direct Fire (10.1).
  • Full-strength AFV's with "armor efficiency" may make two anti-tank (AT) fire attacks per turn (either in their action segment or during opportunity fire) if they have AT fire values of 0 or more (11.2).
  • Each unit with an AT fire value of 2 or more may fire at targets at a distance of between 100% and 150% of its printed AT range. It does so at half its AT fire value. (11.3)
  • Efficient and non-efficient AFV's may conduct two opportunity fires per turn if using direct fire (7.44, 7.64). Units with both Direct and AT Fire values may use either type of fire in the same turn as their opportunity fire, but not both (7.22, 13.0). Units which can take opportunity fire twice per turn do not have to target the same unit both times (13.0).
  • Demoralized AFV's are not required to flee from units that do not have AT fire values (14.3).
  • Place a Wreck marker when an AFV is eliminated in a bridge or town hex (16.3).
  • AFV's do not benefit from Entrenchments (16.42).
  • AFV's may Dig In (16.2).
  • Open-top AFV's: Immune to M, M1 and M2 results on Direct and Bombardment Fire Tables, but DO take step losses from X and #X results (7.25, 7.41, 7.61, BT, DFT). If a "2X" or "3X" result is rolled, at least one of the step losses must be taken by an open-top AFV if present.
  • Closed-top AFV's: Immune to M, M1 and M2 results on Direct and Bombardment Fire Tables. Do not take step losses from Direct or Bombardment Fire. If X or #X result on Fire Table, make M morale check instead (7.25, 7.41, 7.61, BT, DFT).
  • Closed-top AFV's: Provide the +1 modifier on the Assault Table when combined with infantry. (Modifier only applies to Germans in all scenarios; Soviet Guards in scenarios taking place after 1942; Polish, US and Commonwealth in scenarios taking place after 1943.) (ACC)
  • Tank: all are closed-top and provide the +1 Assault bonus, when applicable
  • Tank Destroyer: do not provide the +1 Assault bonus, even if closed-top (SB)
  • Armored Cars: These are Combat Units. They are motorized instead of mechanized. All have their own armored car leaders, who can only activate armored cars (6.85). Do not provide the +1 Assault bonus (ACC).
  • Reconnaissance Vehicle: 8.23 Special Spotting Powers Both foot and vehicle mounted recce units (1.2) possess two special spotting abilities. The first ability is that they can spot enemy in limiting terrain at one hex further than the TEC specifies for other units and leaders. For example, an enemy unit in town can normally be spotted at three hexes or less, but a recce unit can spot them at four hexes.Their second ability is that they can place a Spotted marker on any one enemy unit they can spot per turn, just as if the enemy unit had "blown its cover" by firing. Such Spotted markers are removed as described earlier.
  • Armored Transports: These are not combat units and are therefore not APC's, and they can transport all types of transportable units (5.6) so they are not Prime Movers. They suffer the same vulnerabilities in combat as open-top AFV's (7.61). All are mechanized. (SB)

Display Order of Battle

Japan Order of Battle
Imperial Japanese Army
  • Motorized
United States Order of Battle
Army
  • Mechanized
  • Motorized

Display AARs (1)

Pacific Armor, scenario #16: Roadblock at Munoz
Author JayTownsend
Method Solo
Victor Japan
Play Date 2026-04-12
Language English
Scenario PACA016

Pacific Armor, scenario #16: Roadblock at Munoz

This is one of the larger scenarios in the pack. It was a nail biter until the end. A lot depends on the defender’s setup and the attacker lane of approach. The terrain is mostly flat as you see by the (other) notes on the scenario.

Japanese forces setup in three main areas, one in and around the town hexes on the western side of map 82 another on the in and around the town hexes on the western side of map 83 and about half of my forces setup in or around the town hexes on the eastern side of map 83. The Americans entered in four groups, in four areas as not to bunch up and decided not to tackle all three Japanese battlegroups at once but to concentrate on the two western groups first and regroup for the larger Japanese eastern side defenses.

One mistake the American made early was charging their armor ahead, as the Sherman tanks might be strong but the Japanese have too many anti-tank guns and tanks, and the Americans after losing half their armor early, had to pull the rest back to safety. By the scenario end however, all the American M5s and M4s were eventually lost. The American’s off board artillery and air-strikes help them to take two controlled Japanese areas after very heavy loses but the key to fighting all those entrenchments and city hexes are their 6 Engineer and 1 FLM Engineer units to get those modifiers in assaults. Protect that FLM engineer as long as possible, it comes in very handy and I lost mine towards the end on gameplay.

After taking heavy loses but taking both Japanese western controlled areas, the Americans regrouped to hit the larger Japanese battlegroup defending the eastern side area. The Japanese had a pretty good defensive works here and the battle raged. First time I got to use a Japanese Type 92 armored car, which actually inflicted some damaged. The Americans kept regrouping to assault the last two town hexes and the last two entrenchments that just happened to be on the east-west road on map 83 but these were either contested or held out. Like in actual historical format, the Americans fell short and would have to try another day. They did manage to take 6 out of 8 entrenchments and all the towns but two but fell short of victory and only managed to get one out of three objectives. The Japanese lost 86 steps and 12 leaders and the Americans lost 55 steps and 6 leaders, as this was a very bloody scenario but the Japanese achieved a minor victory and I could see this scenario going either way.

Side notes:

The 20th Infantry attacked make little progress coming just short of Route 99 when Japanese tanks and artillery fire from the southern end of Munoz stalled the attack, the 1st Battalion did manage to clear a cemetery along Route 5 and the southern corner of the town along the railroad. February 2nd was more or the same with only slight gains and General Patrick lost his patience and sacked Colonel Lves over the slow progress, an action he would later regret. On February 3rd again the 20th Infantry made minor gains into tiny sections of Munoz and overran a few strongpoints but General Patrick realized Munoz was going to be a tough nut to crack. The Japanese tanks, artillery and machine gun fire kept the Americans from reaching the main line of defense over the last three days of fighting.

0 Comments
You must be a registered member and logged-in to post a comment.
Errors? Omissions? Report them!
Page generated in 0.391 seconds.