Panzer Grenadier Battles on October 24th:
Afrika 1944 #22 - PAKfront Leyte '44 #12 - Flying Wedge
Fronte Russo #9 - Potemkin Village Leyte '44 #13 - Failure at Buri Airfield
Red & White #28 - Bastion
Errors? Omissions? Report them!
Behind Whose Lines?
Pacific Armor #11
(Attacker) Japan vs United States (Defender)
Formations Involved
Japan 2nd 'Geki' Tank Division
United States 27th Infantry Regiment
Display
Balance:


Overall balance chart for PACA011
Total
Side 1 1
Draw 0
Side 2 0
Overall Rating, 0 votes
5
4
3
2
1
0
Scenario Rank: --- of 1093
Parent Game Pacific Armor
Historicity Historical
Date 1945-01-29
Start Time 20:00
Turn Count 28
Visibility Night
Counters 33
Net Morale 0
Net Initiative 0
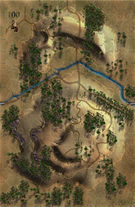
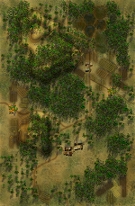
Maps 2: 100, 83
Layout Dimensions 86 x 28 cm
34 x 11 in
Play Bounty 169
AAR Bounty 168
Total Plays 1
Total AARs 1
Battle Types
Ambush
Breakout
Exit the Battle Area
Inflict Enemy Casualties
Scenario Requirements & Playability
Marianas 1944 Maps
Pacific Armor Base Game
Saipan 1944 Maps + Counters
Introduction

The 27th Infantry Regiment set up camp along the road leading from Gonzales toward Pemienta and then on into the mountains. That put them astride the retreat route of a small Japanese force heading eastward. Both the Americans and Japanese appear to have believed themselves well behind their own lines; this came into question when the Japanese ran into the Americans and tried to push on through.

Conclusion

The small Japanese detachment apparently lost all of its heavy equipment in the breakthrough attempts, which lasted until 0400. That included eight irreplaceable 105mm howitzers, along with eight tanks, and 125 men. The Americans suffered 60 casualties, but their advance had not been slowed.

Additional Notes

The Japanese player will need Shin, SS-Ki, and So-Da units from Pacific Armor. The American player will need 37mm AT and M3 halftracks from Pacific Armor


Display Relevant AFV Rules

AFV Rules Pertaining to this Scenario's Order of Battle
  • Vulnerable to results on the Assault Combat Chart (7.25, 7.63, ACC), and may be attacked by Anti-Tank fire (11.2, DFT). Anti-Tank fire only affects the individual unit fired upon (7.62, 11.0).
  • AFV's are activated by tank leaders (3.2, 3.3, 5.42, 6.8). They may also be activated as part of an initial activating stack, but if activated in this way would need a tank leader in order to carry out combat movement.
  • AFV's do not block Direct Fire (10.1).
  • Full-strength AFV's with "armor efficiency" may make two anti-tank (AT) fire attacks per turn (either in their action segment or during opportunity fire) if they have AT fire values of 0 or more (11.2).
  • Each unit with an AT fire value of 2 or more may fire at targets at a distance of between 100% and 150% of its printed AT range. It does so at half its AT fire value. (11.3)
  • Efficient and non-efficient AFV's may conduct two opportunity fires per turn if using direct fire (7.44, 7.64). Units with both Direct and AT Fire values may use either type of fire in the same turn as their opportunity fire, but not both (7.22, 13.0). Units which can take opportunity fire twice per turn do not have to target the same unit both times (13.0).
  • Demoralized AFV's are not required to flee from units that do not have AT fire values (14.3).
  • Place a Wreck marker when an AFV is eliminated in a bridge or town hex (16.3).
  • AFV's do not benefit from Entrenchments (16.42).
  • AFV's may Dig In (16.2).
  • Open-top AFV's: Immune to M, M1 and M2 results on Direct and Bombardment Fire Tables, but DO take step losses from X and #X results (7.25, 7.41, 7.61, BT, DFT). If a "2X" or "3X" result is rolled, at least one of the step losses must be taken by an open-top AFV if present.
  • Closed-top AFV's: Immune to M, M1 and M2 results on Direct and Bombardment Fire Tables. Do not take step losses from Direct or Bombardment Fire. If X or #X result on Fire Table, make M morale check instead (7.25, 7.41, 7.61, BT, DFT).
  • Closed-top AFV's: Provide the +1 modifier on the Assault Table when combined with infantry. (Modifier only applies to Germans in all scenarios; Soviet Guards in scenarios taking place after 1942; Polish, US and Commonwealth in scenarios taking place after 1943.) (ACC)
  • Tank: all are closed-top and provide the +1 Assault bonus, when applicable
  • Assault Gun: if closed-top, provide the +1 Assault bonus, when applicable
  • APC – Armored Personnel Carrier: These are Combat Units, but stack like Transports. They can transport personnel units or towed units. They are not counted as combat units for the +1 stacking modifier on the Direct Fire and Bombardment Tables (4.4). They may be activated by regular leaders and tank leaders (1.2, 3.34, 4.3, 5.43). They do not provide the +1 Assault bonus (ACC).
  • Armored Transports: These are not combat units and are therefore not APC's, and they can transport all types of transportable units (5.6) so they are not Prime Movers. They suffer the same vulnerabilities in combat as open-top AFV's (7.61). All are mechanized. (SB)

Display Order of Battle

Japan Order of Battle
Imperial Japanese Army
  • Foot
United States Order of Battle
Army
  • Mechanized
  • Towed

Display AARs (1)

Pacific Armor, scenario #11: Behind Whose Lines?
Author JayTownsend
Method Solo
Victor Japan
Play Date 2026-04-18
Language English
Scenario PACA011

Pacific Armor, scenario #11: Behind Whose Lines?

This is a smaller size scenario with two victory objectives for the Japanese to achieve or not. It is a deceptive scenarios, in both how you approach it defensively and offensively can effect gameplay or force one side or the other to adapt. I rolled for Night LOS and it was two hexes for this scenario, which can also factor in depending on one hex or two hex visibility.

The Americans setup up a blocking force forward including their 37mm ATG & Halftrack with some Infantry and then put some more infantry for support further back that could block obvious avenues of approach through the terrain. The Japanese went forward on the road hexes and both sides have special scenario rules #3 & #4 until contact in made.

After the initial contact, all hell break loose. The Forward Japanese tank unit, a Shinhoto tank takes a step lose but somehow the Japanese manage to assault the American’s 37mm gun, halftrack and Infantry unit with that flame throwing Japanese SS-Ki unit, another tank step and Infantry unit as well. The Americans probably should have shot the SS-Ki armor unit first instead of the Shinhoto tank unit because the Japanese rolled well in the assaults and no fire-first for the Dug-in Americans, as the Flame throwing tanks cancelled that out. The other Japanese units flank both left and right, the American adjust and go up on the Japanese in step loses until they try to slow some of the escaping Japanese unit in unwise assaults and now the Japanese go up on the Americans in step losses.

In the end, once the Japanese punched two holes through the scattered American defensives they exit 20 steps off the western edge of the map, they did lose their heavy guns and most of their armored transports but lost 11 steps to the Americans 12 steps lost giving them a Major Victory and both their objectives. I had to recount the step loses twice to make sure and there was still Japanese half step disrupted in the Jungle, the American could have gone after to make it a lower Japanese victory but it was not worth the effort.

I can see a number of mistakes the Americans made and in the beginning I thought the Japanese were going to lose but let the scenario playout. I first thought the Japanese couldn’t win now I think it’s more difficult for the Americans but it could be a 50/50 thing. Fun puzzle to try and solve either way.

Side note: The 2nd Tank Division column tried all night and into early morning to break through the perimeter of the 27th Infantry Regiment but when the action ended, the Japanese losses were 125 killed, 8 tanks, 8 artillery prime movers, 4 tractors, 8 105mm howitzers, 5 trucks and other miscellaneous vehicles and equipment destroyed. The 27th Infantry lost 15 men killed and 45 wounded in the night mayhem.

On a side note, the Japanese had over 20 of the “SS-Ki” armored engineer vehicles on Luzon under the 2nd Tank Division. The “SS-Ki” armored tank, could clear mines, plow jungle vegetation, cut barbwire and had a flame-thrower unit. The Americans found 8 more of these in northern Luzon. I am not sure how they did in combat if at all but always though they would be an interesting armored vehicle for Panzer Grenadier and I am happy we finally have one.

0 Comments
You must be a registered member and logged-in to post a comment.
Errors? Omissions? Report them!
Page generated in 0.124 seconds.