
 PACA009

|
Ho-Ro Rampage Pacific Armor #10 |
||
|---|---|---|
| (Attacker) Japan | vs | United States (Defender) |
| Formations Involved | ||
|---|---|---|
| Japan |  |
Eguchi Detachment |
| United States |  |
129th Infantry Regiment |

|


| Overall Rating, 0 votes |
|---|
|
0
|
| Scenario Rank: --- of 1094 |
| Parent Game | Pacific Armor |
|---|---|
| Historicity | Historical |
| Date | 1945-01-29 |
| Start Time | 16:00 |
| Turn Count | 20 |
| Visibility | Day & Night |
| Counters | 72 |
| Net Morale | 0 |
| Net Initiative | 0 |
| Maps | 2: 100, 82 |
| Layout Dimensions | 56 x 43 cm 22 x 17 in |
| Play Bounty | 176 |
| AAR Bounty | 168 |
| Total Plays | 1 |
| Total AARs | 1 |
| Battle Types |
|---|
| Airfield Control |
| Inflict Enemy Casualties |
| Conditions |
|---|
| Entrenchments |
| Minefields |
| Off-board Artillery |
| Terrain Mods |
| Scenario Requirements & Playability | |
|---|---|
| Elsenborn Revised | Counters |
| Leyte '44 | Counters |
| Marianas 1944 | Maps |
| Pacific Armor | Base Game |
| Saipan 1944 | Maps + Counters |
| Introduction |
|---|
|
Following the failure of his morning attack, Eguchi called in more men and ordered his accompanying armor (the 8th Independent Tank company) to regroup for another attempt. During the morning attack the two Ho-Ro self-propelled 150mm howitzers had stood off and provided artillery support. Eguchi told Lt. Fumio Washimi, commanding the 1st Independent Self-Propelled Artillery Company, to do the same for the afternoon attack. Washimi had ideas of his own. |
| Conclusion |
|---|
|
Washimi claimed that he could not make out targets amid all the smoke and explosions, and so he took his pair of Ho-Ro vehicles into the middle of the fray. He had fired off his high-explosive ammunition during the morning attack and needed to close with the Americans to use the very effective 150mm shaped-charge rounds. His report claims that the Ho-Ro suddenly encountered four M18 tank destroyers looming through the smoke, and destroyed two of them, then ambushed a platoon of M4 Shermans, knocking out three of them. Both Ho-Ro escaped, but shrapnel from a near miss killed or wounded all of the crewmen of one vehicle. |
| Additional Notes |
|---|
|
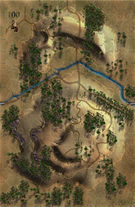
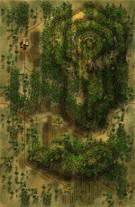
The Japanese player will need ENG, Ho-Ro, and a Sergeant from Pacific Armor. The American player will need I&R, 4.2 inch mortar from Leyte '44, the M10 from Pacific Armor, and M18 from Elsenborn Ridge. |

|
|
|---|
| AFV Rules Pertaining to this Scenario's Order of Battle |
|---|
|
| Imperial Japanese Army |
|---|
|


| Imperial Japanese Navy |
|---|
|


| Army |
|---|
|


| 1 Errata Item | |
|---|---|

|
The M18 has a special rule in Battle of the Bulge but it applies globally: "A two-step M18 unit can fire one anti-tank shot and move half its movement allowance (retain fractions) in a single impulse. The order in which it does these two actions is the player's choice." (Shad
on 2010 Dec 15)
|
| Pacific Armor, scenario #10: Ho-Ro Rampage | ||||||||||||
|---|---|---|---|---|---|---|---|---|---|---|---|---|
Pacific Armor, scenario #10: Ho-Ro Rampage The victory conditions got changed a bit on this one in development and it would be hard to see a Japanese victory as written, so I played it twice one where both sides need to go after the airfields to win and since each side starts with one in their control already, it turned into and interesting melee with both sides attacking the other airfield and ending with both sides only controlling the airfield they started with, or a Draw. Each side needs control of both to win. Now playing this as written the Japanese are the solo attacker and their defensive minefields and entrenchments don’t matter much unless the Americans lose their airfield which is highly unlikely. The Japanese lose more steps, only control their original airfield but managed to eliminate at least four steps of American armor with their forward position heavy AA guns but that is only one objective and a minor American victory. It was kind of easy to predict and I recommend playing this as I mention above as it is way more fun. |
||||||||||||
| 0 Comments |