
 PACA008

|
Counterattack at Fort Stotsenberg Pacific Armor #9 |
||
|---|---|---|
| (Attacker) Japan | vs | United States (Defender) |
| Formations Involved | ||
|---|---|---|
| Japan |  |
Eguchi Detachment |
| United States |  |
129th Infantry Regiment |
| United States |  |
637th Tank Destryer Battalion |

|


| Overall Rating, 0 votes |
|---|
|
0
|
| Scenario Rank: --- of 1093 |
| Parent Game | Pacific Armor |
|---|---|
| Historicity | Historical |
| Date | 1945-01-29 |
| Start Time | 07:15 |
| Turn Count | 20 |
| Visibility | Day |
| Counters | 68 |
| Net Morale | 0 |
| Net Initiative | 0 |
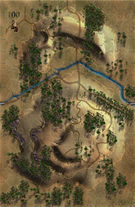
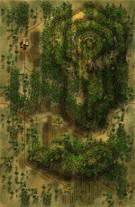
| Maps | 2: 100, 82 |
| Layout Dimensions | 56 x 43 cm 22 x 17 in |
| Play Bounty | 175 |
| AAR Bounty | 168 |
| Total Plays | 1 |
| Total AARs | 1 |
| Battle Types |
|---|
| Airfield Control |
| Exit the Battle Area |
| Inflict Enemy Casualties |
| Conditions |
|---|
| Off-board Artillery |
| Randomly-drawn Aircraft |
| Reinforcements |
| Terrain Mods |
| Scenario Requirements & Playability | |
|---|---|
| Elsenborn Revised | Counters |
| Leyte '44 | Counters |
| Marianas 1944 | Maps |
| Pacific Armor | Base Game |
| Saipan 1944 | Maps + Counters |
| Introduction |
|---|
|
Having held their ground against the American attack, the Eguchi Group planned a morning counterattack to match the successful attack by the Takaya Group against the 160th Infantry in the hilly ground on Eguchi's left. To aid in the assault, Eguchi had been given the aid of two depleted companies of tanks and one of assault guns. |
| Conclusion |
|---|
|
Eguchi's boss, Maj. Gen. Rikichi Tsukada, had risen through the Air Corps ranks and commanded airborne troops. He hoped to restore the original Japanese line of resistance and hold it for at least two more days. But this initial counterattack did little to move the Americans, and so the tank-assisted attack would resume in the late afternoon. |
| Additional Notes |
|---|
|
The Japanese player will need an ENG and the Ho-Ro from Pacific Armor. The American player will need the I&R, Sherman, truck, and M7 from Leyte '44; the M10 from Pacific Armor, and the M18 from Elsenborn Ridge. |

|
|
|---|
| AFV Rules Pertaining to this Scenario's Order of Battle |
|---|
|
| Imperial Japanese Army |
|---|
|


| Imperial Japanese Navy |
|---|
|

| Army |
|---|
|


| 1 Errata Item | |
|---|---|

|
The M18 has a special rule in Battle of the Bulge but it applies globally: "A two-step M18 unit can fire one anti-tank shot and move half its movement allowance (retain fractions) in a single impulse. The order in which it does these two actions is the player's choice." (Shad
on 2010 Dec 15)
|
| Pacific Armor, scenario #9: Counterattack at Fort Stotsenburg | ||||||||||||
|---|---|---|---|---|---|---|---|---|---|---|---|---|
Pacific Armor, scenario #9: Counterattack at Fort Stotsenburg First let me state, it’s cool to have a scenario in the Pacific with a American Tank Destroyer Battalion, with M18s & M10s, not to mention the Normal M4s, M5s & M7s armor units against Japanese Shinhoto & Ho-Ro armor types but this didn’t really come into play as I thought it might. Second, this scenario number; Nine and number Ten for that matter the victory conditions got changed, where I had the Americans as the main aggressors or both had objectives. These were the original victory conditions: The American player must eliminate fifteen or more Japanese steps and tanks do NOT count double. The Japanese player wins by preventing the American victory conditions OR by eliminating ten or more American steps and the M4s, M5s, M7s, M10s and M18s steps do count double. Tie result are a Draw. So with that in mind, I did something kind of gamey, as I did not see how the Japanese could win, as I highly doubt they could control the American side airfield with the opposing forces in play and I doubt they could cause more casualties than they received but might be able to exit some units off the eastern edge of the map but they would clearly still lose if they only achieve one victory condition, so I noticed the American setup first and the Japanese could setup second and only two hexes away. So after the American setup, I setup the Japanese entrenchments and dug-in unit big AA Guns, mostly within two hexes of the Americans lines and on turns 1-3 blasted all the American armor pretty much off the maps, This caused a huge casualty deficit and with holes in their line and the Japanese armor decided not to stick around and exited off the eastern edge of the map, giving the Japanese two objectives and causing the Americans to now have to go on the offensive to maybe get some of those casualties back with the help of air-support, off board artillery and eventually the 637th Tank Destroyer Battalion. It was all round a gamey tactic but the Americans didn’t have enough time to make up the casualty difference and the Japanese exited armor prevent the tank engagement I so wanted. But the Japanese received a minor victory but I would be surprised if anyone could ever get control of both airfields as the Japanese player in either scenarios 9 or 10. |
||||||||||||
| 0 Comments |