
 PACA007

|
Mabalacat Airfields Pacific Armor #8 |
||
|---|---|---|
| (Defender) Japan | vs | United States (Attacker) |
| Formations Involved | ||
|---|---|---|
| Japan |  |
Eguchi Detachment |
| United States |  |
129th Infantry Regiment |

|


| Overall Rating, 0 votes |
|---|
|
0
|
| Scenario Rank: --- of 1094 |
| Parent Game | Pacific Armor |
|---|---|
| Historicity | Historical |
| Date | 1945-01-28 |
| Start Time | 09:00 |
| Turn Count | 20 |
| Visibility | Day |
| Counters | 64 |
| Net Morale | 1 |
| Net Initiative | 0 |
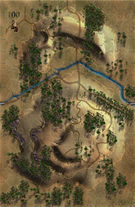
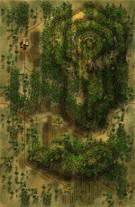
| Maps | 2: 100, 82 |
| Layout Dimensions | 56 x 43 cm 22 x 17 in |
| Play Bounty | 174 |
| AAR Bounty | 168 |
| Total Plays | 1 |
| Total AARs | 1 |
| Battle Types |
|---|
| Airfield Control |
| Inflict Enemy Casualties |
| Entrenchment Control |
| Conditions |
|---|
| Entrenchments |
| Minefields |
| Off-board Artillery |
| Randomly-drawn Aircraft |
| Terrain Mods |
| Scenario Requirements & Playability | |
|---|---|
| Leyte '44 | Counters |
| Marianas 1944 | Maps |
| Pacific Armor | Base Game |
| Saipan 1944 | Maps + Counters |
| Introduction |
|---|
|
The Illinois National Guardsmen of the 129th Infantry Regiment, backed by tank support, spearheaded the attack on Clark Field. The Japanese Kembu group had 30,000 men with which to defend the complex, but most of these were service personnel and other rear-area types, and what combat troops the group did include had little organization and few heavy weapons. Lt. Col. Seizuke Eguchi, charged with stopping the 129th Infantry, had five airfield construction battalions, a loosely organized battalion of replacements, and some anti-aircraft guns. But he did have a great many land mines. |
| Conclusion |
|---|
|
The Japanese service personnel offered little opposition at the two Mabalacat airfields (East and West), but Eguchi's handful of combat infantry met the Americans with automatic weapons fire, and the anti-aircraft gunners laid down withering fire that stalled the armored advance. Having failed to even penetrate the extensive minefields, the Americans would attack again on the following morning. Combat engineers eventually dug 1,350 mines out of this sector. |
| Additional Notes |
|---|
|
Japanese player will need an extra ENG from Leyte'44. The American player will need an I&R, Sherman, 4.2 in mortar and a truck from Leyte '44. |

|
|
|---|
| AFV Rules Pertaining to this Scenario's Order of Battle |
|---|
|
| Imperial Japanese Army |
|---|
|


| Imperial Japanese Navy |
|---|
|

| Army |
|---|
|


| Pacific Armor, scenario #8: Mabalacat Airfields | ||||||||||||
|---|---|---|---|---|---|---|---|---|---|---|---|---|
Pacific Armor, scenario #8: Mabalacat Airfields An interesting scenario, the Americans must inflict more casualties than they receive, control both airfields and control both entrenchments. The Japanese have two huge duel-purpose 120mm AA Guns along with a bunch of other AA Guns including 75/88 guns, that work fine as direct fire or anti-tank guns but not a lot of Infantry. The Americans have a nice dose of both Infantry, armor, mortars and engineers which they will nice as the Japanese have placed a ton of minefields. The Americans do have air-support when they make it through all the AA fire. The Americans tackle the eastern airfield first and realize it’s not a good idea to lead with armor with so many big Japanese AA guns around and minefields after some losses pull the armor back and lead with infantry. The first airfield and entrenchment are taken after heavy losses on both sides and casualties are about even at this point. But now the American can use their full forces and pull those out of the first airfield battle area to join the forward group that are taking a pounding on their approaches to the second airfield. Once they regroup and use their numbers, they easily overcome the second airfield and entrenchment. The Japanese probably needed a better mutual supporting defensives and it was pretty much two groups, and eastern and western. The minefield placement could have been better as well in hindsight but the Americans win a major Victory in this one, achieving all three victory objectives. The Americans lost 14 steps and two leaders but the Japanese lost 21 steps and five leaders to show how heavy the fighting was. |
||||||||||||
| 0 Comments |