
 PACA004

|
The Defense of San Manuel Pacific Armor #5 |
||
|---|---|---|
| (Defender) Japan | vs | United States (Attacker) |
| Formations Involved | ||
|---|---|---|
| Japan |  |
Shigemi Detachment |
| United States |  |
161st 'First Washington' Infantry Regiment |

|


| Overall Rating, 0 votes |
|---|
|
0
|
| Scenario Rank: --- of 1093 |
| Parent Game | Pacific Armor |
|---|---|
| Historicity | Historical |
| Date | 1945-01-24 |
| Start Time | 11:00 |
| Turn Count | 30 |
| Visibility | Day |
| Counters | 134 |
| Net Morale | 0 |
| Net Initiative | 0 |
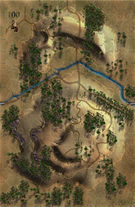
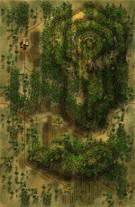
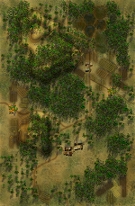
| Maps | 3: 100, 82, 83 |
| Layout Dimensions | 84 x 43 cm 33 x 17 in |
| Play Bounty | 200 |
| AAR Bounty | 168 |
| Total Plays | 1 |
| Total AARs | 1 |
| Battle Types |
|---|
| Inflict Enemy Casualties |
| Urban Assault |
| Entrenchment Control |
| Conditions |
|---|
| Entrenchments |
| Off-board Artillery |
| Reinforcements |
| Terrain Mods |
| Scenario Requirements & Playability | |
|---|---|
| Leyte '44 | Counters |
| Marianas 1944 | Maps + Counters |
| Pacific Armor | Base Game |
| Saipan 1944 | Maps + Counters |
| Introduction |
|---|
|
After five days of steady bombardment, the Americans planned a set-piece attack from two directions. One battalion of the 161st Infantry would make the main effort from the north, with another advancing from the west and southwest. The third battalion would be in reserve with additional tanks and heavy mortars. The Japanese brought in reinforcements of their own and dug in deeper still to await the attack. |
| Conclusion |
|---|
|
The 1st Battalion struck first, following a brief artillery barrage, but managed little progress and lost six tanks to Japanese anti-tank fire. The battalion had already drawn back when 2nd battalion began what was supposed to be the main attack from the north but also met determined resistance. A second effort brought them into the fringes of San Manuel, but a Japanese tank-led counterattack drove them back out again. As night fell the Americans held a few buildings on the northern edge of San Manuel, but the assault had failed in the face of the stubborn Japanese defenders. The Americans would have to try again. |
| Additional Notes |
|---|
|
The Japanese player will need a 47mm from Marianas '44 and the Ho-Ni, Ho-Ha, additional Shinhoto, and trucks from Pacific Armor. The American player will need the M7 and an additional Sherman from Leyte '44, and the 37mm and 4.2 inch mortar from Pacific Armor. |

|
|
|---|
| AFV Rules Pertaining to this Scenario's Order of Battle |
|---|
|
| Imperial Japanese Army |
|---|
|


| Army |
|---|
|


| Pacific Armor, scenario #4: The Defense of San Manuel | ||||||||||||
|---|---|---|---|---|---|---|---|---|---|---|---|---|
Pacific Armor, scenario #4: The Defense of San Manuel The dream pacific scenario or the Pacific Panzer Blitz I always wanted in my youth, this is that scenario. This scenario went through many changes, first in Nihon Silk, then in Luzon, that got broken down into supplements and then changed a bit in development as well in Pacific Armor. I noticed in the (other) section of the scenario, the ignore 60- and 80-meter elevations should say on map 82 not map 83 and the American reinforcements are from the 3rd Battalion. The Japanese decide to setup around the three town sections, with north-east and north-west on map 83 and the south-eastern town area on 82, as San Manuel is kind of spread-out, for this scenario. They put their entrenchments with two each around each town section, which I now think was a mistake strategy wise. The Americans 2nd Battalion, 161st Infantry Regiment, 25th Infantry Division setup on map 100, while the 1st Battalion enters on the western edges of maps 82 & 83 on turn one. Contact is made with the two of the three main Japanese groups and the Americans decide to only concentrate on these two groups first as the third is much large and they do not feel they have the resources to tackle three Japanese battlegroups at once, not until maybe their reinforcements from the 3rd Battalion arrive. Fighting is costly, especially on the approaches to the Japanese dug-in and entrenched groups of heavy weapons, tanks & infantry and American casualties start to mount but will soon be offset with fire power and off board artillery. A nice group of Japanese reinforcements enter on the east edge of maps 83 & 82 including more armor and mechanizes infantry, a rarity in WWII. The Americans now have more on their hand to deal with. Thankfully and kind of lucky on the dice, the American’s 3rd Battalion arrives and the offensive can continue after a turn or two of regrouping but the battle is still getting bloodier. I foolishly lost my last two Sherman tank steps in an assault hex, while a Japanese Ho-Ni fired into the adjacent hex. The Japanese lost a lot of armor as well but the American lost all their armor tank, maybe using them too boldly but their M7 was still in action as was their small 37mm ATG. The American ENG & FLM units are critical in assaults, unfortunately the ENG infantry is lost early and the FLM Engineer unit arrived late but was very helpful. After thirty turns, I could see the American were only going to achieve two out of three victory objectives for a minor victory. In real-life, they would probably have to pulled back and regroup. The Japanese lost 61 steps and 6 leaders but still had a significant force left, while the American lost 32 steps and 5 leaders. A really enjoyable scenario, but I feel both sides could have played much better, the Japanese could have setup a much better defense and the Americans offensive needed to be much more organized and directed with maybe one objective at a time but with 30 turns who knows. I think it’s anyone’s game in this scenario. Side Notes: By the end of The Battle of San Manuel, two scenarios latter: The Shigemi Detachment had little left on paper and in five days of fighting left 750 men dead on the field of battle and all their tanks, trucks and artillery destroyed or captures. While the Americans lost 60 men killed, 200 wounded and at least 9 Tanks/AFVs destroyed. Some questioned later if the assault on San Manuel was necessary as it could have been easily by-passed and blocked off. |
||||||||||||
| 0 Comments |