
 PACA001

|
Firefight at Binalonan Pacific Armor #2 |
||
|---|---|---|
| (Defender) Japan | vs | United States (Attacker) |
| Formations Involved | ||
|---|---|---|
| Japan |  |
Shigemi Detachment |
| United States |  |
161st 'First Washington' Infantry Regiment |
| United States |  |
716th 'Wolfpack' Tank Battalion |

|


| Overall Rating, 2 votes |
|---|
|
3.5
|
| Scenario Rank: --- of 1094 |
| Parent Game | Pacific Armor |
|---|---|
| Historicity | Historical |
| Date | 1945-01-17 |
| Start Time | 17:30 |
| Turn Count | 20 |
| Visibility | Day & Night |
| Counters | 39 |
| Net Morale | 0 |
| Net Initiative | 1 |
| Maps | 1: 83 |
| Layout Dimensions | 43 x 28 cm 17 x 11 in |
| Play Bounty | 162 |
| AAR Bounty | 163 |
| Total Plays | 2 |
| Total AARs | 2 |
| Battle Types |
|---|
| Inflict Enemy Casualties |
| Road Control |
| Urban Assault |
| Conditions |
|---|
| Off-board Artillery |
| Terrain Mods |
| Scenario Requirements & Playability | |
|---|---|
| Pacific Armor | Base Game |
| Saipan 1944 | Maps + Counters |
| Introduction |
|---|
|
Just down the road from Potpot, the Japanese held on to the small town of Binalonan as part of their outpost line. The 25th Infantry Division's 161st Infantry, supported by tanks, pressed against the town. The Japanese 2nd Tank Division had been broken up into small defensive detachments, and at Binalonan one of these would greet the Americans with armored counterattacks |
| Conclusion |
|---|
|
Fierce counterattacks by Japanese tanks did not drive off the Americans; the tanks blazed away without much regard for whether they had a target or not, rolling through the tiny village and back again. By nightfall the Americans had taken part of Binalonan; it would take until noon the next day to clear all of the village. The Japanese lost nine tanks and 250 men in their determined but ineffective defense |
| Additional Notes |
|---|
|
The Ho-Ki counters are found in Pacific Armor |

|
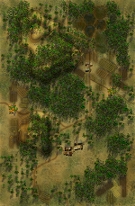
|
|---|
| AFV Rules Pertaining to this Scenario's Order of Battle |
|---|
|
| Imperial Japanese Army |
|---|
|


| Army |
|---|
|


| Pacific Armor, scenario #2: Firefight at Binalonan | ||||||||||||
|---|---|---|---|---|---|---|---|---|---|---|---|---|
Pacific Armor, scenario #2: Firefight at Binalonan An interest straight forward smaller scenario, where the Americans must control the two town hexes of Binalonan, the north-south road and eliminate more enemy steps than they lose. The Japanese defend in and around Binalonan. The American enter with half their force from the north including that one Sherman platoon and the other half from the west. The Americans managed to clear the north-south road and had a lead in casualties until they tried to clear the town hexes and probably should have worn them down a bit before assaulting them but the time factor. The casualties went up, the towns were not cleared and now the Americans were actually tied in steps lost, 13/13 and only achieved one of their victory objectives giving the Japanese a minor victory. Like actually happened, Binalonan wouldn’t be cleared until the next day. Neither side had any armor left but some Ho-Ki prime movers. |
||||||||||||
| 0 Comments |
| Just couldn't pull it off. | ||||||||||||
|---|---|---|---|---|---|---|---|---|---|---|---|---|
The Americans, coming in from the North, went for the nearest town but the Japanese put up a blistering defense hinged on the town itself and in the jungle west of town. The Japanese effort was enhanced by a lone tank platoon in close combat with a half company of US troops in the jungle east of town which went on forever with no resolving. The fight was finally settled in favor of the US troops but left precious little time to make further good use of those troops. By then another half company of troops got tied up in a close assault in the western jungle and the town was still in Japanese control. The whole attack came to naught. (Note - This scenario is a good one for jungle fighting and comes recommended.) |
||||||||||||
| 0 Comments |