Panzer Grenadier Battles on October 24th:
Afrika 1944 #22 - PAKfront Leyte '44 #12 - Flying Wedge
Fronte Russo #9 - Potemkin Village Leyte '44 #13 - Failure at Buri Airfield
Red & White #28 - Bastion
Errors? Omissions? Report them!
Young Criminals
Liberation 1944, 2nd Ed #8
(Attacker) Germany vs Britain (Attacker)
Formations Involved
Britain 27th Armoured Brigade
Britain 3rd Infantry Division
Germany 12th SS “Hitler Jugend” Panzer Division
Germany 21st Panzer Division
Display
Balance:


Overall balance chart for Lib2008
Total
Side 1 2
Draw 0
Side 2 0
Overall Rating, 2 votes
5
4
3
2
1
3.5
Scenario Rank: --- of 1093
Parent Game Liberation 1944, 2nd Ed
Historicity Historical
Date 1944-06-07
Start Time 14:45
Turn Count 24
Visibility Day
Counters 65
Net Morale 0
Net Initiative 1
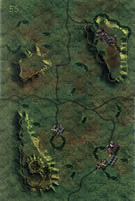
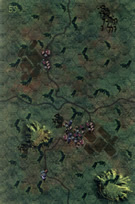
Maps 2: 56, 59
Layout Dimensions 86 x 28 cm
34 x 11 in
Play Bounty 174
AAR Bounty 163
Total Plays 2
Total AARs 2
Duplicates LIBE008
Battle Types
Delaying Action
Exit the Battle Area
Meeting Engagement
Road Control
Urban Assault
Conditions
Off-board Artillery
Randomly-drawn Aircraft
Scenario Requirements & Playability
Liberation 1944, 2nd Ed Base Game
Introduction

The German plans for an immediate armored counter-attack fell apart for a variety of reasons: the Supreme Leader’s indecision, Edgar Feuchtinger’s insatiable sexual appetite, surprise and confusion among other German officers, and the unexpectedly formidable presence of Allied airpower. The SS political militia’s Hitler Youth Panzer Division arrived during the night, with both panzer divisions ordered to attack in the morning.

Conclusion

The Canadian 3rd Division, on the right (eastern) flank of the British 3rd Division, attacked first and pre-empted the German plan. The German commanders decided to let the Canadians over-extend themselves before launching their own attack. The fighting against the Canadians sucked in more and more of the 21st Panzer Division, leaving a lone panzer platoon to support the Hitler Youth’s effort. According to German accounts the SS militia managed to take Cambe anyway, and then drove the British back before pulling back themselves. This rings true as the British declined to follow when the Germans withdrew. In the long run, it made little difference. The piecemeal defensive commitment of available panzers doomed the envisioned grand offensive, likely sowing the seeds of later defeat.


Display Relevant AFV Rules

AFV Rules Pertaining to this Scenario's Order of Battle
  • Vulnerable to results on the Assault Combat Chart (7.25, 7.63, ACC), and may be attacked by Anti-Tank fire (11.2, DFT). Anti-Tank fire only affects the individual unit fired upon (7.62, 11.0).
  • AFV's are activated by tank leaders (3.2, 3.3, 5.42, 6.8). They may also be activated as part of an initial activating stack, but if activated in this way would need a tank leader in order to carry out combat movement.
  • AFV's do not block Direct Fire (10.1).
  • Full-strength AFV's with "armor efficiency" may make two anti-tank (AT) fire attacks per turn (either in their action segment or during opportunity fire) if they have AT fire values of 0 or more (11.2).
  • Each unit with an AT fire value of 2 or more may fire at targets at a distance of between 100% and 150% of its printed AT range. It does so at half its AT fire value. (11.3)
  • Efficient and non-efficient AFV's may conduct two opportunity fires per turn if using direct fire (7.44, 7.64). Units with both Direct and AT Fire values may use either type of fire in the same turn as their opportunity fire, but not both (7.22, 13.0). Units which can take opportunity fire twice per turn do not have to target the same unit both times (13.0).
  • Demoralized AFV's are not required to flee from units that do not have AT fire values (14.3).
  • Place a Wreck marker when an AFV is eliminated in a bridge or town hex (16.3).
  • AFV's do not benefit from Entrenchments (16.42).
  • AFV's may Dig In (16.2).
  • Open-top AFV's: Immune to M, M1 and M2 results on Direct and Bombardment Fire Tables, but DO take step losses from X and #X results (7.25, 7.41, 7.61, BT, DFT). If a "2X" or "3X" result is rolled, at least one of the step losses must be taken by an open-top AFV if present.
  • Closed-top AFV's: Immune to M, M1 and M2 results on Direct and Bombardment Fire Tables. Do not take step losses from Direct or Bombardment Fire. If X or #X result on Fire Table, make M morale check instead (7.25, 7.41, 7.61, BT, DFT).
  • Closed-top AFV's: Provide the +1 modifier on the Assault Table when combined with infantry. (Modifier only applies to Germans in all scenarios; Soviet Guards in scenarios taking place after 1942; Polish, US and Commonwealth in scenarios taking place after 1943.) (ACC)
  • Tank: all are closed-top and provide the +1 Assault bonus, when applicable
  • APC – Armored Personnel Carrier: These are Combat Units, but stack like Transports. They can transport personnel units or towed units. They are not counted as combat units for the +1 stacking modifier on the Direct Fire and Bombardment Tables (4.4). They may be activated by regular leaders and tank leaders (1.2, 3.34, 4.3, 5.43). They do not provide the +1 Assault bonus (ACC).

Display Order of Battle

Britain Order of Battle
Army
  • Mechanized
  • Towed
Germany Order of Battle
Heer
  • Mechanized
Schutzstaffel
  • Mechanized
  • Motorized

Display Errata (2)

2 Errata Items
Overall balance chart for 869

All Bren carriers should have a movement value of 7.

(Shad on 2010 Dec 15)
Overall balance chart for 424

The reduced direct fire value of the SS HMG is 5-5 in Beyond Normandy and Road to Berlin.

(plloyd1010 on 2015 Jul 31)

Display AARs (2)

Young Criminals
Author filbox (Britain)
Method Face to Face
Victor Germany
Participants unknown
Play Date 2025-07-10
Language English
Scenario Lib2008

Young Criminals

On D Day +1, the Canadian 3rd Division, aided with 2 platoons of Shermans from 27th Armoured Brigade, probed their way inland towards Caen. Just south of a little town named Buron, they ran into an attack of the 12th SS “Hitler Jugend” Panzer Division that was reinforced with a lone platoon of tanks from the 21st Panzer Division.

Those Germans have their work cut out. First, they have to secure the roads towards the coastline, then they have to take control of all towns and hamlets up to Cambes-en-Plaine, and thirdly, they have to bypass Buron with as much troops as possible. Daunting tasks indeed, so bold action was needed.

Frantic to finally see some action, the fanatical youths speed their HMG platoons on SPWs along the road to a small hamlet named Authie, just south of Buron. The rest of the SS takes the scenic route up north, while the Canadians organise the defense of Buron. To their own amazement, the HMGs reach Authie unscathed, immediately taking a strategic position away from the allies. The Canucks however know they would not have the resources to hold onto Authie as well as Buron and they send in the Shermans and a Bren carrier platoon to pound the SPWs into submission with AT fire. One blast takes care of the pesky armoured transports, so they turn their next salvo on the infantry, smashing a complete platoon of HMGs to smithereens and killing a most promising Obersturmführer (10-1-2) in the process. Suddenly, the SS HMGs are stuck leaderless in a very precarious position, crying for their mothers.

This first blood sets in motion a long string of violent actions that would last for the next 3 hours. First, the German Nebelwerfer gets revenge by destroying a dug in battery of 6 pounders. Then a Canuck 3” mortar unit gets the same treatment from the German OBA. An eye for an eye. Half an hour later, the rest of the Jugend, advancing through the bocage in a line abreast formation as if on parade, reach Authie and when finally the HMGs are able to reorganize, they promptly kill a Bren carrier unit and demoralize a Sherman platoon! Quickly, the second Sherman platoon skedaddles out of dodge towards a small wood at the southern outskirts of Buron. The grenadiers, together with the out for blood HMGs assault the shocked Shermans. Those tanks survive the initial combat, have to flee, again survive the free shots, and although reduced, get away. Fifteen clicks or so later, their comrades in the wood are all put out of action, when assaulted by the same troops that drove off the first platoon of Shermans. Authie is now firmly in SS hands and the Canadian AT capability vastly diminished.

The Canadians retaliate by putting down a MTC unit that tried to probe the northern part of Buron, but it gives no solace, losing the Shermans is a big blow. At 17.30, the German infantry assaults the western part of Buron and are met with fierce resistance. At the same time, a murderous barrage peppers the tank killers, taking a platoon of grenadiers out of action, but also doing some friendly fire damage on the Canucks right next door. Moments later, the unstoppable HMGs lay down a spray of combined fire that takes out 3 allied steps in one fell swoop! Major catastrophy for the Canadians , who now have to commit all their reserves to plug the line. But the unfazed Canadian commander, a splendid 9-1-2 major has no trouble in keeping morale up. At this point, the Obersturmbahnführer decides that assaulting Buron is not as efficiënt as suppressing it with direct fire, and orders a retreat of the stuck assaulting troops in the west. All those troops get out in good order, sacrificing a unit of supporting SPWs to cover the retreat.

At 18.00, the remnants of the Shermans is finally silenced by the still chasing PzIVs. Moments later, BANG, another devastating combined fire attack kills another 3 steps of Canuck rifles. This time, the Canadian CO can’t cope, and demoralized he must retreat with only a handful of survivors out of the town. A last gasp attempt to break through the German lines towards Caen is stopped cold by the German mortars that covered this route out of town.

At 19.15, the Canadians have only 2 leaderless units still in Buron and HQ orders all allied troops to regroup at Cambes-en-Plaine and Mathieu and liaison with the British. Buron would stay in SS hands for another month until Operation Charnwood would finally liberate the ruins.

In the end, an unhoped for major victory for the Germans! Sure, it turned out a bit onesided, but what a battle! It was action packed from the get go. Both our dice were red hot, resulting in fierce, quick bursts of violent action, turn after turn, as if we were in a rollercoasting Hollywood blockbuster. The only written AAR of this scenario calls it a filler type scenario, not even worth 30 words of text. We would dare to call it a blast. As the German player, I still think that, was it not for the 2 times “3X” results, Buron would never have fallen. At that moment, I was already contemplating on bypassing the town, settling for a possible minor win. It would have been a mortifying balancing act, trying to figure out which troops would be needed to contain the Canadians. Hey, they would only have to break through with one unit to win the game themselves. Those are hard decisions to make playing face to face, a part of this beautiful game you can’t really replicate playing solo.

0 Comments
You must be a registered member and logged-in to post a comment.
Liberation 1944, 2nd Ed #8 - Young Criminals
Author Juiceman
Method Solo
Victor Germany
Play Date 2025-05-01
Language English
Scenario Lib2008

Not much to report with this scenario, the Germans got lucky and took out the two Sherman platoons the rest was downhill for the Germans. Filler type of a scenario.

0 Comments
You must be a registered member and logged-in to post a comment.
Errors? Omissions? Report them!
Page generated in 0.207 seconds.