
 LIBE009

|
Here to Stay Liberation 1944 #10 |
||
|---|---|---|
| (Attacker) Germany | vs | Britain (Defender) |
| Formations Involved | ||
|---|---|---|
| Britain |  |
13th/18th Hussars |
| Britain |  |
5th Parachute Brigade |
| Germany |  |
858th Infantry Regiment |

|


| Overall Rating, 4 votes |
|---|
|
4.25
|
| Scenario Rank: --- of 1093 |
| Parent Game | Liberation 1944 |
|---|---|
| Historicity | Historical |
| Date | 1944-06-10 |
| Start Time | 14:30 |
| Turn Count | 24 |
| Visibility | Day |
| Counters | 93 |
| Net Morale | 0 |
| Net Initiative | 0 |
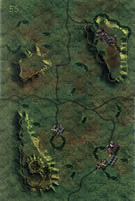
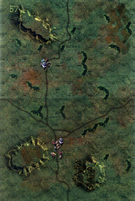
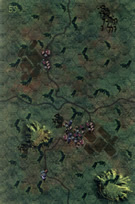
| Maps | 3: 56, 57, 59 |
| Layout Dimensions | 84 x 43 cm 33 x 17 in |
| Play Bounty | 155 |
| AAR Bounty | 168 |
| Total Plays | 4 |
| Total AARs | 1 |
| Duplicates | Lib2010 |
| Battle Types |
|---|
| Breakout |
| Delaying Action |
| Inflict Enemy Casualties |
| Road Control |
| Urban Assault |
| Conditions |
|---|
| Hidden Units |
| Off-board Artillery |
| Smoke |
| Scenario Requirements & Playability | |
|---|---|
| Liberation 1944 | Base Game |
| Introduction |
|---|
|
As long as the British were east of the Orne River they could launch attacks to expand their beachhead without having to factor in a river crossing. The advantages of this were obvious to both sides, so as the British rushed men to the beaches to expand the bridgehead, the Germans looked around for enough troops to drive the Allies back over the Orne. A strong infantry forced back by armor formed up behind the strongpoint of Breville to drive the enemy back over the bridges at Benouville. |
| Conclusion |
|---|
|
The mission failed, being more than the grenadiers could accomplish, but it was a near run thing. They destroyed five of the tanks supporting the 7th Battalion, and the Paras only turned them back with a bayonet charge by C Company of the 13th Parachute Battalion. As quiet descended on the battlefield, the Germans conceded that the British had come to stay. |

|
|
|---|
| AFV Rules Pertaining to this Scenario's Order of Battle |
|---|
|
| Army |
|---|
|


| Heer |
|---|
|


| 4 Errata Items | |
|---|---|

|
All Bren carriers should have a movement value of 7. (Shad
on 2010 Dec 15)
|

|
The reduced direct fire value of the Heer HMG became 5-5 starting with Fall of France. (plloyd1010
on 2015 Jul 31)
|

|
The morale and combat modifiers of German Sergeant #1614 should be "0", not "8". (Shad
on 2010 Dec 15)
|

|
The movement allowance on the counters in Airborne is misprinted. It should be "3." (rerathbun
on 2012 Jan 30)
|
| Push Through & Around the Tommy Paras, Major! | ||||||||||||||
|---|---|---|---|---|---|---|---|---|---|---|---|---|---|---|
This was an exciting and thought provoking 5-session play-through with the resourceful & undaunted, NBGB, leading defending elements of the 5th Parachute Brigade and Squadron B of the 13th/18th Hussar Regiment east of the Orne River in Normandy, in a mixed terrain, 24-game turn, battle. I led advancing elements of the German 858th Infantry Regiment of the 346th Static Infantry Division, in this freewheeling, 3-map fight. Both sides had decent leader draws. We used the FOW (starting on game turn 4), consolidation, tank riders, smoke/illum, extended assault and excess initiative optional rules. We also tried these SEVEN house rules: 1) Road Movement for Mechanized & Foot Units — All FOOT & MECHANIZED units may move on roads at the rate of 1/2 Movement Point (MP) per road hex, just like MOTORIZED units, 2) Standardized Movement for Mechanized Units — All mechanized units may move through clear hexes at a movement cost of only 1 movement point (MP) per hex, instead of 1 1/2. Add one to this cost if moving up, across, or down slopes hexes, 3) Firing Through or Over Friendly Personnel Units — All AT guns, AFVs, Infantry guns (direct fire), Anti-Aircraft (AA) guns and HMGs may fire over or through friendly personnel units. In the case of HMGs, AA guns & Infantry Guns, there must be one unoccupied hex between any friendly unit that is being fired over and the targeted hex as in the current rule (10.1, page 24), 4) Towed Anti-Tank (AT) Hidden Emplacement — Unless prohibited by special scenario rules, ALL dug-in, entrenched, or town- occupying, towed AT gun units always begin scenarios in HIDDEN mode if allowed to dig-in per scenario special rules (please see Optional Rules for Hidden Units; Plotting Position; Revealing; and No Hidden Units Specified on Page 37). For example: dug-in, PaK 38 (50mm); Soviet 45mm, or British 2-pdr and/or 6-pdr towed AT gun platoons are eligible under this house rule, 5) German Assault Gun Activation — German Army, turretless STGs, Jagdpanzer and self-propelled artillery units were typically crewed by artillerymen. Like halftracks, these units may be activated by ALL leaders, as well as Tank Leaders, and 6) Voluntary Unit Reduction — Players may voluntarily reduce 2-step personnel units to 1-step (halved) units if they have at least one leader of MAJOR or higher rank among their side’s assigned force. To do so, the unit to be halved must begin the player’s activation phase in the same hex or in an adjacent hex to a CAPTAIN or higher rank. The full-strength unit to be halved must be in good order and this action costs all the reduced unit’s movement points. Remove the full-strength unit and replace it with 2 reduced strength units. Mark both — and the leader — as activated, and 7) Armored Fighting Vehicle (AFV) Consolidation — Unless prohibited by special scenario rules, reduced 2-step tanks, and other AFV units of the same type, nationality, and morale condition may be combined to form a single, full-strength unit. Both reduced units must start their activation in the same hex and be activated by an adjacent – or same-hex – good order, Tank Leader. This action costs both units all their movement points. Remove one of the units, flip the other to its full-strength side and mark it activated. This rule set provided improved playability, tactical flexibility & simplicity during our high-maneuver, play-through. The initial session (game turns 1-3) encompassed, a 2-pronged, infantry-heavy, German advance on either flank of the dug-in, Tommy paratroopers on Map 57. This approach was relatively methodical and several British positions were quickly outflanked, as the Tommies fell back in good order, only losing 3 steps, and a trio of town hexes to the advancing Germans. Tommy retrograde actions were focused on pulling out of decisive range and splitting German fire. The victory point tally was led by the Brits, 12-5 by the end of this session. Our second session (game turns 4-8) featured, both extended order, flanking columns of German infantry advancing west toward the hills on their respective fronts. The skillful British tactical withdrawal to the west continued, and consolidated on the southwest 20-meter hill on Map 56, on and around the 2-hex township. A pesky Tommy forward observation post remained on the northern 40-meter ridgetop on Map 56, as the German wave began closed in. Wehrmacht artillery accounted for both British 6-pdr AT guns and another pair of steps, causing a reduction in Allied initiative level, while the Germans lost 3 more steps. The revised victory point tally was now 15-10 in favor of the defending Tommies. The third session (game turns 9-12) included the German advance slowing as they poured over the northern 40-meter ridge and began massing to assault both the 1-hex and the 2-hex townships. The primary Tommy forward observation point was overrun in the process. This same approach was repeated on the southern 20-meter hill mass in the vicinity of the British-held, 2-hex town. As dusk began reducing visibility, an enterprising Sherman platoon with a forward observer infiltrated behind German lines in hopes of occupying a road hex on Maps 56 & 57 by the end of the game. Casualties remained relatively low, as losses this session were: 5 British steps & 3 officers, and 4 additional Wehrmacht steps. The updated victory point had narrowed to 15-17 in favor of the defending Brits. A combined FIVE combat 7-die rolls were thrown! Our fourth session (game turns 13-15) was a very grim one for the attacking Wehrmacht with 6 step losses, mostly in close assaults & adjacent-hex firefights. The Brits dropped 3 additional steps and a level of initiative in heavy fighting. Two town hexes remained contested throughout this session, yielding no points to either player. The revised victory point tally was now 21-22 with the Boches ahead by only a single VP, after the first pair of German units exited the west map edge. The fifth & final session (game turns 16-19) ended by mutual agreement when it became apparent that the Brits were not going to prevail. The final score was 30-21 for a minor German victory. There were 8 FOW-shortened game turns of the 19 played. This was a gamey, but fun to play, freewheeling scenario that presented many decision points to both sides. I rate it 5, and recommend it for both SHARED and SOLO play. The more experienced play should lead the attacking Wehrmacht side. |
||||||||||||||
| 0 Comments |
