
 KoCa028

|
Milne Bay Scenario 5: Australian Pursuit Kokoda Campaign #29 |
||
|---|---|---|
| (Attacker) Australia | vs | Japan (Defender) |
| Formations Involved | ||
|---|---|---|
| Australia |  |
18th Infantry Brigade |
| Japan |  |
5th Kure Special Naval Landing Force |

|


| Overall Rating, 4 votes |
|---|
|
3.5
|
| Scenario Rank: --- of 1093 |
| Parent Game | Kokoda Campaign |
|---|---|
| Historicity | Historical |
| Date | 1942-09-03 |
| Start Time | 01:45 |
| Turn Count | 24 |
| Visibility | Night |
| Counters | 43 |
| Net Morale | 1 |
| Net Initiative | 1 |
| Maps | 1: 35 |
| Layout Dimensions | 43 x 28 cm 17 x 11 in |
| Play Bounty | 143 |
| AAR Bounty | 163 |
| Total Plays | 3 |
| Total AARs | 2 |
| Battle Types |
|---|
| Delaying Action |
| Inflict Enemy Casualties |
| Road Control |
| Urban Assault |
| Conditions |
|---|
| Hidden Units |
| Terrain Mods |
| Scenario Requirements & Playability | |
|---|---|
| Kokoda Campaign | Base Game |
| Introduction |
|---|
|
On September 1st the 18th Brigade was brought forward to pursue the retreating Japanese. Australian attack plans were preempted by orders from Douglas MacArthur to prepare to repel a Japanese flanking attack from out of the deep jungle supported by destroyers in Milne Bay. The nonexistent flanking force never attacked, but the Australians stood to arms to repel them all the same. When they eventually resumed their attack against the actual Japanese, they found their enemies well-prepared to meet them. |
| Conclusion |
|---|
|
From 1 Sep to 5 Sep the Australians engaged the Japanese in a series of running battles and gradually pushed them back into their landing areas. During the nights of September 4th and 5th, the Japanese were evacuated by naval ships. |

|
|
|---|
| AFV Rules Pertaining to this Scenario's Order of Battle |
|---|
|
| Army |
|---|
|


| Imperial Japanese Army |
|---|
|


| Imperial Japanese Navy |
|---|
|


| Pursuit |
|---|
|
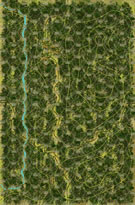
For this scenario the Australians are on the attack while the outnumbered Japanese 5th Kure SNLF are on the defensive but they do get to set up hidden. The Aussies forces cautiously advanced down the trail but their leading platoons were ambushed by the hidden Japanese units that extracted six steps by turn 5 from the Aussie 18th Brigade. Two companies of Australians lead by a couple of good leaders managed to out flank the Japanese position and routed several platoons out of one village hex while threaten a second, but the butchers bill had been high for the Aussies as they lost another four steps coupled with FOW dice rolls ending the turn just when they were gaining momentum. In the end the Japanese counter attacked while taking another 3 Aussie steps on turn 17 to recapture the village hex lost earlier. The Japanese SNLF earned their major victory by controlling most of the trail hexes and eliminating more Aussies steps than they lost. |
| 0 Comments |
| Bad Title for this One - It should be labeled: Mass Banzai Counter-attacks in the Jungle! | ||||||||||||||
|---|---|---|---|---|---|---|---|---|---|---|---|---|---|---|
Please refer to Juiceman's retelling of this fierce, 24-turn,battle in his well-written AAR. Our battle sounded very like his solitaire effort, with the counter-attacking Japanese coming out on top of the "pursuing" - but constantly ambushed, & repeatedly outflanked - Australian side. Casualties were heavy for both forces but the loss of the senior Aussie leader during game turn 19, twigged it for the advancing blue side, as the Emperor's sailors & soldiers reclaimed the critical terrain & villages that they had lost earlier in our play-through. Having a little armor proved decisive for the defending Japanese. We give this slightly-unbalanced and hard-to-play encounter, a solid 3 and recommend it for SHARED play only. |
||||||||||||||
| 1 Comment |

After 5-sessions, this was a great scenario to finish on V-J Day! Wish that I could have been on the deck of the Missouri in Tokyo Bay for the surrender ceremony!
Concur with my distinguished, armor-obsessed, opponent on all points in his AAR.
I really thought that I had this one in the bag after the first 10 turns, but the fates decreed otherwise.