
|
Last One Out Counter Attack #65 |
||
|---|---|---|
| (Defender) North Korea | vs | United States (Attacker) |
| Formations Involved |
|---|

|


| Overall Rating, 0 votes |
|---|
|
0
|
| Scenario Rank: of |
| Parent Game | Counter Attack |
|---|---|
| Historicity | Historical |
| Date | 1950-10-21 |
| Start Time | 06:30 |
| Turn Count | 16 |
| Visibility | Day |
| Counters | 35 |
| Net Morale | 1 |
| Net Initiative | 2 |
| Maps | 2: 114, 115 |
| Layout Dimensions | 56 x 43 cm 22 x 17 in |
| Play Bounty | 152 |
| AAR Bounty | 166 |
| Total Plays | 1 |
| Total AARs | 1 |
| Battle Types |
|---|
| Bridge Control |
| Inflict Enemy Casualties |
| Road Control |
| Urban Assault |
| Scenario Requirements & Playability | |
|---|---|
| Counter Attack | Base Game |
| Introduction |
|---|
|
Having failed to block the North Korean retreat, the Rakkasans collected themselves and headed south toward the North Korean capital, looking for NKPA troops to fight. Before long they found a North Korean regiment dug in and facing the wrong way; the NKPA quickly turned themselves about to face this threat from their rear flank. |
| Conclusion |
|---|
|
The North Koreans inflicted heavy losses on the airborne troops, forcing them back. But the NKPA regiment, tasked with delaying the United Nations advance, soon withdrew themselves to face British and Australian troops advancing from the south. Trapped between the Commonwealth Brigade and the Rakkasans, the 239th Regiment was eventually destroyed in heavy fighting. |

|

|
|---|
| AFV Rules Pertaining to this Scenario's Order of Battle |
|---|
| Chosŏn inmin'gun |
|---|
|


| Airborne |
|---|
|

| Army |
|---|
|


| 1 Errata Item | |
|---|---|
| Scen 65 |
• Scenario #65: Americans set up on Board 114 not 110. Also the victory conditions that mention Board 112 should be replaced with Board 115 in the text and the victory condition for controlling the bridge should be removed, as there is no bridge. (JayTownsend
on 2022 Jan 23)
|
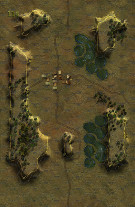
| Korean War: Counter-Attack, scenario #65: Last One Out | ||||||||||||
|---|---|---|---|---|---|---|---|---|---|---|---|---|
Korean War: Counter-Attack, scenario #65: Last One Out After playing scenario 64 with paratrooper drops I had to play the next scenario #65: Last one out against a little stronger organized North Korean force. A little errata should be mentioned for this scenario: • Scenario #65: Americans set up on Board 114 not 110. Also the victory conditions that mention Board 112 should be replaced with Board 115 in the text and the victory condition for controlling the bridge should be removed, as there is no bridge. This happened with the two additional maps added to the game and this scenario not being completely updated correctly. Anyway, the victory conditions are all about eliminating enemy steps, one point for each and two points for each village hex controlled on map 115, five points for controlling the north-south road on map 115 as well and the NKPA start setup there and dug-in, so the American Airborne troops will have to do the attacking from map 114 and the North Koreans are a little more organized then the day before. The Americans find the NKPA ready and a tough fight to take the villages ensued as this seemed to be the easiest object to fight for between this two smaller forces. The North Koreans setup a 120mm mortar and 40mm AA gun on the high ground behind the villages as support and the Americans try to bring up their 75RR gun by jeep to counter this. Both sides lose four or five steps and each controls one village hex each. The Americans have a one point advantage by games end but just to win a minor victory a side must have four or more points, so it is a Draw. This is a tough scenario for either side, I’ll have to play this again. |
||||||||||||
| 0 Comments |