
 FiSw008

|
The Offensive Falters Fire and Sword #9 |
||
|---|---|---|
|
(Defender)
Germany
(Defender) Hungary |
vs | Soviet Union (Attacker) |
| Formations Involved | ||
|---|---|---|
| Germany |  |
13th Panzer Division |
| Germany |  |
60th "Feldherrnhalle" Panzergrenadier Division |
| Soviet Union |  |
4th Guards Mechanized Brigade |

|


| Overall Rating, 1 vote |
|---|
|
5
|
| Scenario Rank: --- of 1094 |
| Parent Game | Fire and Sword |
|---|---|
| Historicity | Historical |
| Date | 1944-11-04 |
| Start Time | 06:00 |
| Turn Count | 30 |
| Visibility | Day & Night |
| Counters | 101 |
| Net Morale | 1 |
| Net Initiative | 1 |
| Maps | 1: 53 |
| Layout Dimensions | 43 x 28 cm 17 x 11 in |
| Play Bounty | 177 |
| AAR Bounty | 168 |
| Total Plays | 1 |
| Total AARs | 1 |
| Battle Types |
|---|
| Hill Control |
| Inflict Enemy Casualties |
| Urban Assault |
| Conditions |
|---|
| Off-board Artillery |
| Randomly-drawn Aircraft |
| Joint Forces Battle |
| Scenario Requirements & Playability | |
|---|---|
| Fire and Sword | Base Game |
| Introduction |
|---|
|
The Soviet advance on Pest from the southeast formed a bulge in the defensive lines, dangerously exposing the Red Army divisions to counterattacks on their flanks. For that reason, 46th Army ordered the 2nd Guards Mechanized Corps holding the right flank to send out an armored force bypassing the town of Pestszentimre which it failed to occupy on the previous day, and driving straight toward the airport. Leaving a small detachment at the southeastern limits of Pestszentimre to protect their extended left flank, the bulk of the task force (including the 37th Guards Tank Brigade) attacked toward Pestzentlörinc. The powerful thrust of about 30 tanks supported by the infantry of 4th Guards Mechanized Brigade ejected the German combat outposts and pushed forward. |
| Conclusion |
|---|
|
Shortly after the start of the attack, stiffAxis resistance halted the Soviets. Having checked Baskakov's onslaught, by midday the defenders (a mix of Germans and Hungarians, mostly from the 13th Panzer Division and Group Billnitzer) counterattacked and recaptured the tactically important Hill 129 (just to the northeast of Pestszentimre). Up to 50 armored vehicles smashed into the lines of the 4th Guards Mechanized Brigade while Axis artillery pounded their positions. Chaos broke out as casualties began to mount. Twenty out of 35 Soviet tanks were destroyed and an infantry battalion that accompanied them nearly wiped out. The wounded included the brigade's commander, his chief of staff, and the commanding officer of the 23rd Guards Tank Regiment. Among the troops, mostly inexperienced recruits, anxiety and something approaching panic broke out. The entire brigade stood on the verge of catastrophe when Baskakov intervened, ordering the corps artillery to bombard the German assembly areas. At the same time, 37th Guards Tank Brigade, along with the Stalin tanks of the 30th Guards Heavy Tank Regiment, returned to the endangered zone and eventually halted the German attack. Throughout the rest of the day fierce fighting continued, but the Soviets gained no more ground and instead switched over to the defensive. At around 1400, the 13th Panzer and Feldhermnhalle Divisions attacked with the objective of repulsing the Soviets and trapping Baskakov's task force. The German attack ground to a halt at Hill 120. After so many attacks, counterattacks and fire exchanges, the entire area was covered with dead bodies and wrecked machines. By the evening of 4 November, it was already clear to both the Stavka and OKH that Malinovsky's attempt to capture Budapest had failed. At 2000, Stalin signed a "stop order" that was immediately sent to the 2nd Ukrainian Front's headquarters. |

|
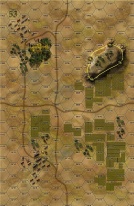
|
|---|
| AFV Rules Pertaining to this Scenario's Order of Battle |
|---|
|
| Heer |
|---|
|


| Schutzstaffel |
|---|
|


| Army |
|---|
|


| Army (RKKA) |
|---|
|


| Guards |
|---|
|


| 6 Errata Items | |
|---|---|

|
The reduced direct fire value of the Heer HMG became 5-5 starting with Fall of France. (plloyd1010
on 2015 Jul 31)
|

|
All SS PzIVH tanks should have a movement of 8. (Shad
on 2010 Dec 15)
|

|
All SPW 251s have an armor value of 0. (Shad
on 2010 Dec 15)
|

|
The reduced direct fire value of the SS HMG is 5-5 in Beyond Normandy and Road to Berlin. (plloyd1010
on 2015 Jul 31)
|

|
All Guards JS-IIs should have AT fire values of 8-8. (Shad
on 2010 Dec 15)
|

|
All Guards T-34/85 tanks should have AT fire values of 7-7. (Shad
on 2010 Dec 15)
|
| Fire and Sword: scenario 9: The Offensive Falters | ||||||||||||
|---|---|---|---|---|---|---|---|---|---|---|---|---|
Fire and Sword: scenario 9: The Offensive Falters This is a very good scenario. It starts with the first 3 turns in the dark so the Soviets can advance with their initial, much larger forces against the much weaker Hungarian forces that start defending in the northern town and woods and the small German SS forces defending dug-in on the northern hill hexes. I disagree with the SS have a morale of 7/5, because they knew it was over for them if captured, so they usually fought to the last round but a very minor point in this scenario. The Russian advance rapidly and have the time to beat the initial Axis forces down, as the Axis kept rolling for reinforcements that didn’t arrive until turn 9. After this, things even up a bit and the chaos ensues in a fun tense way. The armor pounds each other the off-board artillery adds into to this and the Germans have some rare airpower as well, but to control the towns and hills the Infantry starts to take a center stage and both sides start to lose too much of the Infantry strength and their small in numbers leaders. Fun, at one point the Russian RKKA Sergeant had nothing to do but command trucks while the Russian Guard, German Army, SS & Hungarian Leaders, after casualties were in short supply and becoming the most valuable counters on the map. Both the Russians and the Germans get another dose of armor reinforcements on turns 13 and 18 if the dice rolls well for the Germans which adds another armor shootout. I had to keep a running tally of the step loses. I wasn’t sure who won in the end until I counted up all the objectives. The German lost 55 steps to the Russians 58 steps, the German win this objective. The Russian barley had control of 8 town hexes because to Germans took so long with their large forces getting to the battlefield, so the Russians win this objective. The Axis controlled the hill hexes, so the Germans win a minor victory as the Russian could only achieve one out of three victory objective and if the scenario last a turn or two more, they would have to have to withdraw from most of the town hexes, as they were spent. I really enjoyed this scenario, and depending on the dice, the Axis might have a very slight advantage, but not much. It is played on one map, so the fighting happens quickly. Great action, with JgPzIV/70 vs. ISU122, Panther vs. JS2, just to name a few, and don’t forget a Hummel but the Infantry and leaders seemed to be most important in the End. A great scenario and I can highly recommend it |
||||||||||||
| 0 Comments |