
 DrRa002

|
Hilltop Village at Takrouna Dragon Rampant #3 |
||
|---|---|---|
| (Defender) Italy | vs | New Zealand (Attacker) |
| Formations Involved | ||
|---|---|---|
| Italy |  |
101ª Divisione Fanteria Motorizzata "Trieste" |
| New Zealand |  |
1st New Zealand Army Tank Brigade |
| New Zealand |  |
2nd New Zealand Division |

|


| Overall Rating, 1 vote |
|---|
|
4
|
| Scenario Rank: --- of 1094 |
| Parent Game | Dragon Rampant |
|---|---|
| Historicity | Alt-History |
| Date | 1943-04-01 |
| Start Time | 11:00 |
| Turn Count | 30 |
| Visibility | Day |
| Counters | 72 |
| Net Morale | 0 |
| Net Initiative | 1 |
| Maps | 2: 76, 78 |
| Layout Dimensions | 56 x 43 cm 22 x 17 in |
| Play Bounty | 178 |
| AAR Bounty | 168 |
| Total Plays | 1 |
| Total AARs | 1 |
| Battle Types |
|---|
| Breakout |
| Delaying Action |
| Hill Control |
| Inflict Enemy Casualties |
| Conditions |
|---|
| Entrenchments |
| Minefields |
| Off-board Artillery |
| Randomly-drawn Aircraft |
| Smoke |
| Scenario Requirements & Playability | |
|---|---|
| An Army at Dawn | Maps + Counters |
| Dragon Rampant | Counters |
| Introduction |
|---|
|
By design, an Army Tank Brigade such as the New Zealand Military Forces proposed adding to their division was intended to support infantry divisions during offensives. The tough Italian-held position at Takrouna resisted even the splendid Kiwi infantry, but this might not have been the case if the New Zealanders could add their own armor to the equation. |
| Conclusion |
|---|
|
This time, we have a heavily modified version of Scenario Eight (Night Action at Takrouna) from NEW ZEALAND DIVISION. For starters, it's not at night: the Kiwis attack at mid-day, not least because this time they have tanks. The Italians are tougher, though, and they have a little armor support of their own. Not much, but it will help. |

|
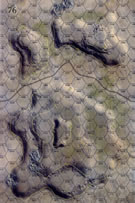
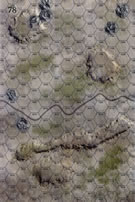
|
|---|
| AFV Rules Pertaining to this Scenario's Order of Battle |
|---|
|
| Regio Esercito |
|---|
|


| New Zealand Army |
|---|
|


| Squeezed one out, did ya? | ||||||||||||
|---|---|---|---|---|---|---|---|---|---|---|---|---|
The Italian Commander set up on the hills/rises on the border of the two playing boards with an AT gun unit and a Sem 75 on either flank and the minefields set up in between, making a run up the road difficult. The Kiwi Commander opted for an Infantry attack on the right flank in the effort to knock out one of the AT gun units (and perhaps a Sem 75 while they were at it). This effort failed miserably. Costing the Kiwis and the Italians an even number of step losses. An effort was then made on the left flank, since it had been weakened by the Italians reinforcing the right flank. This, too, failed. The right flank collapsed (finally) but by then the Kiwis had very little in the way of Infantry left. The Italians made a good retreat with what they had left to the 60 meter high massif on the left side of board 76. There they prepared their last stand. Both of the Sem 75s were still active but the Kiwis had very little Infantry left in which to force the Italians off the last hilltop. At this point the step loss was absolutely even. The Kiwi Commander decided to try for a run off the board to the North and to try to pick off another step or two along the way to try to achieve the victory that way. Unfortunately, the Sem 75s blasted their way to victory while the Kiwis were trying to run off North. (Note - This is an excellant scenario for on-line play.) |
||||||||||||
| 1 Comment |
Another concise, well-written, colorful & interesting AAR!