
 DrRa001

|
Point 209 Dragon Rampant #2 |
||
|---|---|---|
| (Defender) Germany | vs |
Maori
(Attacker)
New Zealand (Attacker) |
| Formations Involved | ||
|---|---|---|
| Germany |  |
164th Light Africa Division |
| Germany |  |
21st Panzer Division |
| New Zealand |  |
1st New Zealand Army Tank Brigade |
| New Zealand |  |
2nd New Zealand Division |

|


| Overall Rating, 1 vote |
|---|
|
3
|
| Scenario Rank: --- of 1094 |
| Parent Game | Dragon Rampant |
|---|---|
| Historicity | Alt-History |
| Date | 1943-03-01 |
| Start Time | 16:00 |
| Turn Count | 24 |
| Visibility | Day |
| Counters | 89 |
| Net Morale | 0 |
| Net Initiative | 2 |
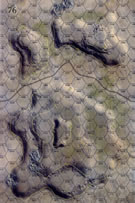
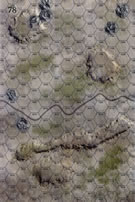
| Maps | 2: 76, 78 |
| Layout Dimensions | 56 x 43 cm 22 x 17 in |
| Play Bounty | 181 |
| AAR Bounty | 168 |
| Total Plays | 1 |
| Total AARs | 1 |
| Battle Types |
|---|
| Breakout |
| Delaying Action |
| Hill Control |
| Inflict Enemy Casualties |
| Conditions |
|---|
| Anti-infantry Wire |
| Entrenchments |
| Minefields |
| Randomly-drawn Aircraft |
| Reinforcements |
| Terrain Mods |
| Joint Forces Battle |
| Scenario Requirements & Playability | |
|---|---|
| An Army at Dawn | Maps + Counters |
| Dragon Rampant | Counters |
| Introduction |
|---|
|
Before the destruction of 4th New Zealand Infantry Brigade, division commander Bernard Freyberg had hoped to create a mobile brigade within his formation, including both tanks and the 28th Maori Infantry Battalion. The Maoris would be used to fill a gap in one of the remaining infantry brigades, and New Zealand armor did not fight in North Africa. Tanks and Maoris would have made a formidable combination. |
| Conclusion |
|---|
|
This is a heavily modified version of Scenario Five (Tebaga Gap) from New Zealand Division. The Kiwis have better armored support this time, and all of their infantry (Maoris, this time) can ride (either in their shiny new Bren carriers, or aboard those New Zealand tanks). But the Germans, they get some tank support, too (eventually), making for a tank battle. |

|
|
|---|
| AFV Rules Pertaining to this Scenario's Order of Battle |
|---|
|
| Heer |
|---|
|


| 28th "Maori" Infantry Battalion |
|---|
|
| New Zealand Army |
|---|
|


| 4 Errata Items | |
|---|---|

|
The reduced direct fire value of the Heer HMG became 5-5 starting with Fall of France. (plloyd1010
on 2015 Jul 31)
|

|
All SS PzIVH tanks should have a movement of 8. (Shad
on 2010 Dec 15)
|

|
The morale and combat modifiers of German Sergeant #1614 should be "0", not "8". (Shad
on 2010 Dec 15)
|

|
INF unit 1112 has full firepower printed on the front and back of the counter. Back should be 4-2. (garbare83686
on 2022 Feb 08)
|
| Got a bit tangled up there! | ||||||||||||
|---|---|---|---|---|---|---|---|---|---|---|---|---|
The Kiwi Commander opted for an infantry assault on the German line, keeping his tanks back until a couple of the AT guns could be delt with. The assault on the line went disastrously for the Kiwis and they retreated, pretty well shot up. (Read: Disastrous die rolling!) By the time that things had gotten back under control, dusk was falling and the tanks were brought up to attempt the finally crack that line. The immediate aftermath of that move was to lose two tank units to the AT guns, which had not been disposed of due to the lack of the Infantry assault accomplishing their mission. In short, it was a pretty well messed up mission for the Kiwis. (Note - This is another good scenario to teach how to assault a strong defensive line,) |
||||||||||||
| 0 Comments |