
 DeRa046

|
Khamsin Desert Rats #47 |
||
|---|---|---|
| (Defender) Germany | vs | Britain (Attacker) |
| Formations Involved | ||
|---|---|---|
| Britain |  |
22nd Armoured Brigade |
| Britain |  |
2nd Armoured Brigade |
| Britain |  |
4th "Black Rats" Armoured Brigade |
| Germany |  |
15th Panzer Division |

|


| Overall Rating, 5 votes |
|---|
|
4
|
| Scenario Rank: 102 of 1094 |
| Parent Game | Desert Rats |
|---|---|
| Historicity | Historical |
| Date | 1942-05-29 |
| Start Time | 08:00 |
| Turn Count | 40 |
| Visibility | Day |
| Counters | 218 |
| Net Morale | 0 |
| Net Initiative | 2 |
| Maps | 2: DR4, DR5 |
| Layout Dimensions | 116 x 88 cm 46 x 35 in |
| Play Bounty | 176 |
| AAR Bounty | 163 |
| Total Plays | 3 |
| Total AARs | 2 |
| Battle Types |
|---|
| Inflict Enemy Casualties |
| Rural Assault |
| Conditions |
|---|
| Off-board Artillery |
| Reinforcements |
| Severe Weather |
| Scenario Requirements & Playability | |
|---|---|
| Desert Rats | Base Game |
| Introduction |
|---|
|
Following heavy tank losses on the first two days of the Gazala battles, Rommel tried to concentrate his forces for a decisive blow against the British fortified line. The British tankers were still eager for battle, however, and attacked first. |
| Conclusion |
|---|
|
A furious tank fight developed, which continued despite a large, howling sandstorm that began at mid-day. The tank attacks kept the Afrika Korps off-balance and prevented Rommel from marshaling an attack against the infantry holding the Gazala line. |
| Additional Notes |
|---|
|
Scenario requires two sets of Desert Rats counters OR ownership of Afrika Korps and Beyond Normandy for unit substitution. Details are as follows: GERMANS need 4 x PzII (have 2), take 2 from Afrika Korps need 8 x PzIIIG (have 6), take 2 from Afrika Korps BRITS need 10 x HMG (have 6), take 4 from Afrika Korps need 6 x 6pdr (have 4), take 2 from Afrika Korps need 28 x BREN (have 15), take 13 from Beyond Normandy need 8 x truck (have 0, all are used as BRENs), take 8 from anywhere need 24 x Grant (have 12), you can either take 12 Shermans from Beyond Normandy and downgrade their movement (-2) and AT range (-1), or you can take 6 Italian Sem. 75/18 from Desert Rats (identical stats), and then only 6 Shermans from Beyond Normandy. Happy gaming! |

|
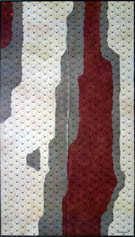
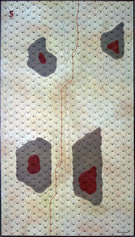
|
|---|
| AFV Rules Pertaining to this Scenario's Order of Battle |
|---|
|
| Army |
|---|
|


| Heer |
|---|
|


| 8 Errata Items | |
|---|---|
| Scen 47 |
Erratum – no one can throw a 1 or a 2 with 2 dice as published in the scenario special rules – only a 2 is possible with a 2d6 throw. (treadasaurusrex
on 2024 Jul 06)
|

|
All Bren carriers should have a movement value of 7. (Shad
on 2010 Dec 15)
|

|
Two British infantry have their full strengths printed on the back. They should both be "2-3" when reduced. (Shad
on 2010 Dec 15)
|

|
Ignore the direct fire values. (Shad
on 2010 Dec 15)
|

|
The reduced direct fire value of the Heer HMG became 5-5 starting with Fall of France. (plloyd1010
on 2015 Jul 31)
|

|
The Pz IVe appearing in the original Panzer Grenadier game had an Anti tank value of 4-7. As of Afrika Korps (2002), continuing onward through the 3rd and 4th edition games, the anti tank value has been 4-4. (plloyd1010
on 2016 Jul 25)
|

|
The morale and combat modifiers of German Sergeant #1614 should be "0", not "8". (Shad
on 2010 Dec 15)
|

|
All SPW 251s have an armor value of 0. (Shad
on 2010 Dec 15)
|
| "One giant armored nose-to-nose badass freaking fistfight!" |
|---|
|
I spent most of my free time in November and December working on features for PG-HQ. Come Christmastime, I was ready to sneak away from the computer for awhile and actually play some PG! I'm currently trying to get each of my PG games played once, and I had an itch for some freewheeling carnage, so that meant Desert Rats was going on the table. Also, with 11 plays notched for Airborne my Average Counters Pushed stat had slipped to 43, which left me ranked 48th of 65 and well below the site average of 63. For someone who claims to love monster battles, this was getting embarrassing! To recover some honor, I resolved to play the Desert Rats scenario with the most counters, which according to PG-HQ's basic search function turns out to be #47: Khamsin. Unfortunately, as stated in the scenario book, Khamsin requires two sets of Desert Rats counters. I don't have two sets of Desert Rats counters. However, as I was looking over the OOB I didn't see anything too exotic, so I decided to "take one for the team" and spent the better part of an afternoon figuring out if substitutions from other games would allow me to play the scenario without too much pain and suffering. In the end, yanking units freely from Afrika Korps and Beyond Normandy left me with only 7 units (Shermans all) without exactly correct counter stats. This was easily fixed between the ears, though. So, with 218 counters stacked neatly on my ManTable, more than 5 times my current Average Counters Pushed and equivalent to 12% of my Total Counters Pushed to date, I was ready to go. This scenario pits a small but extremely potent German force against a mass of weaker but exceedingly numerous Brits. The maps are arranged such that the roads run east-west. There are no terrain features to speak of. The Germans begin in place, though not dug-in, and may set up as far as halfway across the map. The Brits enter from the east. There is the possibility (2d6 = 1 or 2 at the start of each turn) that a blinding sandstorm will blow up and reduce visibility to 3 hexes for the rest of the scenario. The earlier this happens the greater the chance the Brits will miss out on a large chunk of their reinforcements, as the sandstorm will turn them away. Victory conditions are simple - kill more of them than they kill of you. In short, this is one giant armored nose-to-nose badass freaking fistfight. Battle PlansAs the Germans, I based my initial setup around the absolutely awesome 88mm. With an AT fire of 8 and range 9, this baby can sling shells at AT Fire 4 a full 14 hexes. Not a single British AFV has armor greater than 3, so when placed as forwards as possible and in the center north/south you've got a killzone that covers most of both east-west roads and roughly half the map - brutal! Backing up that position is the bulk of my infantry, as the German armor is going to do most of the heavy-lifting this day. As for the armor, the longest ranged AFVs will start in the middle, with one large battlegroup astride either road to the north and south. The British forces which will begin the battle are no match for my AFVs, so I aim to pounce and eliminate as many as I can before any British reinforcements show up (1d6 = 6 at the start of each turn). As the British, I plan to take full advantage of the complete lack of terrain features. I'll enter along the southern east-west road and then swing well south to stay out of range of the 88s holding the center. Attacking from due south, I'll prevent the Germans from establishing any meaningful crossfire. Concentrated, my initial detachment is enough to overwhelm either of the German flank battlegroups. The Germans will either have to redeploy to match my numbers leaving the north open for my reinforcements, stand and fight which gives me the best chance, or withdraw to the north which breaks up their defensive array and buys me time for my reinforcements to arrive. Best case scenario for the Brits is to get all reinforcements on and THEN have the sandstorm kick-up, negating the significant German AT Range advantage. We shall see... Neutral Observer's Predicted Outcomes
Turn 1 - 0800 - "Best Laid Schemes of Mice and Men Go Often Askew"Chance is a funny thing. As it happened, none of those 4 predicted outcomes came to pass... (turn preliminaries) 2d6 = 1 or 2 brings the sandstorm... German player: 2d6 = 2! The sandstorm arrives on the very first turn! The British reinforcements are halved! The British player (also me, of course!) is crestfallen! 1d6 = 6 brings the remaining British reinforcements... British player: 1d6 = 6! The reinforcements appear over the next dunes. The British OOB has been doubled in one fell swoop! The German player is shocked! As the British, I enter the battlefield by rushing headlong down the southern road towards the German flank. With a visibility of only 3 for the duration of the scenario, I need fear neither the 88mm artillery in the center of the map nor the greater overall German AT fire range. We are now fighting square, at least when it comes to range of engagement. Furthermore, with all of my reinforcements in hand, aggressive entry has the potential to create a massive force disparity on the German flank before he can redeploy his central and northern detachments. Maximum aggression and a bit of luck from here on out will see me victorious in the end. As the Germans, my careful initial deployment is suddenly a dreadful liability. I need time to bring my central and northern forces down into range, so I push the infantry from my southern battlegroup right up to the nose of the British spearhead and unload them to block the road. We'll assault man vs. tank if we have to - it's imperative that I jam up the road long enough for my help to arrive. My AFVs in the north and center have to cross sand to join the battle, while the British are flying straight down the road to hit me head-on. I plan to draw fire and make as orderly a withdrawal as possible westward along the road. At worst, I'll take losses but delay the British. At best, I'll string them out a bit and leave them vulnerable to flanking fire when the main contingent arrives. With a +2 initiative advantage, this might just work! Turn 2 - 0815As the Germans, 3/4ths of my forces are in manic flight southward to meet the onrushing British. The remaining 1/4th are desperately trying to jam up the road. 3 steps of infantry were lost to deadly accurate AFV opportunity fire from lead elements of the British column as I pulled back westward, but in doing so I succeeded in stopping British westward progress on the roadway. The few AFVs I have available in the south have been arrayed in a widely-spaced wall to try and contain the possibility of British flanking fire. As the British, I happily machine-gunned the fleeing German infantry. The enemy has been bloodied and after only 15 minutes of combat! Stopping to shoot Nazis in the back did slow my westward progress, though. As a result, my disposition has morphed from a column to a mushroom shape as AFVs previously in the rear flow off-road out and around to either flank. All infantrymen and their APCs are being kept in the rear as reserve. With such low visibility they are best kept behind but very close, thereby positioned to dart forwards and unload should German armor get careless and be caught too far forwards. Turn 3 - 0830, GSL=3, BSL=0As the Germans, I won the initiative roll but found myself with only one activation. After a lot of thought I decided to try and extricate 2 platoons of PzIVEs rather than have them sit and shoot up the British AFVs which were adjacent on 3 sides. If I'm going to win this scenario it'll be through patience, not suicidal heroism. The choice proved wise as my PzIVEs disappeared rearward into the howling sandstorm with the loss of only one step, despite 8(!) British AT OpFire shots. This action alone pinned their spearhead in place for at least another 15 minutes. A fair trade. Further north, the bulk of my forces have begun to reform a new, centralized defensive front. The delaying tactics have worked, for now. As the British, I did manage to smoke several platoons of weak PzIIs, however I was unable to capitalize on my near encirclement of the PzIVEs. While the sandstorm has neutralized the superior German AT fire range, it hasn't made their armor any weaker! The Germans have done well to stall my comparatively numerous forces and give their central and northern detachments time to reunite, but I still command a markedly larger force and have plenty of time to grind them down into desert dust. Turn 4 - 0845, GSL=13, BSL=0Play Note: per scenario rules, the British have met their victory condition (most kills wins) and satisfied the minimum (6 kills), and thereby could retire from the board victorious rules as written. However, as the introduction explains, the British tankers were eager for battle - and are not about to pack it in so quickly! Especially when the beating has been so lopsided, ha! As the Germans, my fighting withdrawal has gone beautifully. The infantry, when asked to make a suicidal stand to delay the enemy advance, decided instead to make a stand and keep right on living - holding things up far longer than I could have dreamed. Additionally, hot shooting by my PzIII crews (3 hits on 4 unmodified shots) have served notice to those overconfident limeys that the DAK is never to be taken lightly, regardless of force disparity. As the British, my inability to clear the road of infantry meant little to no forward progress would be made this turn. The sandstorm continues unabated, limiting my ability to bring the superior numbers of my armor to bear on individual German targets. Combined with some lousy shooting by nervous tankers, the German delaying tactics have been indisputably successful and their heavy formation can be seen digging-in on the horizon. We must be patient and careful, for the tiger has been cornered... Turn 5 - 0900, GSL=13, BSL=8As the Germans, my forward infantry have finally fallen, but I was able to evacuate some 50mm pieces, extremely valuable when I suffer for lack of AT capable units (if not for their potency). My main force has begun digging in along a curving front, anchored at one end by my 88s and at the other by my PzIVF2s. Four platoons of PzIIIGs are screening out in front to make sure the British don't advance too quickly through the sandstorm. As the British, several more German AFVs were destroyed, and the last of their suicidal infantry routed, but a handful of Crusaders got a bit ahead of their detachment in the sandstorm and suddenly found themselves face to face with the PzIVF2s. Predictable, it did not end favorably. The Germans have established a respectable line of battle. The natural response is for us to leave enough units in the center to command respect, while flanking either end of the line in a pincer movement. With all German units furiously digging in, the German advantage in armor quality, and the sandstorm making our artillery all but useless... the hard work will be left to our infantry. The Bren carriers have been ordered out to either flank, and our men will shortly unload and proceed against the ends of the German line. Skirmishing has ceased. The real battle begins now. The Real BattleIf I have learned anything from this scenario, it is that I am a poor leader of men. When faced with the task of crushing a cornered and outnumbered foe, I managed to attack in a disjointed and inefficient fashion that put many good men 6 feet below. As the German commander, I succeeded in establishing a strong defensive arc, the mother of all hedgehogs, if you will. As the British aggressor, I found it particularly hard to crack this nut. The 3 hex visibility made setting up AT crossfire extremely dicey. Even with the crossfire bonus, my tankers were often shooting with a -1 or -2 DRM whereas the dug-in German PzIVs were confidently blasting away at +2 (or better) all day. The next 3 hours of battle was a toe-to-toe slugfest. Each side blowing massive holes into the other's lines. Only one side had the numbers to refill those holes, however, and as the British I slowly made headway against the well-organized Germans. And yet eventually even the most hungry wolf has eaten its fill, and Turn 16 saw the last bit of momentum drain away from the British attack. The order was given to disengage, retreat into the cover of the howling walls of sand, and rally and reform the lines. The withdrawl was complete by the end of Turn 17, and steplosses stood at 87 for the Germans and 91 for the British. More tellingly, though the number of disordered British units far outnumbered their good-ordered men, as they melted away into the desert the German commander found himself with precious little left to command. The devil-sent 88s remained in their ferocious glory, led by a fanatical 10-0-1 LT COL, 10-2-1 SGT, and HMGs. But one PzIV platoon was all that remained of the intimidating Afrika Korps AFV detachment. British infantry had slowly and methodically destroyed the rest. With ample time (another 23 turns) for the British leaders to reorganize their men, and knowing their AFVs would soon be attacking with impunity, the German commander surrendered despite his marginal lead in steplosses. To do otherwise would mean death to the very last man. It was simply a question of when. AnalysisAs the Germans, I played an excellent defensive battle with relatively few mistakes. But defending is always easier than attacking. As the British, I struggled mightily. A plethora of units and poor visibility made for lots of traffic jams and inefficient deployments. A better commander than I would have had greater success under the circumstances. Overall, I enjoyed this scenario immensely, though it did test me both mentally and in terms of patience. I very much recommend it for solo or head-to-head play, with the caveat that there are really 5 or 6 different situations hidden in this scenario due to the British having 2 waves of variable reinforcements and the on-going possibility of a sandstorm blowing up. I think somehow finding a way to play this double-blind, with AFVs probing and feinting amidst the sandstorm, would be the highlight of a wargamer's life... |
| 0 Comments |
| Stop the Desert Rats in a Sand Storm | ||||||||||||||
|---|---|---|---|---|---|---|---|---|---|---|---|---|---|---|
This was a large-scale & stimulating 21-session play-through with the determined & doughty Jockulus, leading armored elements of the attacking British 7th Armoured Division in the open desert southwest of Tobruk during the Ghazala Campaign. I led defending elements of the German 15th Panzer Division. The Germans drew a fine set of leaders, mirroring the actual battle. The Brits were not so fortunate. However, when the sandstorm arrived during the 4th game turn, this one turned into a close-range, very bloody, overlong, slugfest. We used the FOW, consolidation, extended assault, smoke/illum, hidden units, tank riders, strategic movement and excess initiative optional rules. In addition, we used these 4 house rules: 1) Road Movement for Mechanized & Foot Units - All FOOT & MECHANIZED units may move on roads at the rate of 1/2 of a Movement Point (MP) per road hex, just like MOTORIZED units, and 2) Standardized Movement for Mechanized Units - All mechanized units may move through clear hexes at a movement cost of only 1 movement point (MP) per hex, instead of 1 1/2. Add one to this cost if moving up, across, or down slopes hexes, and 3) Dug In Units are Automatically in Limiting Terrain in Desert Games Unless prohibited by special scenario rules, ALL units that are dug-in on slope hexes are considered to be in limiting terrain and are spotted if enemy units approach to within 3 hexes, or 4 hexes for reconnaissance units – unless they are marked with a spotted marker, see 8.22, 4) Tank Leader Forward Observation - Full strength, efficient tank leaders may spot for ALL artillery & air strikes in accordance with the normal spotting rules (8.0, page 19). Just as leader units may spot, this action does not require an activation. These house rules improved both sides’ mobility, realism and game simplicity The initial session (game turns 1 and part of 2) was a high-maneuver extravaganza that featured mobile elements of the British 2nd Armoured Brigade moving onto Map 4 in 2 separate wings; one directly west (left flank) on the long, east-west 40-meter ridge, and another (right flank) in the wide valley just north of the ridge. Two companies plus of British infantrymen approached behind the tanks along the ridge crest in their bren carriers. Simultaneously, forward elements of the 15th Panzer both advanced & reversed to secure better observation as the Tommies approached on the ridge, as did a company of scouting German light tanks on Map 5. Several sacrificial German transport units also showed themselves in bids to attract attention. An OBA exchange in the 2nd game turn was ineffective for both sides as time expired in this session. Our deplorable, second session (end of game turn 2, through the start of turn 6) featured the start of the Khamsin during game turn 4, which reduced visibility to a maximum of 3 hexes for the balance of this fiasco of a scenario. The probing & scouting Germans managed to lose an entire platoon of Pz-II light tanks to accurate British AT fire, accounting for their first 4 step losses. Other Jerry tank units managed to waste 6 AT shots at relatively short range just before the sandstorm hit. The Brits’ oncoming, combined arms wave atop the long east-west ridge continued flawlessly, thanks primarily to the inclement weather and my opponent’s deliberate and methodical approach. With the substantial Axis advantages in terms of both long-range observation, and AT gunnery now lost in the flying sands of Libya, this one seemed on a path for an eventual British decisive victory. The costly & truncated, third session (end of game turn 6, through the start of turn 7) featured the beginning of heavy, close range fire exchanges on the main east-west ridgetop where the visibility was only of 3 hexes in the sandstorm. Wild maneuvering by the pelting British armor on the northernmost hill also ensued as they encountered a forward-deployed mechanized infantry company with escorting tanks. A hail of German AT and OBA fire struck the leading elements of the British column on the ridgetop, resulting in the loss of 9 steps, including a platoon of Crusader I tanks, an HMG platoon and 3 Bren carrier units. These casualties reduced the Tommies; initiative by two levels, while return fire eliminating another probing, Pz-II unit, which also lowered the initiative level of the defending Jerries. Our frustrating & truncated fourth session (game turn 7 to the start of 9) featured multiple failed AT fires and a singularly ineffective German close assault in the north. Only 3 British steps were lost in this session: a pair of bren carrier platoons and a step of infantry. On the big ridge, the Tommies began stepping out of range and back into the gloom of the raging sandstorm, when they realized that they were outgunned by superior, mostly dug-in tanks, artillery and infantry units. We then lost our internet connection and ended the session. A combined TEN combat 7-die rolls were thrown. The fifth session (end of game turn 9-10) featured a nasty exchange of close range German AT fire that resulted in 6 step losses – two bren carrier units and a troop of Crusader I tanks for the attacking Tommies on the large ridgetop. Very soon, the reinforcing British 22nd Armoured Brigade surged onto the battle map from the NE corner, forming a powerful right flank advance. The victory point tally was now: 17 for the Wehrmacht defenders and 8 for the rapidly-moving Tommies. Our very bloody, sixth session (game turns 11 through the first half of 12) featured a mighty British push in the north (right) flank and the destruction of a truculent company of Landser infantry, as well as a platoon of Grant tanks in a close assault on the northeast 40-meter hill on Map 5. In the south, the Brits slowed to a stop, chased off some probing Pz-IIIG tanks and began earnestly, digging-in on the long 40-meter ridge. Step losses this session were: 8 for the defending Wehrmacht boys, and 6 for the charging Tommies. The high-mobility, seventh session (game turns 12-13) mostly consisted of the British side’s remorseless advance in the north half of the battle map, where their massive right flank pincer moved forward behind a very strong armored spearhead. They were able to isolate 2 German positions in the process. In the south the Tommies continued digging in on the long ridge. Step losses this session were 4 more for the Jerries and only 2 for the surging Tommies, with the additional losses finally bringing the German initiative level down to the same as the British side: zero. The ongoing Khamsin sand storm had now permanently delayed the entry of the laggard 4th Brigade of the British 7th (Desert Rats) Armoured division. The two brigades already on the map would now have to slug it out in the sandstorm with the remaining strength of the 15th Panzer. Our eighth session (game turns 14 to the start of 15) was a very grim one for the hapless Afrika Korps with 6 unanswered step losses in maneuver combat, mostly in the north and central portions of the battle map as the Brits continued their inexorable movement to the west. The Jerries could not throw dice to save their misbegotten souls on this occasion, missing shot after AT shot – even on bombardment rolls! My opponent’s approach proceeded methodically in near-textbook fashion. The next several sessions proved equally devastating for the defending Boche. The high-mobility & exciting, ninth session (game turns 15-16) featured the extension of the British right flank & central thrusts, as well as some unexpected German armor counter-moves, accurate long-range AT fire and OBA successes. Both sides dodged & weaved their respective ways across the north half of the battle map in the midst of the ongoing Khamsin sandstorm with visibility still limited to only 3 hexes. Vehicle and troops would appear here and there, fire, and then retreat back into the gloom. Wehrmacht troopers & tanks managed a rapid redeployment under fire from the NW corner of the battle map with negligible losses, and re-established their mobile, defense-in-depth in the central sector. My distinguished opponent offered this observation: “In a rather hilarious moment, the British had left their senior commander on his own and exposed in the rear. Two German tank units charged through a gap in the sandstorm to try to capture the completely surprised and discomfited, Colonel. Luckily for him, he survived the capture attempt, and managed to run 600 meters to a nearby ATG defensive position to prevent a repeat attempt.” Step losses this session totaled a surprising: 2 for the Wehrmacht and 6 for the resurgent Tommies. The revised victory point tally was now: 34 for the defending Afrika Korps and 26 for the Desert Rats. Our fast-paced, tenth session (game turns 17-18) featured additional cat & mouse maneuvering by both sides in the north half of the battle map and 4 more step losses for the struggling Germans, to only a single step loss for the advancing Tommies. The last Jerry Pz-II light tank section was eliminated as were a scuttling SPW platoon as the British wave moved further to the west and turned south. The remaining German mobile units in the area withdrew under covering fire in some sectors and feinted or probed in others, attempting to keep the Brits spread out as much as possible. The British infantry continued to try to tie down German units in assault, with a HMG platoon advancing to assault an ATG. Two more tank vs. tank fights began to develop: one in the west where several British tank troops nearly surrounded a Pz-IVE platoon, and in the center, where a Pz-IIIG unit was mostly surrounded by advancing British Grant, Crusader and Honey tanks. The slightly-delayed, eleventh session (game turns 19-20) featured repeated – and often ineffective – exchanges of AT fire in the northern half of the battle field. Session step losses to the Afrika Korps totaled 4, and there were another 8 steps lost by the advancing British side. These casualties included a platoon of probing Pz-IIIG tanks and two platoons of British tanks. The scuttling Jerries luckily managed to escape from 2 of 3 tank battles with and the related crossfires. Advancing Tommy infantry began washing up on the lower slopes of the smaller 40-meter hill in the SW quadrant of Map 5, where a couple of close assaults, backed by armor took place. Elsewhere, probing British units, and infiltrating German armor veered back and forth, but they generally trended further west and south. A frustrating, combined total of TEN combat 7-die rolls were thrown this session. Our high-mobility & costly 12th session (game turns 21-22) featured a set of mighty tank-on-tank firefights resulting in the elimination of another 8 British steps of armor, as well as another German halftrack! The onrushing wave of British combined arms pincers on the northwest portion of Map 5 drew into decisive range on, and around, the central 40-meter hill. The revised victory point tally was now around: 57 for the Afrika Korps, and 33 for the surging Tommies. The much-delayed and very costly, thirteenth session (game turns end of 22 – start of 24) featured heavy casualties for both sides with another 8 German steps lost, to 6 for the charging Brits. Most of the losses were due to AT fire against armored units as the contending forces maneuvered in the central and western sections of Map 5. The rapidly diminishing Axis force was able to pull off a relatively successful tactical withdrawal from positions on the east-west, 40-meter ridge in the face of concentrated British fire power. The Tommies advanced cautiously into the vacuum created by the retreating Afrika Corps elements on to the summit of the 40-meter ridge, and in the adjoining valley. Our 14th & 15th sessions (game turns 24 – 29) featured lively exchanges of lethal AT fire, and a great deal of maneuver by both sides, resulting in additional step losses of 14 for the rapidly-diminishing, German side, and 10 for the surging Tommies. Afrika Korps elements continued their tactical withdrawal to the south in the direction of the long, 40-meter, east-west ridge. They fell into armor-killing crossfires in the process that were created by audacious flanking moves by the resurgent, Tommies. The victory point tally was now: 76 for the Wehrmacht, and 53 for the Desert Rats. The 16th session (game turns 30–31) featured relatively few casualties, only a single step loss for the Brits and 2 for the scrambling Germans. This was a cat & mouse turn with a fair amount of strategic movement in the sandstorm as the British moved to flank the remaining German position from the west. The next two game turns will likely prove decisive. The victory point tally was around: 77 for the Afrika Korps, and 55 for the Desert Rats. Our much-delayed, 17th session (game turns 32–33) was a relatively grim one for the Afrika Korps with an additional 3 steps lost, along with a German leader. There were also 3 steps lost for the British, but their adversaries threw a total of 5 combat 7-die rolls at critical moments. The remaining German units were now trapped between the original contingent of Brits east of their positions on the ridge, and the second contingent pushing aggressively into decisive range from the west. The revised victory points were now around: 80 for the Afrika Korps, and 58 for the advancing Desert Rats. The costly 18th session (completed the 33rd and started the 36th game turn) featured a variety of “cat and mouse” actions centered on the long east-west ridge with many AT and OBA shots and a single close assault. Unexpectedly, the embattled Germans had the better of the exchanges of gunfire and inflicted an additional 8 step losses on the advancing Brits, who had left two troops of scouting Honey tanks exposed. Meanwhile, the Germans lost 4 steps of their much-diminished complement of armor. The flagging, but resolute, 15th Panzer continued to pound the Brits with multiple artillery barrages, but to minimal avail this session. The victory point tally was now: 88 for the pinned-in-place, Afrika Korps elements, and 62 for the surging Desert Rats. Our 19th session (game turn 36-37) featured was another grim one for both sides with multiple exchanges of AT and OBA fire, as well as a successful close assault by the outnumbered Germans in Hex 04-1923. In all, the 15th Panzer lost another 5 steps of tanks, while the Brits lost 6 armored steps in heavy fighting on the long east-west ridge. Wisely, the Tommies continued efforts to force the Afrika Korps to split their fire, and also maneuvered to create armor piercing crossfires. The action-packed, and costly, 20th session (game turn 38) featured the jaws of the British vice beginning to close on the trapped, dug-in Afrika Korps troops. But it was too little, too late for the Brits, as the Germans had superior firepower and were well positioned. A series of tank-on-tank fire fights broke out on the southern margin of the east-west ridge as the struggling Tommies attempted armored crossfire attacks against a pair of dug-in, panzer platoons. Some remarkably bad combat die rolls ensued, but 2 Wehrmacht armor steps were eliminated. Each side had initiative bonuses to begin their turns this session, and there were a great many required morale checks, as tank after probing British tank, was eliminated or demoralized in a hail of close-range, AT fire. Ironically, the dreaded German 88 failed to score as the Tommy combined arms force pushed into decisive range. In all, there were 12 additional step losses and a leader killed among the British attackers, as well as 4 more steps lost by the defending Germans. The updated victory point score was now: 106 for the pinned, Afrika Korps, and 71 for the remaining Desert Rats. A combined ELEVEN, combat 7-die rolls were thrown this session. With little time left for the Brits to make headway, the Germans remained in a strong position, with the enemy attack floundering. Our 21st and final session (game turns 39-40) was a grim one for both sides as the British vise finally closed on the German defensive line. The final step losses were colossal! Germany lost 68 steps in combat, and the British lost 136. A very hard-won, hard-fought Afrika Korps victory in the sandstorm. There were 19 FOW-shortened game turns of the 40 played! Scenario Erratum – no one can throw a 1 or a 2 with 2 dice as published in the scenario special rules – only a 2 is possible with a 2d6 throw. This note was recorded on PG-HQ (6 July 2024). This unbalanced, scenario’s victory conditions should be rewritten to require at least one geographical objective for the attacking British side. It is very engaging to play with an adept & cunning opponent, and if one can avoid the sandstorm, it has the potential to be a very enjoyable SHARED play, requiring patience and skilled, combined arms maneuver. As this one favors the attacking British side, the more experienced player should play the defending German side. We recommend this one for both SHARED and SOLO play, and rate it a 4. |
||||||||||||||
| 1 Comment |
