|
This was an extended 5-session, hypothetical meeting engagement, with the dauntless & clever, NBGB, leading forward elements of the US 1st Armored Division, in the wilds of Tunisia. I led advancing elements of the newly created & deployed, Italian 1st “Mussolino” Blackshirt Armored Division in this 30-turn fracas in the desert. Surprisingly, both sides drew decent, but limited, sets of leaders.
We used the Fog of War (starting game turn 2), smoke/illum, consolidation, extended assault, Italian efficiency, excess initiative and efficient unit move & fire optional rules. We also tried these EIGHT house rules: 1) Road Movement for Mechanized & Foot Units – All FOOT & MECHANIZED units may move on roads at the rate of 1/2 a Movement Point (MP) per road hex, just like MOTORIZED units, 2) Standardized Movement for Mechanized Units - All mechanized units may move through clear hexes at a movement cost of only 1 movement point (MP) per hex, instead of 1 1/2. Add one to this cost if moving up, across, or down slopes hexes, 3) Dug In Units are Automatically in Limiting Terrain in Desert Games — Unless prohibited by special scenario rules, ALL units that are dug-in on slope hexes are considered to be in limiting terrain and are spotted if enemy units approach to within 3 hexes, or 4 hexes for reconnaissance units – unless they are marked with a spotted marker, see 8.22, 4) Firing Through or Over Friendly Personnel Units — All AT guns, AFVs, Infantry guns (direct fire), Anti-Aircraft (AA) guns and HMGs may fire over or through friendly personnel units. In the case of HMGs, AA guns & Infantry Guns, there must be one unoccupied hex between any friendly unit that is being fired over and the targeted hex as in the current rule (10.1, page 24), 5) Armored Fighting Vehicle (AFV) Consolidation — Unless prohibited by special scenario rules, reduced 2-step tanks, and other AFV units of the same type, nationality, and morale condition may be combined to form a single, full-strength unit. Both reduced units must start their activation in the same hex and be activated by an adjacent – or same-hex – good order, Tank Leader. This action costs both units all their movement points. Remove one of the units, flip the other to its full-strength side and mark it activated, 6) Tank Leader Forward Observation — Full strength, EFFICIENT tank leaders may spot for ALL artillery & air strikes in accordance with the normal spotting rules (8.0, page 19). Just as leaders may spot enemy units, this action does not require an activation, 7) Small Caliber AT & AA Rapid Fire Optional Rule — All small caliber (<48mm or less) anti-tank (AT) as well as automatic, anti-aircraft (AA) towed or self-propelled artillery units may fire twice in OPPORTUNITY FIRE (OPFIRE) against moving enemy formations using the same rules as apply for personnel units (INF, RIF, GREN, HMG, ENG, et al) when using OPFIRE. For example, British towed or portee 2-pdr AT guns, all 20mm, 25mm, 28mm, 37mm, 45mm, 47mm towed AT guns, and towed or self-propelled 20mm, 37mm or 40mm AA guns may fire two OPFIRE missions at individual, moving enemy vehicular or personnel unit targets. Units firing OPFIRE may not move or be limbered and loaded in the same turn in which they OPFIRE, and finally 8) Voluntary Unit Reduction — Players may voluntarily reduce 2-step personnel units to 1-step (halved) units if they have at least one leader of MAJOR or higher rank among their side’s assigned force. To do so, the unit to be halved must begin the player’s activation phase in the same hex or in an adjacent hex to a CAPTAIN or higher rank. The full-strength unit to be halved must be in good order and this action costs all the reduced unit’s movement points. Remove the full- strength unit and replace it with 2 reduced strength units. Mark both — and the leader — as activated.
We also alternated drawing air support, determined by which side threw a higher single die roll. We felt that this house rule selection improved simplicity & playability in this scenario.
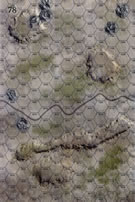
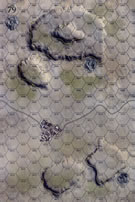
Our high mobility, first session (game turns 1-4) featured joint movements to contact from either side of the battle map. The US force came on in three, separate columns with the armor concentrated in the north (left flank) and central thrust. The bulk of the GIs came on in the south (right flank)focused on the long east-west ridge on Map 78. The Italians pushed on in two, combined arms groups concentrating on occupying the 40-meter hilltop & the 3-hex town on map79. An accurate American P-38 airstrike in game turn 3 eliminated a step of MSVN infantry on the hilltop. An Italian (left flank) armored thrust led by a company of P-26/42 tanks in the south managed to separate the American infantry column from their supporting APCs & scouting light tanks.
The intense & high maneuver, second session (game turns 5-9) featured a lot of mobility and many critical decision points for both sides. The Americans committed to a sweeping left flank thrust with the bulk of their armor got get defilade positions on the stagnant Italian defenders atop the 40 meter hill mass. In spite of some very poor gunnery shots, sniping Italian tanks managed to inflict a painful 15 step losses on the scrambling GI armor and APCs, while absorbing the loss of a pair of BR-81 halftracks. This shifted the initiative level downward for the GIs. The revised step loss total was now 15-3 in favor of the defending men of Rome.
Our action-packed & costly, third session (game turns 10-14 ) included a successful, combined arms American push, which yielded a pair of hilltop hexes on the 40-meter hill mass. This was accompanied by a brave, but ill-fated, double envelopment maneuver of Yankee armor – subsequently spoiled by miserable tank gunnery. Strategically, the battle now hung in the balance, as the men of Rome had lost half of their tenuous foothold on the summit. Crucially, the last of the US M-3 halftrack platoons and the final M-6 SPAT unit were eliminated by rampaging Italian P-26/42 tanks, while a headlong Italian counter attack managed to eliminate the senior American leader in a close assault. Il Duce’s tank crews also suffered from inconsistent gunnery as the session wore on. The revised step loss total was now 26-8, still in favor of Mussolini’s Blackshirts.
The very exciting & costly fourth session (game turns 15-17) was focused on a colossal struggle for the top of the big hill with multiple adjacent-hex firefights, many AT shots and ferocious close assaults. Step losses this session totaled 17 and a leader lost for the scrambling American side, and another 8 Italian steps, resulting in Axis initiative dropping a level. GIs were able to secure their third, 40-meter hilltop hex, and the first of Mussolini’s P-26-42 tank platoons was eliminated. A draw is becoming a distinct possibility with 12 more game turns to go.
Our fast-paced & hard hitting fifth session (game turns 18-23 ) was another grim one for the remaining GIs who suffered another 11 step losses, while the Italians lost 2 more, plus a leader in very heavy fighting. In the end, the Italians held the town, and a single 40-meter hex on the big hill, while dropping more than 14 steps. They did eliminate more than 15 American steps, and the final step losses were 55 to the US side, and 18 lost by the scrambling Italians. A draw was agreed to at the end of the 23rd game turn.
This scenario was relatively balanced and fun-to-play in mountainous, desert terrain with excellent visibility. In our opinion, given the March 1943 time frame, the American counter mix should drop the pair of M-6 portees, and replace these units with a couple of M-3/75 TDs. We also think that the length of this scenario is excessive, and it should be reduced to about 22-24 game turns. Since the Italian counter mix includes no OBA, we think that adding the possibility of air support for both sides, as determined by die roll, makes for a more intense and slightly better balanced scenario. As published, though, it merits a 5 in shared, online play with a challenging & flexible opponent, and it is quite suitable for both SHARED and SOLO play.
|

 BlDi005