
|
Win or Die: Bure and Wavreille, Belgium Britain's Bulge #5 |
||
|---|---|---|
| (Attacker) Britain | vs | Germany (Defender) |
| Formations Involved | ||
|---|---|---|
| Britain |  |
6th Airborne Division |
| Germany |  |
2nd "Vienna" Panzer Division |

|


| Overall Rating, 3 votes |
|---|
|
3.33
|
| Scenario Rank: --- of 957 |
| Parent Game | Britain's Bulge |
|---|---|
| Historicity | Historical |
| Date | 1945-01-03 |
| Start Time | 13:00 |
| Turn Count | 16 |
| Visibility | Day |
| Counters | 66 |
| Net Morale | 0 |
| Net Initiative | 1 |
| Maps | 3: 22, 24, 25 |
| Layout Dimensions | 84 x 43 cm 33 x 17 in |
| Play Bounty | 172 |
| AAR Bounty | 160 |
| Total Plays | 2 |
| Total AARs | 2 |
| Battle Types |
|---|
| Hill Control |
| Road Control |
| Conditions |
|---|
| Entrenchments |
| Minefields |
| Severe Weather |
| Scenario Requirements & Playability | |
|---|---|
| Britain's Bulge | Base Game |
| Elsenborn Ridge | Maps + Counters |
| Liberation 1944 | Counters |
| Introduction |
|---|
|
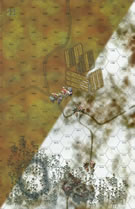
Montgomery’s counteroffensive in the Ardennes began with 29th Armoured Brigade moving east of the Meuse to support the 6th Airborne Division’s attack against the German salient. The fighting concentrated in the area of Wavreille and Bure, small farming villages just to the south of Rochefort. The attack involved two parachute battalions of 5 Para Brigade. Their objectives were the villages of Bure and Wavreille and then eastwards to Grupont and Forrières to cross the river Lomme. The weather had become positively savage: spasmodic blizzards reduced visibility often to a matter of yards, deepening snow made ground conditions nearly impossible, and the cold was biting. The attack on Bure by the 13th (Lancashire) Parachute Battalion started at 1300. Supported by the tanks of C Squadron/2nd Fife and Forfar Yeomanry Regiment, A Company was to secure the village, while B Company secured the high ground and C Company was in reserve. The paratroopers were also supported by men of the 1st Belgian SAS Squadron. At 1430, the 7th (Light Infantry) Parachute Battalion supported by another squadron of Shermans advanced on Wavreille, four kilometers north of Bure. The battle motto of 13th Para Battalion was “Win or Die,” a shortened version of: “They win or die who wear the rose of Lancashire.” |
| Conclusion |
|---|
|
Despite the massive array of heavy guns available to 6th Airborne Division, the British attack on Bure went in without any artillery support. The attacking force came down the hills to the north and northwest of the village. When the paratroopers of the 13th Battalion reached the valley between the hills in the north and the village itself, the Germans opened fire with machine guns and mortars. The unfortunate Paras sat in the woods under heavy shelling. “The Germans knew we were there,” recalled A Company’s commander, Major Jack Watson. “They were waiting for us and as soon as we started to break cover, I looked up and I could see about a foot above my head the branches of trees being shattered by intense machine gun fire and mortaring. They obviously had the guns on fixed lines and they pinned us down before we even got off the start line. This was the first time I’d led a company attack and within minutes I’d lost about one-third of them. I could hear the men of my left-hand platoon shouting for our medics.” The attack immediately met sustained heavy mortar and machine gun fire, supported by German armor, and casualties mounted in both companies. The supporting tanks from C Squadron made an adventurous approach to the village, slithering from side to side on the glassy road. Two hundred yards short of the village the leading tank struck a mine and the remainder of the troop paused before entering the village from another quarter, where an armor-piercing shell took out another of the tanks. Repelled, the paratroopers regrouped and attacked again. This time A Company managed to gain a foothold in the village while B Company reached the high ground through which it entered Bure. There, panzerfaust rockets knocked out two of the leading tanks and 13th Parachute Battalion took many casualties. The Paras fought their way from house to house, eventually establishing themselves at the crossroads in the center of the village. The Germans counter-attacked from the south-east, led by four self-propelled guns. British tanks put three of them out of action and the fourth withdrew. At 1800 the Paras along with a troop of Shermans from 2nd Fire & Forfar Yeomanry held half of Bure. |

|
|
|---|
| AFV Rules Pertaining to this Scenario's Order of Battle |
|---|
|
| Army |
|---|
|


| Heer |
|---|
|


| 5 Errata Items | |
|---|---|

|
All Bren carriers should have a movement value of 7. (Shad
on 2010 Dec 15)
|

|
The "Optional Values" for the Firefly given in an Avalanche Press Daily Content piece on the 17-Pdr Anti-Tank gun (and printed on a replacement counter sheet Download) are now the Official Ratings, published in games like Cassino '44, Grossdeutschland 1946, and Indian Unity. These are: 5-5 / 8-8 Full Strength and 3-5 / 8-8 Reduced Strength. (caryn
on 2012 May 03)
|

|
Ignore the direct fire values. (Shad
on 2010 Dec 15)
|

|
The reduced direct fire value of the Heer HMG became 5-5 starting with Fall of France. (plloyd1010
on 2015 Jul 31)
|

|
All SPW 251s have an armor value of 0. (Shad
on 2010 Dec 15)
|
| Hold in Place and try to Stop the Snow-Covered Brits! | ||||||||||||||
|---|---|---|---|---|---|---|---|---|---|---|---|---|---|---|
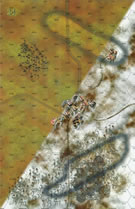
This was a 4-session play-through with the bold & determined, Grognard Gunny, leading attacking elements of the British 6th Airborne Division. I led defending elements of the battered German 2nd Panzer Division, in deep snow terrain and visibility of only 4 hexes (800 meters). Both sides drew decent sets of leaders. We used the FOW, smoke/illum, excess initiative, and extended assault optional rules, along with the following house rule: Standardized Movement for Mechanized Units - All mechanized units may move through clear hexes at a movement cost of only 1 movement point (MP) per hex, instead of 1 1/2. Add one to this cost if moving up, across, or down slopes hexes. The initial session (game turns 1-5) featured a careful, British movement to contact from the west to east in 3 task groups. In the north (left pincer), they rapidly liberated the small village of Wavreille, and then moved south through the snow to attempt to flank the 3 German positions on the eastern 40-meter hilltop on Map 25. In the center, they slowly moved east taking advantage of the light woods and poor visibility to close on another flank of those same positions. In the south (right pincer), both sides exchanged quite a bit of desultory fire in the vicinity of the 7-hex, town of Bure, where an overeager Sherman platoon came to grief in a minefield, and was eliminated by short-range AT fire, Thus, the Germans drew first blood, with a 4-step loss to the surging Tommies, which also lowered their initiative level. Our second session (game turns 6-10) was an extremely grim one for the attacking Tommies with 12 step losses including 2 platoons of tanks as both sides scrambled for advantage in the snowy landscape. Their initial armor-heavy close assault on the east 40-meter hill on Map 25, collapsed for lack of sufficient infantry support and the unpleasant discovery of another German minefield. By the end of the tenth game turn, the Brit’s initiative had fallen to zero, however they still held Wavreille in the north, but were having a devil of a time gaining a foothold on the wooded, 40-meter summit. There was still hope for a limited British victory in this fight with 1 objective secured and another still within reach, although the chances had diminished significantly by the end of the session. The third & fourth sessions (game turns 11-20) featured a substantial exchange of long-range, AT fire and adjacent-hex firefighting. The British conceded during game turn 20, resulting in a minor German victory, as they had liberated Wavreille, but did not have enough time left to finish taking the required town of Bure, and all the remaining 40-meter hilltops. Oddly, there were no German steps lost. The Tommies lost 17 steps in all. There were 14 FOW-shortened game turns of the 20 played. These played havoc with the Tommies attack sequencing! Though this was fun to play, with a determined & skilled opponent, we decided to give this scenario a 3 in SHARED play, and suggest that the more experienced player should take the British side. It is very suitable for SOLO play. |
||||||||||||||
| 0 Comments |
| It's ALWAYS the hills! | ||||||||||||||
|---|---|---|---|---|---|---|---|---|---|---|---|---|---|---|
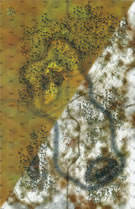
The British Commander, having but 16 turns to accomplish all the objectives, split his forces into three and attempted to punch though the middle and take the hills. While the German Commander gave up the Northern town, he did hold on to the high ground on the West side of the map and the Southern town. The Brits took the Northern town without a fight and put a holding force to pin the Germans in the South while the tried to take the Central Highlands. The Brits ran out of time and troops in the effort.... but it was an exciting and close run thing. (Note - this scenario is a good test of character for the British and if played by two opponents, the British player should be the more experienced.) |
||||||||||||||
| 0 Comments |