

|


| Overall Rating, 3 votes |
|---|
|
3.67
|
| Scenario Rank: --- of 957 |
| Parent Game | Bron Pancerna |
|---|---|
| Historicity | Alt-History |
| Date | 1940-09-02 |
| Start Time | 06:00 |
| Turn Count | 30 |
| Visibility | Day |
| Counters | 182 |
| Net Morale | 0 |
| Net Initiative | 1 |
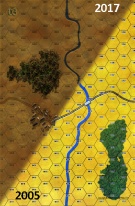
| Maps | 2: 3, 6 |
| Layout Dimensions | 56 x 43 cm 22 x 17 in |
| Play Bounty | 201 |
| AAR Bounty | 160 |
| Total Plays | 2 |
| Total AARs | 2 |
| Battle Types |
|---|
| Bridge Control |
| Inflict Enemy Casualties |
| Rural Assault |
| Conditions |
|---|
| Off-board Artillery |
| Scenario Requirements & Playability | |
|---|---|
| Bron Pancerna | Base Game |
| Deluge | Counters |
| Fall of France 1 | Counters |
| Fire in the Steppe | Maps + Counters |
| Introduction |
|---|
|
Polish defensive doctrine called for immediate counter-attacks against enemy penetrations, something infantry divisions could not accomplish against the panzers in 1939. The mechanized cavalry brigades were to provide that capability, but only one had been established before the September Campaign and it had very few tanks. There would have been more of them, with more tanks, a year later. |
| Conclusion |
|---|
|
In 1939, Polish military intelligence gave the front-line divisions a good idea of where the Germans would attack and with what sort of force. Only in some instances could the Poles make use of that information. With a strong armored force to conduct counter-attacks, the defenders of Poland could have made much more use of that information. |
| Additional Notes |
|---|
|
Full strength Polish INF units have a direct fire value of 6-3. Piechoty (infantry) counters have been created for those players who are willing to make their own counters to reflect this counter variant. Counters from White Eagles and Eastern Front Deluxe may be used in place of those from The Deluge and Fire in the Steppe. |

|

|
|---|
| AFV Rules Pertaining to this Scenario's Order of Battle |
|---|
|
| Heer |
|---|
|


| Wojska Lądowe |
|---|
|


| 3 Errata Items | |
|---|---|

|
The reduced direct fire value of the Heer HMG became 5-5 starting with Fall of France. (plloyd1010
on 2015 Jul 31)
|

|
The morale and combat modifiers of German Sergeant #1614 should be "0", not "8". (Shad
on 2010 Dec 15)
|

|
The StuG IIb appearing in the original Panzer Grenadier game had an Anti tank value of 4-7. As of Eastern Front Deluxe (2005), continuing onward through the 3rd and 4th edition games, the anti-tank value has been 4-4. (plloyd1010
on 2022 Jul 21)
|
| Take the Bridge, Cross the River & Push Back the Poles | ||||||||||||||
|---|---|---|---|---|---|---|---|---|---|---|---|---|---|---|
This was an entertaining, 8-session play-through with the unpredictable & wily, NBGB, leading defending elements of the Polish 14th Infantry division and an the attached Wielkopolska Cavalry Brigade. I led attacking elements of the Wehrmacht’s 20th Motorized Division without benefit of any kind of recon or scouting elements. Both sides drew middling leader sets, with the Germans having marginally better quality. This was maneuver-and-combined-arms extravaganza focused on an opposed river crossing, and the need to have at least 18 good order Jerry units east of the river by the end of 30 game turns. All the initial Polish units began in hidden mode, making the German side’s task much harder to play. We used the FOW (starting on game turn 5), consolidation, smoke/illum, hidden units (Polish), excess initiative, recon by fire, strategic movement and extended assault optional rules. Also utilized were these 3 house rules: 1) Road Movement for Mechanized & Foot Units – All FOOT & MECHANIZED units may move on roads at the rate of 1/2 a Movement Point (MP) per road hex, just like MOTORIZED units, and 2) Standardized Movement for Mechanized Units - All mechanized units may move through clear hexes at a movement cost of only 1 movement point (MP) per hex, instead of 1 1/2. Add one to this cost if moving up, across, or down slopes hexes, and 3) Enhanced Anti-Tank (AT) Gunnery & Hidden Emplacement – Unless prohibited by special scenario rules, ALL dug-in, entrenched, or town- occupying, towed AT gun units and Self-Propelled AT guns may fire in opportunity fire (OPFIRE) TWICE just like tanks in the standard rule set. For example: dug-in, German PaK 36 (37mm); PaK 38 (50mm); or British 6-pdr towed AT gun platoons are therefore able to fire TWO AT shots per unit in OPFIRE situations. In addition, towed, or self-propelled, AT guns always begin scenarios in HIDDEN mode if allowed to dig-in per scenario special rules, or are entrenched, and/or town-occupying (please see Optional Rules for Hidden Units; Plotting Position; Revealing; and No Hidden Units Specified on Page 37). The high mobility, first session (game turns 1-2) featured an somewhat jumbled, Wehrmacht movement-to-contact from the west edge of the battle map leading to the rapid occupation of the 5-hex town on Map 3. The Boche secured a number of observation posts as the sun rose and began encountering effective Polish opfire by the end of the first game turn. The bulk of the first wave of attackers was initially located south of the town, heading east as fast as possible. Our second session (game turns 3-5) featured the loss of 7 Germans steps, and 3 steps for Polish side, as the contending forces drew closer together and more Wehrmacht platoons crossed the minor river. The Polish armored force did not arrive on time, and the German infantry wave was now concentrated in the vicinity of the bridge, and on south, where they bypassed the southern-most Polish entrenchment on the river and drove into the forest as fast as possible. The Boche suffered repeated morale failures in both forests, but especially on the west side of the river, where their firepower was effectively halved thanks primarily to accurate Polish opfire and OBA strikes. The ferocity of this battle seems to grow with each turn. The somewhat frustrating, third session (game turns 6-9) featured both sides attempting a great many morale recoveries rolls thanks to heavy fighting along the river, centered on the middle 2 embattled entrenchment hexes, and in the south woods on Map 03. Polish armor began entering the battle map during the eighth game turn, and the last of the Wehrmacht infantry reserves entered the following turn. Step losses now totaled: 10 for the continually advancing German side, and 8 for the defending Poles, resulting in a decline in Polish initiative level. A combined NINE combat 7-die rolls were thrown in this session. Our intense, fourth session (game turns 10-11) featured a large-scale exchange of adjacent-hex firefights and bombardments along the river and in the south wood. The Wehrmacht lost an additional step and a leader who was scouting east of the river. The Poles lost 6 more steps in the fierce fighting. The Polish cavalry brigade elements moved further west and divided its strength into challenging locations across the river in the north, and also into fire support positions near their comrades still holding in both of the two contested entrenchment hexes, one of which contains the crucial bridge. A combined SIX combat 7-die rolls were thrown in this session. The fifth session (game turns 12-14) featured a good deal of Polish armored maneuver on the west side of the river where they briefly menaced the German mortar units in the town & capturing a pair of hapless transport units, before drawing off to the south. After many turns of close assault resistance, the brave Poles defending in the bridge hex collapsed into demoralization and lost their garrison commander during game turn 14. Step losses this session totaled: 8 for the Polish defenders, and 2 for the Jerries. The Wehrmacht wave was close to finally clearing the south wood. A combined EIGHT combat 7-die rolls were thrown this session. Our action-packed, sixth session (game turns 15-18) saw step losses for both sides quickly accumulate as the Germans moved to secure the crucial bridge hex after a lengthy series of close assaults. There were repeated adjacent-hex fire fights, long-distance AT shots, as well as some unexpectedly successful artillery strikes this session. Step losses were another: 5 for the Wehrmacht and 11 for the Polish defenders, who lost also lost a level of initiative. The updated victory point tally was: 32 for the Boche and 17 for the slowly-dwindling, Poles. Once again, a combined EIGHT combat 7-die rolls were thrown. The hard-fought, seventh session (game turns 19-20) featured more close assaults and adjacent-hex firefights on the east side of the river as heretofore uncommitted Polish reserves entered the fight on the northern half of the battle map. Only 2 entrenchment have been taken by the Germans, so far. In testament to the close-range ferocity of this battle: two more Polish leaders were captured this session, bringing the total to 6, compared to just 1 for the scrambling Germans. Step losses today were: 8 for the Poles and 4 more for the Wehrmacht, resulting in around 42 victory points for the Boche and 21 for the Polish defenders. A combined FIVE combat 7-die rolls were thrown, but there are now 8 FOW-shortened turns of the 20 played. The eighth session (game turns 21-22) was spectacular for the German attackers, who managed to inflict another 11 step losses and only took one in return in a series of adjacent-hex firefights, some lucky AT shots, and a trio of bloody close assaults. The Poles conceded a major German victory at the end of the 22nd game turn by mutual agreement that there was no possibility of a Polish victory with the Axis side in possession of the bridge and its troops well-established across the contested river. This was a fast-paced & fun-to-play scenario with a skilled & adept opponent handling a mixed-force of the 1940 Polish Army, well-placed in a flexible defense, anchored by 4 primary entrenchments along a minor river. As published, IMHO, the more experienced player should lead the attacking Germans. I give it an enthusiastic rating of 4. As is often the case, this hypothetical scenario lacks recon and scouting units for the attacking side. Also, the Poles lack an engineer unit that might be able to destroy the critical bridge and thereby prevent the unhampered crossing of the too numerous (48!) German motor transport units. In addition, neither side has combat aviation support as they might have had in 1940. These deficiencies could easily be corrected with a quick rewrite, that would then merit a rating of 5. I recommend this interesting scenario one for both SHARED and SOLO play. |
||||||||||||||
| 0 Comments |
| Counter Attack |
|---|
|
Scenario #2 has an infantry regiment of the German 20th Motorized Division, supported by a company of assault guns, attacking across a minor river against a smaller Polish Infantry force dug-in on the east side and covering the single bridge, there is a rumor that Polish reinforcements from the Wielkopolska Cavalry Brigade are heading to the area, will see if they can arrive in time. The German infantry, led by the assault guns, attacked south of the village with the goal of getting across the river and into the woods out flanking the Polish defenders covering the bridge. A Polish ATG opened fire on the lead StuG platoon but missed, the Germans quickly brought down concentrated OBA fire and with a lucky hit (snake eyes) eliminated the ATG, thus removing the AT threat on this section of the Polish defense. Under intense Polish OBA and mortar fire the German infantry crossed the river, eliminated the dug-in defenders and began advancing on the woods in order to clear them of Polish infantry. It was at this time that the Polish armor reinforcements arrived, two reinforced companies, one of S35’s the other 9TP’s, they immediately started moving southeast to attack the German infantry in the open disrupted & demoralized by the Polish artillery when they come under fire from the German regimental AT company that had deployed in the village and in the woods just north of the village. The combination of the PaK 36’s on the flank and StuG’s to their front caused the Polish armor to retreat to a more favorable position, minus several steps. The Polish artillery assets shifted their fire from the German infantry to the ATG’s to try and silence the guns. The shift in fire allowed the German infantry that was disrupted to recover and advance once again to help the platoons clearing the woods of Polish infantry. Have to say the StuG’s with their short 75L24 guns (4-4) & armor of 4 held their own against the new Polish tank forces and only lost 1 step during the engagement. The combination of German leaders, artillery assets & the StuG’s tipped the battle to the Germans in this scenario, who achieved two out of the three victory conditions for a minor win. |
| 0 Comments |