
|
Roman Wall New Zealand Division #4 |
||
|---|---|---|
| (Defender) Italy | vs | New Zealand (Attacker) |
| Formations Involved | ||
|---|---|---|
| New Zealand |  |
2nd New Zealand Division |

|


| Overall Rating, 1 vote |
|---|
|
4
|
| Scenario Rank: --- of 964 |
| Parent Game | New Zealand Division |
|---|---|
| Historicity | Historical |
| Date | 1943-03-21 |
| Start Time | 22:00 |
| Turn Count | 24 |
| Visibility | Night |
| Counters | 94 |
| Net Morale | 0 |
| Net Initiative | 1 |
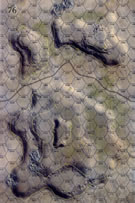
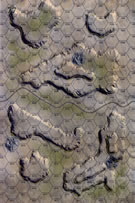
| Maps | 2: 76, 77 |
| Layout Dimensions | 56 x 43 cm 22 x 17 in |
| Play Bounty | 180 |
| AAR Bounty | 223 |
| Total Plays | 1 |
| Total AARs | 0 |
| Battle Types |
|---|
| Hill Control |
| Inflict Enemy Casualties |
| Road Control |
| Conditions |
|---|
| Off-board Artillery |
| Scenario Requirements & Playability | |
|---|---|
| An Army at Dawn | Maps + Counters |
| New Zealand Division | Base Game |
| Introduction |
|---|
|
The British Operation Supercharge II reverted to Eight Army commander Bernard Montgomery’s favored practice of careful preparation with intense artillery support. While British divisions pinned the German defenders of the Mareth Line, the New Zealanders with added British tanks and French infantry would make a “left hook” around the defenses, through the Tebaga Gap. |
| Conclusion |
|---|
|
New Zealand intelligence knew the Tebaga Gap to be defended by Italians; they didn’t know they were the tough, long-service Sahariane, the camel-riding Italian answer to the Long Range Desert Group, dug in behind a Roman fortification. The Sahariane had lost most of their Libyan camelry during the retreat, but picked up other die-hard Italian soldiers from just about every unit present in North Africa. Gen. Alberto Mannerini had welded them into a cohesive, hard-fighting unit that now dealt the Kiwis an unexpected bloody setback. The New Zealand Official History would proclaim the action “a clear-cut victory,” but this was false bravado: the Kiwis did not break the Italian lines and suffered heavy casualties in the effort. |

|
|
|---|
| Regio Esercito |
|---|
|


| New Zealand Army |
|---|
|


