
|
Over the Hills and Far Away Scenario 2: Templeton's Crossing, Day One Kokoda Campaign #18 |
||
|---|---|---|
| (Attacker) Australia | vs | Japan (Defender) |
| Formations Involved | ||
|---|---|---|
| Australia |  |
25th Infantry Brigade |
| Japan |  |
144th Infantry Regiment |

|


| Overall Rating, 6 votes |
|---|
|
3.5
|
| Scenario Rank: 440 of 964 |
| Parent Game | Kokoda Campaign |
|---|---|
| Historicity | Historical |
| Date | 1942-10-11 |
| Start Time | 08:00 |
| Turn Count | 20 |
| Visibility | Day |
| Counters | 68 |
| Net Morale | 0 |
| Net Initiative | 0 |
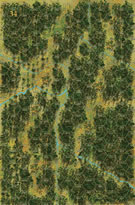
| Maps | 1: 34 |
| Layout Dimensions | 43 x 28 cm 17 x 11 in |
| Play Bounty | 147 |
| AAR Bounty | 161 |
| Total Plays | 5 |
| Total AARs | 2 |
| Battle Types |
|---|
| Inflict Enemy Casualties |
| Urban Assault |
| Conditions |
|---|
| Reinforcements |
| Terrain Mods |
| Scenario Requirements & Playability | |
|---|---|
| Kokoda Campaign | Base Game |
| Introduction |
|---|
|
Three days after encountering the first Japanese outposts, the 25th Brigade had massed for an attack in force. Brigadier Eather ordered the 2/33rd Battalion to attack up the main track from Myola toward Templeton's Crossing while the 2/25th Battalion would also attack up a side track from Kagi to Templeton's Crossing. They would face I Battalion of the 144th Regiment which had begun receiving reinforcements from II Battalion. |
| Conclusion |
|---|
|
Under pressure from Blamey to show results, Tubby Allen pressed his subordinates to attack with all possible speed and force. Despite these orders, the Australian attack quickly turned into more of a large patrolling action and failed to make any progress at all against a Japanese force that was numerically larger. Still suffering from a lack of supplies, the Australians had resorted to recruiting native Papuan carriers at gunpoint, and the unwilling conscripts tossed their loads into the bush (including, at times, Australian wounded) and bolted for freedom at the first opportunity. Nevertheless, the battle would continue the next day. |

|
|
|---|
| Army |
|---|
|


| Imperial Japanese Army |
|---|
|


| 1 Errata Item | |
|---|---|
| Scen 18 |
The second Victory Condition for the Australians should Read: Minor Victory for Control of one village. (Juiceman
on 2021 Sep 30)
|
| Templeton's Crossing, Day One |
|---|
|
Same map and similar set up as the previous scenario, with the adding of hidden units for the Japanese. Control of the villages is key to winning for both sides with fighting concentrated along the southern trails 2 closest villages to the south edge of the map. The Aussies were able to gain control of one village to win a minor victory |
| 0 Comments |
| Take More than One Village - If You Can! | ||||||||||||||
|---|---|---|---|---|---|---|---|---|---|---|---|---|---|---|
A 20-turn pitched battle with the aggressive T-Rex - him without tanks or nasty AFVs - as the Japanese side in the jungles of New Guinea. I crewed the Australian side. Both sides drew decent leaders in this 4-session play-through. We did not use the FOW until turn 10, but did use the excess initiative, hidden units and consolidation optional rules. This scenario started out great for the Aussies with 3 village liberated, or contested, by my Diggers . . . then turn 12 happened and it was all downhill from there. In that turn, the senior Australian leader was captured in a close assault, and 2 other Allied leaders were killed, causing chaos and causing the up-'till-then fruitful Digger attack to come apart at the seams. Fierce and methodical Japanese counter attacks followed in the south half of the map, with Lady Luck favoring Axis die rolling in combat, morale recovery and initiative. It was ugly. By the end, the overstretched, Japanese were in control of every single hamlet on the battle map. I give this not very good, probably untested, scenario a rating of 2, only because of the fun we had playing it. It is probably better played in shared mode, and does not really lend itself to solitaire play (hidden units). |
||||||||||||||
| 0 Comments |