Errors? Omissions? Report them!
|
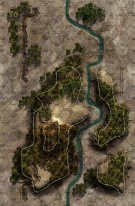
Duga Ridge Black Mountain #9 |
||
|---|---|---|
| (Attacker) Montenegro | vs | Austro-Hungarian Empire (Attacker) |
| Formations Involved | ||
|---|---|---|
| Austro-Hungarian Empire |  |
3rd Mountain Brigade |
| Montenegro |  |
Niksic Division |

|
| Overall Rating, 1 vote |
|---|
|
4
|
| Scenario Rank: --- of 964 |
| Parent Game | Black Mountain |
|---|---|
| Historicity | Historical |
| Date | 1914-08-17 |
| Start Time | 10:00 |
| Turn Count | 24 |
| Visibility | Day |
| Counters | 50 |
| Net Morale | 0 |
| Net Initiative | 1 |
| Maps | 1: 96 |
| Layout Dimensions | 43 x 28 cm 17 x 11 in |
| Play Bounty | 163 |
| AAR Bounty | 223 |
| Total Plays | 1 |
| Total AARs | 0 |
| Battle Types |
|---|
| Hill Control |
| Inflict Enemy Casualties |
| Meeting Engagement |
| Urban Assault |
| Conditions |
|---|
| Terrain Mods |
| Scenario Requirements & Playability | |
|---|---|
| Black Mountain | Base Game |
| Introduction |
|---|
|
As soon as XVI Corps ordered GM Pongracz and his 3rd Mountain Brigade to relieve the fortress garrison at Bileca, being assailed by thousands of Montenegrins, he started his brigade to the north-west to march to the garrison’s assistance. Even as the Austrians began to move, scouts reported a Montenegrin advance from over the border. Pongracz turned his brigade back to meet them. |
| Conclusion |
|---|
|
The Montenegrins managed to briefly occupy the ridge before the Austrians threw them back off of it. Pongracz then ordered an attack on the retreating Montenegrins, who turned and fought for hours before eventually giving way. The lack of formal organization hindered the Montenegrins in many ways, but their thirst for close combat remained absolutely intact. |
Display Order of Battle
Errors? Omissions? Report them!

 BkMn008


