
|
The Bridge at Borisov Eastern Front #22 |
||
|---|---|---|
| (Attacker) Germany | vs | Soviet Union (Defender) |
| Formations Involved | ||
|---|---|---|
| Germany |  |
52nd Motorized Infantry Regiment |
| Soviet Union |  |
50th Rifle Division |

| Total | |
|---|---|
| Side 1 | 2 |
| Draw | 4 |
| Side 2 | 3 |


| Overall Rating, 10 votes |
|---|
|
3.2
|
| Scenario Rank: 600 of 913 |
| Parent Game | Eastern Front |
|---|---|
| Historicity | Historical |
| Date | 1941-07-01 |
| Start Time | 12:00 |
| Turn Count | 28 |
| Visibility | Day |
| Counters | 147 |
| Net Morale | 0 |
| Net Initiative | 2 |
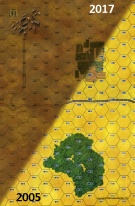
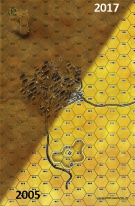
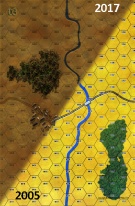
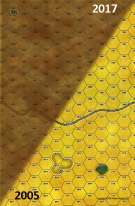
| Maps | 4: 1, 2, 3, 8 |
| Layout Dimensions | 112 x 43 cm 44 x 17 in |
| Play Bounty | 110 |
| AAR Bounty | 147 |
| Total Plays | 9 |
| Total AARs | 5 |
| Battle Types |
|---|
| Bridge Control |
| River Crossing |
| Urban Assault |
| Conditions |
|---|
| Off-board Artillery |
| Randomly-drawn Aircraft |
| Reinforcements |
| Scenario Requirements & Playability | |
|---|---|
| Eastern Front | Base Game |
| Introduction |
|---|
|
A flying column of 18th Panzer Division, composed of elements of 18th Panzer and 52nd Motorized Infantry Regiments, drove for the bridge over the Berezina River near the town of Borisov. General A.I.Eremenko, commander of the Western Front, ordered the bridge held at all costs. |
| Conclusion |
|---|
|
The flying column closed on the bridge, but stout Soviet defense held the span. By mid-afternoon additional Germans arrived and captured the bridge thanks to overwhelming numbers. the Soviets promptly counterattacked, driving the Germans back but failing to recapture the bridge. |

|
|
|---|
| AFV Rules Pertaining to this Scenario's Order of Battle |
|---|
|
| Heer |
|---|
|


| Army (RKKA) |
|---|
|


| 8 Errata Items | |
|---|---|
| Scen 22 |
This scenario uses the old 1d6 system for river crossings (the 3rd Edition rules use 2d6). You can tell because the number for AFVs is "1". You can't roll a 1 or less on 2d6. Whenever the river crossing numbers are 6/2/1 or 5/2/1, you are rolling just one d6 (and trying to roll equal to or less than those numbers, by type, Foot/Motorized/AFV). (Shad
on 2010 Apr 29)
|

|
Two 105mms (ID#s 1204, 1205) have "16-31" fire values in black (direct fire), when they should be in white (indirect fire). (Shad
on 2010 Dec 15)
|

|
The reduced direct fire value of the Heer HMG became 5-5 starting with Fall of France. (plloyd1010
on 2015 Jul 31)
|

|
The Pz IVe appearing in the original Panzer Grenadier game had an Anti tank value of 4-7. As of Afrika Korps (2002), continuing onward through the 3rd and 4th edition games, the anti tank value has been 4-4. (plloyd1010
on 2016 Jul 25)
|

|
The morale and combat modifiers of German Sergeant #1614 should be "0", not "8". (Shad
on 2010 Dec 15)
|

|
All SPW 251s have an armor value of 0. (Shad
on 2010 Dec 15)
|

|
The reduced direct fire value in Kursk: Burning Tigers is 4-4. (plloyd1010
on 2015 Jul 31)
|

|
Kommissars never get morale or combat modifiers. Ignore misprints. (Shad
on 2010 Dec 15)
|
| High Risk/High Return |
|---|
|
IF you are cautious as the German you will get a draw. IF you aren't you COULD get a win. The Germans will have to bypass some of the Soviet positions on the way to the bridge if they stand a chance to get across and get into the town. On a greater strategic basis the risk is worth it. Even if the Germans get trapped in Borisov the Soviets will have to retreat to the east or be bottled up. As a result, the victory conditions correctly reflect the strategic reality. As a player in the game though, the idea of leaving intact enemies to my rear is scary. Nice balance between the strategic reality and the tactical situation. Add to that the fact that this is a blast to play and has real replay value as well. It gets a five. |
| 0 Comments |
| Deus ex Feline | ||||||||||||
|---|---|---|---|---|---|---|---|---|---|---|---|---|
Unable to complete this battle due to the overnight intervention of the Paw of God, but the results were trending in favor of the Soviets. German armor took a beating from well-sited ATGs and the dug-in Soviet infantry in depth made it difficult for the Germans to concentrate mass against the town and bridge. Would like to try again sometime to rethink the German attack, which I think lacked imagination. |
||||||||||||
| 0 Comments |
| Blow the bridge, kill the engineer -game over! | ||||||||||||||
|---|---|---|---|---|---|---|---|---|---|---|---|---|---|---|
I think the title to this AAR sums it all up. As the Germans I had the task to cross a river, one way or the other and then take a very large town on the far eastern map. I had plenty of panzers along with a good amount of mortar platoons, one 105mm and maybe just enough foot units to get the job done. I also got to draw one aircraft on any turn for a one-time only use. Facing me were a lot of Soviet INF and HMG units, probably outnumbering mine well over two-to-one and that is not counting the Soviet reinforcements that were soon to arrive. There were also a few platoons of T-26s and some armored cars to deal with. Well, if this was just a slap-down battle then that wouldn't be too hard to contend with. The Soviets also had decent morale rated at 8/6 for a change. In this match Wayne and I played with the hidden AT gun house rule which was a first for me. That prompted me to advance with a lot of caution with my armored units and once the first 45mm was revealed I began to focus on eliminating it and the 76.2mm that it had paired up with but not before I got caught in some deadly crossfire action. Very quickly I had lost one step of SdKfz222 armored cars along with a PzII and a PzIVE -so much for using caution!. I was utterly humiliated and my initiative level dropped very fast after that. All the while I had paid no mind to the Soviet engineer that was setting up the bridge for demolition. That was the key mistake. Everything I had in terms of available indirect fire and air support should have immediately been concentrated on at least disrupting that engineer. So three turns pass as the required time to set the charges and then, with a 50% chance of succeeding, the bridge was blown on the first try. Soon my reinforcements arrived but I had trouble managing, organizing and combining them with the originally deployed units. Time started passing very quickly and soon I found myself stuck. I had my sole ENG unit loaded with some SPW251s by the river waiting for the right moment to expose them to Soviet OBA and other fire types and then MAYBE attempt a crossing. All the while more Soviet troops are massing on the other side of the river. Overwhelmed with my predictament of trying to keep the enemy hammered down and trying to knock out more of his AT guns and artillery I overlooked that the two platoons of T-26s had moved with AT fire range of my APCs. It was now turn 11, Soviet forces were due to arrive next turn to make matters worse and the enemy ENG was already waiting for them on the river bank to help get them across to my units - the horror!. Along with that another ENG would be arriving to either make another river crossing or to replace the existing one. The funny part of all this was that Wayne and I had stopped after 10 turns of play in our first session and he knew his tanks had my carriers ranged, I didn't. So we set up for turn 11 and he made aware that he had two shots at eliminating my APC with ENG unit needed to cross the river. So that was it, one activation, the SPW251 carrying the ENG eliminated by the T-26s -game over. I could not get a draw unless I had at least one unit across. All in all not a terrible scenario and things may have turned out differently if the Soviet ENG had failed to blow the bridge on the first try or was somehow eliminated but I didn't have such luck. It was hard rating this one and if it were a solo play I most likely would of rated it higher, at least a "3". I also believe that I have a lot to learn about managing coordinating a large amount of units of varying types on the offensive. In a way I was kind of relieved that this ended less than halfway through the scenario length of 28 turns. I think I would of been quite frustrated if another 10 or more turns passed before the inevitable happened. It was very simple -kill the Soviet engineer maybe get a draw; kill the German engineer win the battle. So, with over 3 hours left of valuable playing time left Wayne and I set-up for another match from EF, #10-"The Duel" which was finished very quickly with the remainder of our session. |
||||||||||||||
| 0 Comments |
| A bridge way too far | ||||||||||||||
|---|---|---|---|---|---|---|---|---|---|---|---|---|---|---|
This scenario played using Skype against young Brett has a German "flying column" of INF, Panzers and various ordinance pieces trying to cross the Berezina river either by forcing the all ready wired for demolition bridge (very unlikely) or throwing their own bridge across the river. The Red Army however can contest this crossing and outnumber the Germans in men if not in armour. The Germans advance onto the board, the Red Army engineers on the bridge take 30 mins to set the fuses and blow the bridge on turn 4. Even if this attempt had failed (on a die roll 1-3) they would sill have a chance of a second go before the Germans would be upon them. This presumes the Soviet player has blocked the German advance around the town on board 8. This means to stop the Soviet play from winning the German's have to build a bridge and get at least one unit across. This then makes the single German ENG the only unit which the Russian's have to worry about. Brett being the German commander quickly realized this and put his ENG into a APC to protect him against artillery fire. However as he advanced toward the river he cam into extreme range of my T26 tanks. They fired and blew up the APC's carrying the ENG. Game Over. This scenario is very hard for the German player to win even should he get units across the river to take all the town hexes on board 2 seems to me a tough ask. For balance I would add two more ENG to the German reinforcements. As it stands its a flawed scenario. |
||||||||||||||
| 1 Comment |
I really got a laugh considering that I had spent a good hour or so setting this one up the night before. I didn't notice that my APCs carrying the ENG had blundered a hex too far and too close to your T-26s at the conclusion of our last session, only to have the next morning's session end immediately after you rolling for and getting the initiative and then on the first activation and next die roll ending the game in seconds! I think that was one of my worst hidings yet, right up there with the thrashing Vince gave me in the following scenario, #23- "Depot Defense" when I played the Soviets, losing the game right after Vince opened fire up me for the first time i think on the 4th or 5th game turn! Well played sir!
| problematic but promising | ||||||||||||
|---|---|---|---|---|---|---|---|---|---|---|---|---|
I played through about ten turns of this scenario. I agree with others who highlight its main problem: the Germans are far too dependent on the bridge not being destroyed. I don't think they have a realistic chance to cross the major river with enough units to take the large town when the Reds can target the lone engineer unit with mortars, OBA, and whatever other units are near it and there's a 50% chance the bridge is blown up by the Soviets. That's what happened on turn 10 of my play. I didn't think it was worth it to play on. I think one typically needs to be very methodical and patient playing PG. I don't think there's much chance the Germans get enough units across the river to completely capture the town without the bridge. That being said, I think the scenario has promise. It does have an interesting mix of opposing forces. If I play it again I think I'd house rule removing the Red Army engineers, thus keeping the bridge intact. |
||||||||||||
| 0 Comments |