
|
Turning the Tables Winter Soldiers #10 |
||
|---|---|---|
| (Defender) Germany | vs | United States (Attacker) |
| Formations Involved | ||
|---|---|---|
| Germany |  |
1st SS "Leibstandarte Adolf Hitler" Division |
| Germany |  |
Kampfgruppe Hansen |
| United States |  |
3rd "Spearhead" Armored Division |

| Total | |
|---|---|
| Side 1 | 2 |
| Draw | 0 |
| Side 2 | 1 |


| Overall Rating, 3 votes |
|---|
|
4.33
|
| Scenario Rank: --- of 913 |
| Parent Game | Winter Soldiers |
|---|---|
| Historicity | Historical |
| Date | 1944-12-23 |
| Start Time | 10:30 |
| Turn Count | 20 |
| Visibility | Day |
| Counters | 58 |
| Net Morale | 0 |
| Net Initiative | 2 |
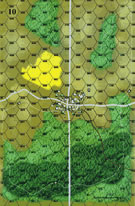
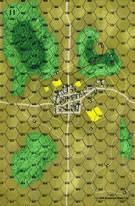
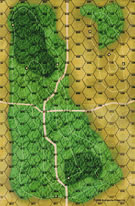
| Maps | 3: 10, 11, 9 |
| Layout Dimensions | 84 x 43 cm 33 x 17 in |
| Play Bounty | 155 |
| AAR Bounty | 165 |
| Total Plays | 3 |
| Total AARs | 2 |
| Battle Types |
|---|
| Inflict Enemy Casualties |
| Road Control |
| Urban Assault |
| Conditions |
|---|
| Off-board Artillery |
| Scenario Requirements & Playability | |
|---|---|
| Battle of the Bulge | Maps |
| Elsenborn Ridge | Maps + Counters |
| Winter Soldiers | Base Game |
| Introduction |
|---|
|
Kampfgruppe Hansen had shrunk to a shadow of its former self in the past two days trying to reach the trapped Kampfgruppe Peiper. The armor still languished south of the Ambleve River, and the few anti-tank guns supporting the infantry across the river had dwindled from battle losses. The primary focus of the command staff shifted away from rescuing Peiper to how to defend themselves against the expected counterattack |
| Conclusion |
|---|
|
The Americans planned their attack well, hitting the depleted battle group from two different directions as the men in gray were starting to advance. The Germans sorely missed their panzers as the American tanks battered their positions, wounding yet another battalion commander at Petit Coo, and grinding the 12th Company to nothing. On their way to Biester the Americans mauled the opposing 11th Company as well, killing their company commander in the fighting. It took six miles of fighting retreat pell-mell through the woods before the Germans found their grit before the Petit Spa Bridge, and stopped the American advance. |
| Additional Notes |
|---|
|
SS transport counters are available as a free download from Avalanche Press. If not using these or other SS transport from other games, players should use regular German army transport as substitutes. |

|
|
|---|
| AFV Rules Pertaining to this Scenario's Order of Battle |
|---|
|
| Schutzstaffel |
|---|
|


")
")
")
")


| Army |
|---|
|


| Throw caution to the wind | ||||||||||||
|---|---|---|---|---|---|---|---|---|---|---|---|---|
In this scenario we find out if the German player can read. If they can they will see that the group that arrives from the north comes without transport. In such a situation one has to question a choice to defend the northern town. Certainly such a defense can delay the movement of this group and its Stuarts to support the Shermans and the mechanized infantry that arrive from the west but at the same time, it seems likely that the force will be destroyed to no real purpose and will deprive the southern town of the weight of troops necessary to hold out to the end of the scenario. I was a wimp and clustered my hidden Germans around the crossroads in the light woods on the middle board. I was counting on getting a couple steps worth of armor as they ran into the 75/41 which was hidden there. Unfortunately the American player can also generally read and leads with infantry to scout out both the northern town and the crossroads (the Germans set up only in the towns or in hexes on or adjacent to the north south road. So the infantry arrives from the west mounted and dismounts then runs towards the crossroads "finding" the Germans there. Yes they lost some steps but the attempt to get to 10 steps destroyed doesn't really get there (they end up with 9 including two steps of Stuarts which were eventually knocked out in the fight for the southern town). The western force destroys the crossroads German defenders and, joined by the northern force, advances on the southern town. Had I put any force into the northern town it would have substantially held up the northern force and given the Americans fits. So throw caution to the wind and drop a GREN platoon there and force the American force to root you out. Heck it doesn't even have to be hidden. Assaults on the southern town using the engineers, tanks and leaders ultimately crush the Germans with one turn remaining in the scenario. If they had not done so, the Germans would have won the scenario. That one ENG unit is gold in this one as it provides the necessary "oomph" to move the Germans out of town. Get it demoralizaed (as I did) and you can see the entire scenario drifting away from you. This one was a nail biter and would be even better ftf with the hidden units. While I try to replicate the tactics that I use ftf against hidden units when I play solo I can never be completely unaware of where my troops are. I give this one a "4" with a possible higher score played ftf. |
||||||||||||
| 0 Comments |
| Not so fast Tomato | ||||||||||||
|---|---|---|---|---|---|---|---|---|---|---|---|---|
German Set-Up: 2xGren + 2xSPW in Petit Coo (hidden); 2xGren on Board 9 cross-roads; rest in Biester on Board 11 (with 20mm in the thorp in 1004-11). The mortars were placed in woods or hill hexes to the east of the main N/S road. US attack axes: the VC's are such that it is necessary to control all town hexes (save for 1004-11) in order to control the road and all adjacent hexes, whereas one can control all town hexes without controlling the road. Thus, the US decides to avoid the Baord 9 cross-roads sending one company to encircle Biester from the north and west whereas another moves to attack from the north and east. Meanwhile, the reinforced company moves down from the north map edge whilst the Stuarts move south along the western board edge, then follow the road into the western side of Petit Coo to reconnoiter. This latter turned out to be an error. Before dinner, I was firmly intending for the SS units in Petit Coo simply to bunker down in the northern most town hex and try to hold out as long as they could, using OF to wear down the US infantry. But returning afterwards and seeing those Stuarts in the middle of town with the crews smoking cigars! The SS assaults! Rolls a '6' on the 18-column even with the town defensive shift, rolls '5' and '6' for their INF-borne AT weapons ... and suddenly there are fewer Stuart steps and a lot of black DEM markers. The only luck the US had here was that that AT rolls were low enough that only single-step kills were attained. But the Hughes Curse on the House of Stuart strikes again. On the south end of the board, the hidden 75/41 kills an M3 bearing an INF and the next turn a step of M4/76 before US OBA and some DF send the weapon and crew to Valhalla. Mid-Game is a series of US assaults followed by recoveries as the Germans try to hold on. Petit Coo finally falls, but the US can send very little in the way of survivors south. Meanwhile, the 2xGren in the Board 9 cross-roads moves south to harass and damage DEM US units fleeing DF or assaults. Die rolling here went back-and-forth with each side getting in a "better" roll as units were worn down. The key roll, however, was a German HMG+Gren pair getting in a '12' roll on the 22-col vs. a 3-unit US stack (in town); not only did this kill two steps, but DEM the armor support intended to carry out an assault next turn. With the 2xGren reinforcing elements and a strong unassaulted German town hex; and US units with a host of black and blue covered units, the game ended with a major German victory. |
||||||||||||
| 0 Comments |