
|
Fuel Stop: Bullingen Winter Soldiers #1 |
||
|---|---|---|
| (Attacker) Germany | vs | United States (Defender) |
| Formations Involved | ||
|---|---|---|
| Germany |  |
1st SS "Leibstandarte Adolf Hitler" Division |
| Germany |  |
Kampfgruppe Peiper |
| United States |  |
1121st Engineer Group |
| United States |  |
254th Engineer Battalion |

| Total | |
|---|---|
| Side 1 | 14 |
| Draw | 0 |
| Side 2 | 1 |


| Overall Rating, 16 votes |
|---|
|
3.13
|
| Scenario Rank: 668 of 913 |
| Parent Game | Winter Soldiers |
|---|---|
| Historicity | Historical |
| Date | 1944-12-17 |
| Start Time | 07:00 |
| Turn Count | 15 |
| Visibility | Day |
| Counters | 61 |
| Net Morale | 0 |
| Net Initiative | 1 |
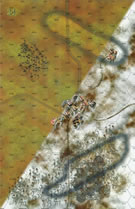
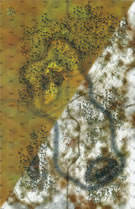
| Maps | 2: 24, 25 |
| Layout Dimensions | 56 x 43 cm 22 x 17 in |
| Play Bounty | 140 |
| AAR Bounty | 135 |
| Total Plays | 15 |
| Total AARs | 7 |
| Battle Types |
|---|
| Inflict Enemy Casualties |
| Urban Assault |
| Scenario Requirements & Playability | |
|---|---|
| Battle of the Bulge | Counters |
| Elsenborn Ridge | Maps + Counters |
| Winter Soldiers | Base Game |
| Introduction |
|---|
|
The planners at Oberkommando der Wehrmacht envisioned great things for Kampfgruppe Peiper when they transmitted the code word, Wacht Am Rhein, to launch the Battle of the Bulge. SS Obersturmbannführer Joachim Peiper's reinforced mechanized brigade intended to race through a gap created by the infantry and cross the Meuse River near Liege allowing the insertions of fresh mobile formations to capture the key Allied port of Antwerp and split the Allied lines in half. The plan relied on shaky logistics with little chance of friendly fuel supplies reaching the spearhead before the Meuse. Therefore when intelligence determined that an American fuel dump was located in Bullingen its capture became a top priority for Peiper. |
| Conclusion |
|---|
|
After Kampfgruppe Peiper reached Honsfeld they swung north, encountering an independent engineer battalion deploying to stop them. Without the promised armor support the engineers were forced to engage the attacking armor with bazookas. The small successes they enjoyed were more than offset by the heavy casualties suffered. After refueling, Kampfgruppe Peiper rolled on. |
| Additional Notes |
|---|
|
SS transport counters are available as a free download from Avalanche Press. If not using these or other SS transport from other games, players should use regular German army transport as substitutes. |

|
|
|---|
| AFV Rules Pertaining to this Scenario's Order of Battle |
|---|
|
| Luftwaffe |
|---|
|


| Schutzstaffel |
|---|
|


")
")
")
")

| Army |
|---|
|


| 3 Errata Items | |
|---|---|

|
The reduced direct fire value of the SS HMG is 5-5 in Beyond Normandy and Road to Berlin. (plloyd1010
on 2015 Jul 31)
|

|
The Units in Beyond Normandy were misprinted with a movement factor of 5. The movement factor should be 8. (rerathbun
on 2012 Mar 21)
|
|
|
Liberation 1944's counters are mislabeled 'PzIVF2.' The counter's ratings are correct (Armor 5, Move 8, DF 11-6, AT 6-8). (rerathbun
on 2014 Feb 14)
|
| Still Holding On | ||||||||||||
|---|---|---|---|---|---|---|---|---|---|---|---|---|
This 15 turn fight has a battalion of US engineers holding the large town on board 24 against a kamphgroup of SS and Falscherjaegers who need to take every town hex to win. The US sets up north of the east-west road on board 25, the Germans start south of that road. I decided the Americans would rush into the town, dismount and defend it instead of trying a delaying action, since the Germans have tanks and half tracks capable of bipassing pockets of resistance. The US got the initiative and did get most of the force into town, but German mortars disrupted a truck full of engineers,who then became the first casualties as German tanks approached and finished them. The Germans were able to take the southern half of the town, and enveloped the north half. Casualties went back and forth, but the early loss of the US Major, followed by 2 Lieutenants, made the only option defending and hoping for the best. The game quickly moved through all 15 turns, and in the end two town hexes remained contested to prevent a German win. 16 German step losses, including step losses from all 3 tanks, was more than the 6 steps required for a US win. Great game. |
||||||||||||
| 0 Comments |
| Racing to Bullingen | ||||||||||||
|---|---|---|---|---|---|---|---|---|---|---|---|---|
In this scenario the American engineers are moving to the town of Bullingen, but the 1SS kampfgruppe Peiper is also racing to Bullingen. The American tactic was to get to the town and try to resist the German attack. Which is an almost impossible task, because the Germans where also racing to the town with their Pz IVH tanks. And when the American engineers reached the town, the Germans (which where adjacent) opened fire demoralizing some engineers and inflicting a few step losses. Unfortunately the Americans were not able to hold all the town hexes. And the Germans now captured the fist three town hexes. After that the germans had a better grip on the town, and drove the American engineers out of the town. When the game ended the whole town was german controlled, and the Americans failed their task to hold Bullingen. So the Germans won! |
||||||||||||
| 0 Comments |
| Tormenta de fuego sobre Bullingen |
|---|
|
En este escenario una fuerza alemana compuesta por dos compañías de granaderos SS, tres pelotones de tanques PzIVH, también de las SS, cerca de dos compañías de paracaidistas y ocho pelotones de transportes acorazados SPW 251 atacan una ciudad (Bullingen) defendida por algo menos de tres compañías de ingenieros americanos. La batalla se desarrolla sobre dos mapas. Los americanos deben desplegar todas sus fuerzas al sur de la ciudad, muy cerca de las posiciones iniciales de los alemanes. En consecuencia, los americanos establecen una posición defensiva compuesta por una compañía barreando la carretera de acceso a la ciudad, esperando con ello retrasar el avance alemán y posibilitar la retirada ordenada del resto de sus fuerzas al interior de Bullingen. Sin embargo, los americanos no han tenido en cuenta que el despliegue alemán se hace a lo largo de todo el frente, avanzando por las alas, con lo que la posición americana en la carretera, en el centro del campo de batalla, corre peligro de verse copada. En vista de ello los americanos se retiran precipitadamente de esa posición, aunque los alemanes consiguen darles alcance y rodear a algunos pelotones, imposibilitando su acceso a la ciudad. No obstante, el grueso de las fuerzas americanas consigue llegar a Bullingen sano y salvo y se apresta a la defensa ante el inminente avance alemán. A continuación se efectúa un metódico ataque a la ciudad por los alemanes, utilizando como punta de lanza los tres pelotones de blindados. Los alemanes atacan con cautela, ya que para ganar deben conquistar la ciudad en su totalidad sin sufrir más de seis "steps" de bajas. Los atacantes no pueden iniciar asaltos a la ligera, ya que sus enemigos son todos ellos ingenieros y se benefician de un modificador de columna en los asaltos. Al final la prudente táctica alemana de concentración de fuego sobre un hex de ciudad tras otro para desmoralizar al enemigo y luego asaltarlo da sus frutos y en el último turno los germanos consiguen aniquilar la agónica resistencia enemiga y ocupar completamente la ciudad. Interesante escenario que demuestra una vez más que en la toma de ciudades debe debilitarse al enemigo antes de asaltarlo. |
| 0 Comments |
| Engineers v. SS | ||||||||||||
|---|---|---|---|---|---|---|---|---|---|---|---|---|
In playing some unbalanced scenarios just to build some tactical skill, this one proved a slightly better play than I thought. The Germans have an overwhelming force of SS troops, tanks and some PARA's to attack the town held by the American ENG's. The Americans force is weak, ENG's with one HMG, a couple of M3's and a bunch of trucks. No OBA for both sides and no heavy weapons for the Americans. The Americans do get the setup, but the force is so small that it will be tough to defend the town. Morale is equal for the Americans and SS, but the PARA's are lower. The leaders favored the SS with morale and firepower bonus and high morale. The setup has the Americans in the town on board 24. In thinking about the defense, the only solution I could see was load the ENG into the town and fend off the attack. The one point that will hopefully fend off a direct assault is the HMG and M3 in the southern most town hex. The Germans load up on SPW251 and the tanks on the southern road. They advance up the road and start to flank out as the approach the open terrain before the town. One force of tanks and GREN's moving west to advance on the hill east of Bullingen. The other force of PARA's move west to the ridge southwest of Bullingen. The STNBFR takes the HMGs and some SPW251's to cover the southern approaches to the town. One the Germans make it to the hill west of Bullingen an American LT with and ENG and M3 position on the hill to hopefully OP fire on the advancing Germans. The Germans maneuver to get on the hill and the advance PzIVH's open fire on the brave LT disrupting him before they can fire. SS troops move up to the light woods to provide a fire base for the western attack on Bullingen. To the south another PzIVH advances on the town with SS troops advancing behind. American OP fire is weak and the Germans close on the southern hex of Bullingen. German fire to the west demoralizes the American defenders and force the LT leading them to recover rather than fire on the Germans. The Americans shift troops from the south to the west and the Germans assault into the southern hex of the town, scoring a step loss on the ENG's. To the west the situation, deteriorates for the Americans with a demoralized ENG fleeing. Germans advance and assault the remaining Americans, killing the other ENG and mortally wounding the LT. Other SS troops move to cut the town in half, while a PzIVH and GREN assault a northern Bullingen hex. To the east the PARA's have advanced to the woods north east of town to await a advance on the north east town hexes. A small groups SS GREN's and HMG unit move to attack the southwest of the town. The other PzIVH supports the attack and they close on the town. At this point, the Americans are surrounded and now the SS will crush the American defense. The Americans don't give up and key OP and DF fire kill 2 SS GREN steps as the charge into Bullingen. The other bright point is the stopping of the German PARA's. The PARA's advance once the SS have encircled the town, but American ENG's OP fire on the PARA's demoralizing 3 of the platoons and the LT. They flee back into the woods in a later turn. There presence will more likely not be needed. The SS began there assaults and slowly destroy the ENG's. Eventually just an HMG and ENG are left and they are subjected to heavy fire and assault clearing the town. A German victory. I was prepared for another 2 rating on this one but found the fight to be a bit more spirited in the assaults as well as the historical context of the scenario bumped this up to a 3. It might be better if the Germans have a more restrictive step loss, possibly 4 steps rather than 6. |
||||||||||||
| 3 Comments |
Why are you trying to build up actual 'extra' tactical skill Alan ? You have far more experience than nearly everybody else, and more attibutes is simply unfair ! :-)
To use your term, those bloody SS. I am still trying to figure out how to kill them.
| Almost out of fuel | ||||||||||||
|---|---|---|---|---|---|---|---|---|---|---|---|---|
Set-Up Issues: One AAR here seems to suggest that set-up in the town is allowed: my reading is that US units must set up only on Board 25 on or north of the E/W road, NOT on board 24 (the board holding the only town hexes). The US has a choice of forward defense; flee to the large town; or some combination. I noted that a PzIVH on 0613/25 (hex/board) sees road hex 1006 on board 24 at a range of 10; likewise a PzIVH on 0705/25 can "see" road hex 1209, at a range of 8. So US units loaded on trucks would be vulnerable to AT fire unless US units were placed forward to preclude German set-up in those hexes. I felt that this would risk too much US firepower to destruction either from OF or by having unsupported units up front. So I stacked up my ENG and lone HMG to foot it northwards with only two ENG to hold the road and the western "approach" through the woods in dug-in positions. The Germans had the paras and two PzIVH's to the west; most of their foot and SPW's on the road; and two GREN/SPWs and the PzIVH on the east. This PzIV took OF fire at the US M3's on 1006/25, but missed; then they moved back to the center to support the road advance. US get the upper hand early with good OF rolls (a '2' on the 30 col for one thing killing an SPW/Gren-step/leader. A para step was also lost. The Germans rolled two consecutive '1's on the 30-col for assaults (albeit the US rolled a '1' also for a "fizzle" assault). By turn four, the SS had cleared the road and the other US blocking unit at the loss of a para step; two gren steps; and an SPW (four step losses to each side). Turns 5-7 brought the German approach and US OF. A fair number of DIS/DEM to the Germans, but numbers began to overwhelm (did lose two more SPW steps). The real turning point, however, was that in two consecutive assaults, US-13col vs. Ger 18 or 24's, the US rolled 1's. The PzIV's enveloped the town to take out the M3's which were trying to dodge about. By turn 9, US holds two town hexes with 2ENG or 1HMG + ENG-R. Germans attack/assault from other town hexes to take advantage of town DEF + recovery bonuses. 10 German steps lost; US 12. It took until turn 13 for the Germans to clear those last two hexes and they were hurt doing so with a few more step losses and morale failures. With a few hours to recover, however, and restock, these elements of Kampgruppe Peiper would be ready for action having lost about a company of SS grenadiers; a platoon of Luftwaffe troups; and corresponding APC transport. The armored component, however, had escaped in good order. This scenario had a bit more tension in it in this reality than might be construed from other plays and the net German victory margin. The US hit hard early with German fizzles; followed by the Germans sweeping most before them; then an increasingly tense end game as the last DF + assaults tried to clear the town. |
||||||||||||
| 0 Comments |
| Fuel Stop at Bulligen or Speed Bump at Bulligan |
|---|
|
I knew when I looked at this scenario that it would be somewhat tilted to the Axis. What an understatement. The Allies set up with half their infantry force in delaying positions on the road and in the gaps between the woods on both flanks. The rest of the Allies set up in the trucks and Halftracks ready to make a dash for the town. The Allied delaying force put up as much resistance as your average Wal-Mart greeter and was quickly swallowed up. The allies had the choice of setting up on the village perimeter to make the Axis cross open ground to make contact. This of course would set the Allies up for the combined fire of the Axis Mark IVs supported by Hmgs and direct fire from infantry. Despite having the town for cover the Allies were looking at 22 or 30 column shots directed at them on every turn and when the Axis moved adjacent that column would rise. Now if the Allies decided to leave the village perimeter hexes unoccupied and let the Axis walk in they could avoid the crushing direct fire and perhaps get an advantage in assault with the Engineers. That is what they tried. What a fantasy that was! Once the Axis were in the village in strength there was no way the Allies had a chance. Not only were the high morale, high firepower infantry in place in the victory hexes but with the halftracks too making a successful Allied assault not likely. Within 7 turns, not even half way, it was mercifully all over. The Axis had cleared the speed bump without touching bottom. Not even a spark. Although the Allies did manage to eliminate 6 Axis steps it made no difference because the Axis occupied all the town hexes. The victory conditions clearly state that the Allies must occupy at least one town hex AND eliminate 6 Axis steps. If the victory conditions gave the Allies a draw for eliminating the six steps it would have been a more close run thing. The Axis would have had to have been more cautious which could have delayed the attack somewhat and given the Allies more of a chance to hold out. |
| 0 Comments |
| Unbalanced, but Historically Accurate | ||||||||||||||
|---|---|---|---|---|---|---|---|---|---|---|---|---|---|---|
This was a 3-session play-through with a wily opponent, new to online shared play on Vassal. I foolishly played the hapless US side, and my opponent played the attacking Germans. We used the defense-favoring FOW, and the consolidation, excess initiative, smoke and extended assault optional rules. This scenario was mostly about an unsuccessful delaying action for the American defenders that was quickly overwhelmed by the Boche. Being in town hexes made little difference for the defending garrisons troops - even if they included combat engineers. Germans close assault successes in town hexes, led quickly to the creation of Nazi strongholds that proved unassailable by the lower morale US troops. Once established, there was no real way to lever the Germans out of their occupied hexes. Scenario victory conditions require that the Allies occupy at least one town hex and also eliminate 6 steps. In our play-through, the Americans were able to inflict 7 steps losses on the Nazis, but could not hold the needed town hexes. I give this historically-accurate, hopelessly unbalanced encounter a generous 2, since it was fun to play with an old pal. As others have stated it not suitable for shared play - stick to solo for this one! |
||||||||||||||
| 0 Comments |