
|
Hurling Down the Track Waltzing Matilda #10 |
||
|---|---|---|
| (Attacker) Japan | vs | Australia (Attacker) |
| Formations Involved | ||
|---|---|---|
| Australia |  |
2nd Armoured Division |
| Japan |  |
2nd "Geki" Tank Division |

| Total | |
|---|---|
| Side 1 | 0 |
| Draw | 0 |
| Side 2 | 1 |


| Overall Rating, 1 vote |
|---|
|
3
|
| Scenario Rank: --- of 913 |
| Parent Game | Waltzing Matilda |
|---|---|
| Historicity | Alt-History |
| Date | 1942-11-01 |
| Start Time | 07:30 |
| Turn Count | 32 |
| Visibility | Day |
| Counters | 260 |
| Net Morale | 0 |
| Net Initiative | 1 |
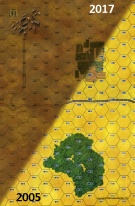
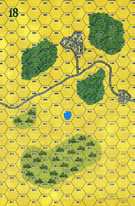
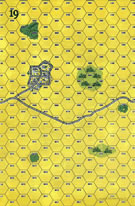
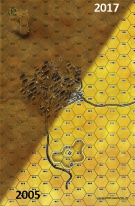
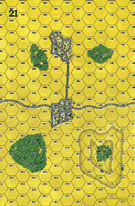
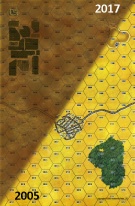
| Maps | 6: 1, 18, 19, 2, 21, 4 |
| Layout Dimensions | 86 x 84 cm 34 x 33 in |
| Play Bounty | 241 |
| AAR Bounty | 171 |
| Total Plays | 1 |
| Total AARs | 1 |
| Battle Types |
|---|
| Inflict Enemy Casualties |
| Meeting Engagement |
| Urban Assault |
| Conditions |
|---|
| Off-board Artillery |
| Randomly-drawn Aircraft |
| Scenario Requirements & Playability | |
|---|---|
| Afrika Korps | Counters |
| Eastern Front | Maps |
| Guadalcanal | Counters |
| Road to Berlin | Maps |
| Waltzing Matilda | Base Game |
| Introduction |
|---|
|
Japanese planners could not agree on the ultimate goal of an invasion of Australia. Did they want to seize port centers on the north coast, like Darwin and Townsville, to limit Australia's usefulness as a base for an Allied counteroffensive? Or were they after outright conquest of the island continent? If the latter, then the big centers of population and industry in the southeast would have to be taken and held. The Australian Citizen Military Force would have something to say in that case. |
| Conclusion |
|---|
|
The Militia's initial mechanized force, 2nd Armoured Division, began as 2nd Cavalry Division, converting first to 2nd Motor Division before becoming an armored unit. Australia issued its first shipments of American-made tanks to the Australian Imperial Force's favored unit, 1st Armoured, and the Militia divisions were expected to make do with the Australian Cruiser, a local copy of the British Crusader tank (with a unique all-cast turret and upper hull). They would eventually receive their own American-made vehicles, but never took them into action. |
| Additional Notes |
|---|
|
Players should make an extra copy of the Japanese pieces from Waltzing Matilda to provide all the Japanese units needed for the scenario. |

|
|
|---|
| AFV Rules Pertaining to this Scenario's Order of Battle |
|---|
|
| Army |
|---|
|


| Imperial Japanese Army |
|---|
|


| Hurling the Japanese Back | ||||||||||||
|---|---|---|---|---|---|---|---|---|---|---|---|---|
This is a very large meeting engagement, with tanks on both sides. The Australians have very few tank leaders, six for 23 tanks (perhaps the scenario writer forgot that the AC1 and AC3 are tanks?), so they have to be careful with them. The Australians used their fast, wheeled APCs to win the race to the big town on map 2. The Japanese moved up to the attack, but made a mistake in trying to stand off and wear down the defenders before assaulting. This gave the Australians the opportunity to move up their slower and more heavily armed Bren Carriers and tanks. Once the Australian firepower arrived, the Japanese were out of options. The Australian tanks have poor guns but good armor. Some of the Japanese tanks have good guns, but none have good armor and the Australians were able to drive them back, inflicting heavy casualties. The Australian firepower and the fact that they held the majority of the town hexes forced the Japanese into desperate assaults in the towns at poor odds. In the end, the Australians inflicted over 100 step losses on the Japanese (tanks counted double), suffering less than half as many themselves. They controlled most of the small towns, and almost all of the large town. Major Australian Victory I rated this one a 3. The ending would have been a lot closer if I'd played the Japanese better. I'd like to try it again, but it's a big time commitment. If you're a fan of large combined-arms scenarios, you'll probably rate it a 4. |
||||||||||||
| 0 Comments |