
|
As Fast As a Leopard Waltzing Matilda #7 |
||
|---|---|---|
| (Attacker) Japan | vs | Australia (Defender) |
| Formations Involved | ||
|---|---|---|
| Australia |  |
4th Light Horse Regiment |
| Japan |  |
4th Cavalry Brigade |

| Total | |
|---|---|
| Side 1 | 0 |
| Draw | 0 |
| Side 2 | 1 |


| Overall Rating, 1 vote |
|---|
|
4
|
| Scenario Rank: --- of 913 |
| Parent Game | Waltzing Matilda |
|---|---|
| Historicity | Alt-History |
| Date | 1942-09-01 |
| Start Time | 08:00 |
| Turn Count | 26 |
| Visibility | Day |
| Counters | 72 |
| Net Morale | 0 |
| Net Initiative | 2 |
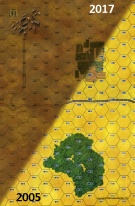
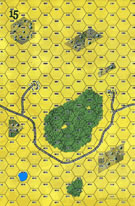
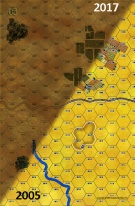
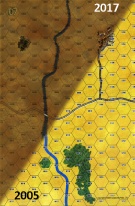
| Maps | 5: 1, 15, 5, 6, 7 |
| Layout Dimensions | 140 x 43 cm 55 x 17 in |
| Play Bounty | 183 |
| AAR Bounty | 171 |
| Total Plays | 1 |
| Total AARs | 1 |
| Battle Types |
|---|
| Delaying Action |
| Exit the Battle Area |
| Road Control |
| Scenario Requirements & Playability | |
|---|---|
| Afrika Korps | Counters |
| Eastern Front | Maps |
| Guadalcanal | Counters |
| Road to Berlin | Maps |
| Secret Weapons | Counters |
| Waltzing Matilda | Base Game |
| Introduction |
|---|
|
The Japanese conquest of Malaya relied on rapid movement through and around Allied positions, using bicycles, trucks and simple rapid marching. An invasion of Australia would likewise depend on rapid movement to isolate Australian forces and obtain local superiority - while the continent's garrison wasn't very large, the Japanese estimated they could at best land ten divisions. Even that, with hindsight, appears a fantastic stretch. |
| Conclusion |
|---|
|
Japan possessed a cavalry tradition as vain as any Western power's, but the large cavalry units spent the war in China. Transporting them to Australia would have given the invaders a mobile force able to fuel itself from local resources, but like all Japanese units they would have faced determined resistance. |

|

|
|---|
| AFV Rules Pertaining to this Scenario's Order of Battle |
|---|
|
| Army |
|---|
|


| Imperial Japanese Army |
|---|
|


| 1 Errata Item | |
|---|---|
| Scen 7 |
The Note section should mention that a piece from Secret Weapons is required. (rerathbun
on 2011 Dec 26)
|
| As Fast As a Leopard, and Just As Fragile | ||||||||||||
|---|---|---|---|---|---|---|---|---|---|---|---|---|
The Japanese objectives are to control the road and exit off the south edge. The Australians must try to prevent them, while inflicting as many step losses as possible. The Australian cavalry sets up as far north as possible, using the extensive woods on Map 6 to anchor their line. The line is reinforced by two HMGs and backed by mortars. The artillery the rest of the HMGs set up behind the river further back. The Japanese cavalry enters the north edge and advances in line, while their HMGs and artillery are transported up the road. The Japanese cavalry advances to within four hundred yards of the Australian line east of the woods, and the Australians slowly retire, staying just out of range. The Japanese approach and assault the Australian Light Horse and HMGs holding in the woods. The assaults go poorly for the Japanese; They suffer disruptions and a demoralization while doing no damage to the Aussies. In the meantime, the Australian artillery and mortars' shooting is outstanding. They destroy several squadrons of Japanese cavalry and kill the Colonel in command of the whole force. The Japanese advance slowly over the next few hours, but are unable to break the Australian line. Their effort costs them too many casualties, as the Australian shooting and bombardment continue to be excellent. The result is an Australian Major Victory. This is a good cavalry versus cavalry scenario, and is closer than the score indicates. The Australians were extremely lucky with their die rolls, while the Japanese die rolling was below average. |
||||||||||||
| 0 Comments |