
|
Red God of War: Counter-Attack Sinister Forces #39 |
||
|---|---|---|
| (Attacker) Germany | vs | Soviet Union (Defender) |
| Formations Involved | ||
|---|---|---|
| Germany |  |
SS Cavalry Division |
| Soviet Union |  |
75th Rifle Brigade |

| Total | |
|---|---|
| Side 1 | 0 |
| Draw | 1 |
| Side 2 | 6 |


| Overall Rating, 8 votes |
|---|
|
2.88
|
| Scenario Rank: 785 of 913 |
| Parent Game | Sinister Forces |
|---|---|
| Historicity | Historical |
| Date | 1942-12-07 |
| Start Time | 08:30 |
| Turn Count | 25 |
| Visibility | Day |
| Counters | 56 |
| Net Morale | 0 |
| Net Initiative | 1 |
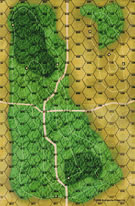
| Maps | 2: 6, 9 |
| Layout Dimensions | 56 x 43 cm 22 x 17 in |
| Play Bounty | 123 |
| AAR Bounty | 141 |
| Total Plays | 7 |
| Total AARs | 6 |
| Battle Types |
|---|
| Road Control |
| Conditions |
|---|
| Off-board Artillery |
| Severe Weather |
| Terrain Mods |
| Scenario Requirements & Playability | |
|---|---|
| Battle of the Bulge | Maps |
| Eastern Front | Maps + Counters |
| Sinister Forces | Base Game |
| Introduction |
|---|
|
Taking an assortment of other units under its command, the 19th Panzer Division launched an attack against the southern "shoulder" of the Soviet 41st Army's penetration of German lines near Belyi. On the panzer division's left, the SS cavalry Division moved out as well, tasked with broadening the German penetration and protecting the 19th's exposed flank. |
| Conclusion |
|---|
|
The SS attack failed to make much progress, succeeding only in bringing down artillery fire on their positions which 41st Army might have better allocated to stopping the panzer drive. The Germans would seal off and destroy 41st Army before Operation Mars was over, but with little thanks due to the SS. |

|

|
|---|
| Heer |
|---|
|
| Schutzstaffel |
|---|
|


")
")
")
")
| Army (RKKA) |
|---|
|


| 3 Errata Items | |
|---|---|

|
The movement allowance on the counters in Airborne is misprinted. It should be "3." (rerathbun
on 2012 Jan 30)
|

|
The reduced direct fire value in Kursk: Burning Tigers is 4-4. (plloyd1010
on 2015 Jul 31)
|

|
Kommissars never get morale or combat modifiers. Ignore misprints. (Shad
on 2010 Dec 15)
|
| Keep Pushing On | ||||||||||||
|---|---|---|---|---|---|---|---|---|---|---|---|---|
The Soviets took a look at the map and decided to set up three comapnies, each backed up by HMG in three different areas. The easternmost company sat up in the board 9 frozen swamp. The westmost company set up on the Board 6 road running between the 2 frozen swamps. The reserve company set up in the middle of the map on the east-west road. The Soviet MTR and HMG were located midway between the road and the south edge. They were all waiting for the German stroke and it didn't take long for that to happen. The CAV entered the south edge of board 6 and looped west around the Soviet positions. The INF, HMG, and MTR all drove straight up the middle of the board. The Comrades didn't take this intrusion lightly as the eastern company began moving west through the swamps. That tied in with the German plan. That is, the INF and HMG would establish a firebase in the middle while the CAV begun rolling up the Soviets from the west. The idea was for the Soviets would gut themselves attacking the middle while the CAV made hay. The only catch to the plan is that the Soviets didn't care for their role in it. For much of the game the two sides were engaged in a leapfrog attack and fallback defense. Eventually the Germans ran out of steam (and troops). Weakly armed cavalry (3 FP) certainly aren't going to do a whole lot of damage, even in a charge. Instead of the Soviets gutting themselves, it was the Germans doing just that against the Soviet defense. Despite the crappy troops, this one turned into a real close game. The casualty lists weren't that extreme, but certainly large enough that the Germans had to go for controlling the length of one of the two roads to get the win. Since they had bypassed the north-south road to the west they had to get the east-west road. I called the game with three turns to go. Even if there were no Soviet opposition, the Germans could not physically control the entire road before game's end. |
||||||||||||
| 0 Comments |
| Necessary but not Sufficient | ||||||||||||
|---|---|---|---|---|---|---|---|---|---|---|---|---|
Set-up and attack as per forum post. Early German OBA success paved the way for good initial advance on the western flank. The westernmost outpost was DEM and forced away into the frozen swamp north of the E/W road. Soviet OBA scored DEM/DIS on the German HMG stack making its way northward. Soviets reoriented their cross-roads force to face attack axis from the west. The second soviet outpost on the western board proved more robust and the Red God of Artillery awoke when the SS horsemen appeared. Main German attack moved easterly with the major battle taking place for the crossroads. The Soviets recognized that whilst for the Germans possession of the crossroads was a necessary condition for victory, it was not in-and-of-itself sufficient. Soviet OF, especially with the 10-1-1 captain's ability to combine fire, wrecked havoc: but the Soviets also performed a withdrawal from the crossroads with a pair of INF's going north and another west. The Germans required sufficient time to recover and reorganize (especially with leader casualties) that the Soviets could dig-in again in their new positions. The SS could not dislodge them by game end. Also, the Soviet units from the westernmost outpost, eventually recovered themselves requiring the SS to send units to engage them. As the eastern board units held their roads, these soviet units could afford to play cat-and-mouse, but they were capable of making a dash for either road over the last 4-5 turns. So the SS held the crossroads, but had not cleared either road; and suffered dearly for so doing. |
||||||||||||
| 0 Comments |
| Not enough horsepower | ||||||||||||||
|---|---|---|---|---|---|---|---|---|---|---|---|---|---|---|
This was an enjoyable Skype game with Tony Langston over the course of two sessions. Tony took the Soviets and I had the Germans. In the initial look at the scenario, believed it would be a challenge for the Germans and a good one for Tony to master his PG defense. I was a bit worried going into it that it would be a too easy Soviet win, but with a bit of review of the SSR's and the VC's, I figured I might have found some cracks in the defensive solid defense that I expected. The match itself will not be good for players with the same experience level as the Soviets have a very good advantage of being able to setup in a very good defensive position. As for the position, the Soviets were setup if a strong hedgehog defense around the crossroads on board 9. Dugin, with HMG's to the front and several INF's along the flanks, this was going to be a hard scenario to charge up the flanks. The only lone exception was a OBA spotting LT and INF on board 6, but they soon joined the defense once the Germans made there advance. The Soviets just need to hold the roads and keep enough troops in alive and in good order on the roads to maintain there control. From the Germans perspective, they will need to push the Germans off the roads as well as kill at least ten steps. This is a tall order for the German force of cavalry and infantry as they are evenly match with there numbers. For support weapons there is just two 81mm mortars and 36 factor of OBA. These are decent enough, but for a full assault on dugin positions it may be too little. Mobility will be the key for the Germans. They will need to get around the Soviets and, hopefully, dislodge them from their dugin positions. But the Germans will want to limit there casualties, else give the game to the Soviets. For the advance the German infantry moves quickly down the road, with the HMG's loaded on wagons. This stacks them up a bit that the Soviets take advantage of with some targeted OBA that double demoralizes a wagon with an HMG. (In my hast to get them moving, I failed in one of the basics.) Vengeance is to the Germans as the German OBA hits the spotted mortar hex and demoralize the 45mm AT gun followed by a Komassair failed recovery attempt. West of the road the SS Cavalry move onto the board and race into the frozen swamps, which cover most of the two boards. The swamps are unique to provide a column shift as well as cover for units that don't fire but are fully spotted if they fire. The Germans use this to their advantage to close on the Soviets without taking fire. But as the Cavalry closes they realize that a charge is impossible on the frozen swamps and begin to maneuver back on to board 6 as the Soviets hunker-down around the crossroads. The Cavalry is able to make it behind the Soviets, but in a brief exposed moment the Soviet OBA strikes again. A REIT is reduced and one demoralized. By this point the German infantry is positioned to the south east of the crossroads ready to attack the Soviet left flank. Shifting of units has weakened it slightly and a good dose of OBA with a followup assault could break their line. But the Soviets hit first and step loss a German INF followed by German hit on the dugin Soviet INF. The Germans regroups and second German OBA strike leaves another reduced INF as well as killing a Soviet LT. At this point the SS Major brings his cavalry forward to strike the north-west side of the Soviet defenses, but Soviet artillery beats them to the punch, killing the Major as well as step of REIT. This end the threat from the north-east as SS LT takes over rally the demoralized cavalrymen. Posturing continues as two groups of INF/HMG take up positions to turn the Soviet left after the loss of the infantry steps from before. Direct firing into the positions gets some disruptions and demoralization that the Soviets are able to shake off before the Germans can take advantage. Soviet artillery scores another hit on the exposed German mortars killing one step. The Germans catch a break as another group Soviet INF/HMG demoralize and retreat. A SS LT advances his HMG and INF to assault but is hit by OP fire the kills an HMG step. More shuffling for the advancing Germans with a fresh HMG replacing the reduced and INF's try to get into position to assault. But again, Soviet OBA hit and reduce and INF. The Soviets try to get units back in line, but the Kommisairs help again fails with another step loss. But the Soviets pull units from the west side that is free of German pressure and continue to hold the line. The Germans then get a chance with a disrupted INF and leader they assault, but Soviet first fire demoralized the HMG and the INF can only generate a morale check that the Soviets pass. The Soviets quickly reinforce the assault and the Germans are now out numbered and begin to pull back from the assault. Soviet OBA is punishing again as a morale check forces a double demoralization on the retreating HMG. The SS LT tries to pull back his INF and is hit by fleeing fire and yet another loss for the Germans. As the casualties grow the Germans now move to a defensive position, preserving there units to keep the casualty count below 12 steps. Units disappear into the frozen swamps but German OBA scores another lose before they disappear. The Soviets slow to see the pull back remain in their foxholes until it is to late to get the elusive twelfth step. A late push by the Soviets does not get a demoralized HMG killed and the game ends in a draw. |
||||||||||||||
| 0 Comments |
| My Horse for a Kingdom (or even just a leader with a combat/morale modifier) | ||||||||||||||
|---|---|---|---|---|---|---|---|---|---|---|---|---|---|---|
INTRODUCTION In this scenario, Elements of an SS Cavalry division and infantry elements of the 19th Panzer division move to protect the main flanks of the division while dislodging Soviet advances in the lines. I played Alan Sawyer in two skype sessions on this one and it went the full 25 turns. The Soviets are tasked with holding at least one of the roads AND inflicting at least 12 steps losses on the Germans for any type of Victory conditions while the Germans need to clear at least the North/South road completely. The Game ended in a Draw, thanks to mis-reading the VC on my part but also, the lack of any Soviet leaders with any kind of combat or morale modifiers made it very hard to press an attack out of defensive positions with any benefit. SETUP The Soviets setup concentrated on the crossroads on Board 9. HMG/INF in three stacks around the crossroads with leaders. Lt Col and 82mm MTR behind with 45mm AT Gun. Single Lt and INF on board 6 to spot in case of German flanking move. Germans enter the map up the north/south road, leading with INF and HMG followed by MTR/HMG stack. REIT units approach on the left flank of the large swamp on board 9. BATTLE The SS troops begin by entering on the road on board 9 in column with INF units leading the column followed by the mortars and HMGs loaded in wagons. The Soviet mortar fires on the tail end of the column as they are unable to move into the swamp and are exposed, causing a wagon to explode with an HMG platoon loaded. The Germans fire back with OBA and destroy the 45mm AT Gun. As the victory conditions called for the Germans to control at least one of the roads, the Soviet plan was to maintain their dug in positions and wear down the onslaught. The Cavalry units entered on the south-western edge of the swamp and moved to skirt the dug in positions by moving north through the swamps on board 6. As the cavalry moved on, the Soviet INF platoon and LT in hex 1009 on board 6 moves to shore up the right flank in the swamp. Most of the time, I watched the Germans slowly approach looking for an opportunity to launch an assault or two that might break the Soviet line. As the Infantry and HMGs approached and attempted to circle around the main defensive positions with the HMGs, the Cavalry continued their flanking manuevers through the swamps on board 6. However, as they ultimately needed to get to the swamp on board 9, they crossed over open ground and loss several men and horses to Soviet OBA. In the meantime, The Germans approached the dug in positions and attempted to flank the left side and after some particularly brutal fighting (losing several infantry steps and having several cavalry units becoming disrupted and demoralized), they were able to get into position to begin spraying rifle and MG fire on the dug-in positions. Despite several units losing morale, The lines held, but not unitl several elements were executed by the local Kommissar. After several executions, it seemed as though the rest of the troops got the message and decided to return to fight. The cavalry did make an attempt to rush the Soviets from the northern flanking move, but were repelled by OP Fire and further OBA attacks that destroyed a unit of Cav and forced them to withdraw before engaging the soviets defending the rear area of the dug-in positions. Even without exceptional leaders, the Soviets were able to hold fairly well, rolling well on morale checks and only losing a LT and an INF platoon from direct fire attacks. The Soviet OBA continued to bombard German positions that were revealed with fire and the casualty count started to rise for the SS. After laying down fire for several turns, the Germans finally launched an assault on Turn 19 against a lone disrupted INF unit and officer with an INF, HMG and Officer. As they moved on the dug-in positions, the Soviet units put up a fierce resistance, demoralizing the HMG unit. After failing their recovery, they fled from the assault, leaving the INF and officer to fight the Soviets, who where shoring up their defense with units in reserve along the road. Not being able to take the crossroads and continuing to take casualties by uncannily accurate Soviet OBA, the Germans began to withdraw from the attack having suffered 11 step losses compared to 6 for the Soviets. The Soviets made one final effort to inflict another step loss to gain the victory but were unable to move or combine enough units to provide enough firepower to inflict damage. AFTERMATH In the two scenarios that Alan and I have played, we have gone down to the wire and that is what makes great scenarios and this a great game. This was probably my best effort at playing the game as I was able to defend the crossroads and really left Alan with a difficult nut to crack. I rated this a '3' but it would be a low 3 / high 2 as it seemed that I ended up passing for most of the game as I waited to see where the main thrust of the attack would come, but I also had no option to combine any fire from any adjacent hexes, having all leaders with neither combat or morale modifiers. I seemed to get real lucky on my Kommissar rolls (who was an '8' morale and usually needing '6' to recover demoralized troops), and my OBA, which did make it very difficult for Alan. When we did get into battle, they seemed to be real close, and were it not for the fact that I had thought I needed 10 step losses instead of 12 that caused me to make some rash moves in the end, I possibly could have forced another loss for the win. Overall, it was a somewhat fun, quick scenario to play. |
||||||||||||||
| 0 Comments |
| The Great War, Revisited | ||||||||||||
|---|---|---|---|---|---|---|---|---|---|---|---|---|
The SS Cavalry Division is charged with the task of protecting the flank of a counterattack against the Mars offensive. They have slightly more troops than the defending Soviets but have the task of completely opening at least a north south road and if they want to be devastatingly effective to also clear the east west road. If they had morale superiority or a firepower advantage or even a significant artillery advantage this might be possible but they have none of these. What they do have is mobility which helps but the terrain is awful (mostly frozen swamp, 2 MPs, and a -1 column on DF and bombardment) and heavy snow impedes movement in general (all units have -1 MP). As the Soviet I chose to defend the crossroads on Board 9 with a company of infantry and the entire complement (3 platoons) of HMGs. In a fall back position on Board 9 I had another company of infantry and the mortar and in the swamps on Board 6 I kept 2 companies of infantry as a reserve. The SS, seeing that their victory would be heavily dependent on their ability to clear as much of board 9 as possible entered directly up the road on Board 9. Their goal was to outflank the Soviet position and crush the heavy weapons by crumbling both edges of the position. They would then advance on whichever axis appeared promising. This, of course, depended on their ability to crush the Soviets, who, as it turned out, weren't really interested in being crushed with one exception. The approach to the Soviet line was standard 19th Century. The infantry and heavy weapons were in the center of the line and the cavalry moved to the flanks. A charge on the AT gun which was attached to the Soviet front line proved problematic and 2 step of cavalry were eliminated and then the advance of the center ran into all sorts of trouble. In two turns of assault the SS had lost 12 steps, all to direct casualties. All I could think of was cavalry attacks in 1914. In essence the battle was over by turn 5 although I played it the rest of the way through. Eventually the weakened SS were able to get some traction and eliminated most of the Soviet front line. The demoralized Soviets were met by their Kommissar (8-0-0) who proceeded to reeducate 5 steps of infantry and HMGs, causing as much damage to the Soviet force as the SS did and providing a much needed ray of hope to the SS as they continued up the north south road to attack the troops left there in hopes of gaining their minor victory conditions. Meanwhile the two Soviet companies on Board 6 bided their time and on turn 19 burst from the swamps in a movement towards the crossroads which was primarily abandoned by the Germans in their attempts to reduce the last vestiges of the front line while simultaneously reducing the northern company of Soviets. The introduction of this force into the center of the SS position was unstoppable and the Soviets ended the scenario with a major victory. I give this one a "2", not because it was a lousy scenario but because it has limited options. The SS really has very little ability to affect the Soviets and although my result was heavily influenced by the SS losses early on I see little ability of the Germans to gain any kind of victory. Losses, however, are guaranteed in that, to gain sufficient mass to have any positive outcome the Germans have to stack three in an hex, and often have cavalry in the hex giving the Soviets two positive column shifts. Indeed this was so inviting that several times the Soviet OBA hit assault hexes in order to destroy the SS despite the friendly fire it involved. |
||||||||||||
| 0 Comments |
| Tough day at the office for the SS cavalry | ||||||||||||
|---|---|---|---|---|---|---|---|---|---|---|---|---|
On the icy steppes of Soviet Russia a SS Cavalry units with some INF & HMG support are tasked with taking an important crossroad during the Russian winter counter offensive in 1942. The Soviets are dug in around the crossroads and have good artillery support, the SS Lt Col dispatches his Cavalry units to the right flank to take the Soviets from the rear while his slower moving units will advance up the North/South road and engage the Red Army in a frontal attack. A classic maneuver, however the Soviet artillery disrupted the flank attack by the CAV and excellent Russian HMG fire disrupted the German frontal attack. It had started well for the German foot units who pushed in the Soviet picket forces without loss and even destroyed a 45mm A/T unit in close assault. However the officer in charge of that plucky platoon called in Artillery fire on his own position which resulted in the first German losses. After that it went downhill very rapidly, as accurate opportunity fire made it impossible for the German commander to get his fire line organised meanwhile the Russian artillery was having a good day disrupting the flank attack. Eventually the SS cavalry commander launched two charges both of which succeeded in tying down Russian INF in assault but failed to cause any losses, the Soviet Lt Col quickly reinforced the assault and drove the horsemen away. The German commander realizing that he would not be able to take the Soviet positions withdrew.**This is a real hard ask for the SS IMHO, a good Soviet set up around the board 9 cross roads gives the Soviets chance to reinforce any part of the defense which appears to be threatened, the total lack of cover makes the German cavalry easy targets and the poor German morale means that though casualties were quite light in mu game there were a lot of disrupted and demoralized German unit in the rear of the battlefield. In this game I had a KOM 8-0-0 which would normally mean at least a couple of summary executions but not in this scenario as he managed to persuade several units back to the colours in time to reinforce threatened sectors. Not a great scenario, I am marking it a two but that is possibly a little harsh. Looking forward to seeing other results on this one.* |
||||||||||||
| 2 Comments |
Wayne, I would be interested to know your exact Soviet Union setup and see if I can come with a different plan of attack.
Daniel, This is from memory but all units on board 9 0509 Dug in 81 0510 Dug in INF HMG LTCOL 0609 Dug in HMG INF 0409 Dug in HMG INF. This was the inner ring of defenses. 0711 Dug in 45 INF 0512 Dug In INF x 2 0311 Dug in INF x 2 0209 Dug in INF x 2 0207 Dug in INF x 2. The outer ring. The KOM was with the LTCOL the WGNs with the 81 & 45 and other LDRS with outlying INF, the INF in 0209 and 1 INF from the Inner ring deployed to the North to face the SS CAV. Feel free to comment on this set up. But remember its Christmas so be nice.