
|
No Honor to Lose Sinister Forces #4 |
||
|---|---|---|
| (Attacker) Germany | vs | Soviet Union (Attacker) |
| Formations Involved | ||
|---|---|---|
| Germany |  |
2nd SS "Das Reich" Division |
| Soviet Union |  |
100th Rifle Division |
| Soviet Union |  |
42nd NKVD Rifle Brigade |

| Total | |
|---|---|
| Side 1 | 1 |
| Draw | 0 |
| Side 2 | 3 |


| Overall Rating, 4 votes |
|---|
|
3.25
|
| Scenario Rank: --- of 913 |
| Parent Game | Sinister Forces |
|---|---|
| Historicity | Historical |
| Date | 1941-07-10 |
| Start Time | 10:00 |
| Turn Count | 15 |
| Visibility | Day |
| Counters | 136 |
| Net Morale | 0 |
| Net Initiative | 1 |
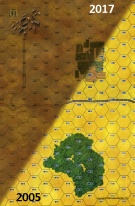
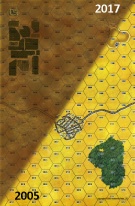
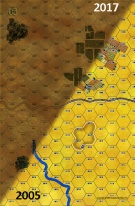
| Maps | 4: 1, 4, 5, 6 |
| Layout Dimensions | 86 x 56 cm 34 x 22 in |
| Play Bounty | 156 |
| AAR Bounty | 165 |
| Total Plays | 4 |
| Total AARs | 2 |
| Battle Types |
|---|
| Exit the Battle Area |
| Meeting Engagement |
| Road Control |
| Scenario Requirements & Playability | |
|---|---|
| Eastern Front | Maps + Counters |
| Sinister Forces | Base Game |
| Introduction |
|---|
|
Col. Gen. Herbert von Vietinghoff's 46th Panzer Corps had just one panzer division, plus an SS motorized division of doubtful combat value and the palace guard regiment, Grossdeutschland, which had not yet earned its later elite reputation. Vietinghoff left the SS and Grossdeutschland unit to trail along behind the armored spearhead, but that didn't free them from combat with bypassed Soviet units. Some of these, like the units of 2nd Rifle Corps, still had their full complements of heavy equipment and ammunition, and plenty of fighting spirit. |
| Conclusion |
|---|
|
In heavy fighting, the SS men managed to keep the road open but suffered severe casualties in doing so. Lack of march discipline and slow reaction time cost the Germans heavily, allowing the attackers to approach very close to the road column before the SS reacted. But neither side wanted a prolonged action, and soon both broke contact to re-join their side's other formations to the east. |

|

|
|---|
| AFV Rules Pertaining to this Scenario's Order of Battle |
|---|
|
| Heer |
|---|
|


| Schutzstaffel |
|---|
|


| Army (RKKA) |
|---|
|


| NKVD |
|---|
|


| 4 Errata Items | |
|---|---|

|
Two 105mms (ID#s 1204, 1205) have "16-31" fire values in black (direct fire), when they should be in white (indirect fire). (Shad
on 2010 Dec 15)
|

|
All SS 75mm IG guns are direct fire weapons (black), not indirect (white). (Shad
on 2010 Dec 15)
|

|
The reduced direct fire value in Kursk: Burning Tigers is 4-4. (plloyd1010
on 2015 Jul 31)
|

|
Kommissars never get morale or combat modifiers. Ignore misprints. (Shad
on 2010 Dec 15)
|
| But wait, in '41 the Soviets have bad leaders and morale, right? | ||||||||||||
|---|---|---|---|---|---|---|---|---|---|---|---|---|
Here we have a classic inversion. The Reich division is tasked with holding a road while exiting troops to the north along the road. NKVD and RKKA forces are attacking. The key is that the Reich troopers have the same morale as the RKKA and similar firepower (as opposed to HEER who outperform the RKKA on morale and firepower. In this case, however, the NKVD troops have better firepower and morale than the SS. Having played a lot of Slovak vs. Hungary scenarios I was sort of ready for this. Battlefields when both sides have poor morale tend to become VERY messy with routing going in both directions, at the same time. Early in the scenario it became apparent that the SS did not have the luxury of exiting units off the board if they were to be able to hold the road. There were too many Russians in total and the SS firepower (at that point in the war) was not sufficient to compensate for the low numbers of units available. The SS almost held the road and caused plenty of casualites but could not retain their cohesion. Eventually the rout of an infantry/HMG fire position permitted a large hole in the line to form which was swarmed by the RKKA in the center of the SS line. In the north a large mixed group of NKVD and RKKA had gained the road, sucked in the SS to try to evict them and had worn down the SS so that by the last three turns of the game too many of the SS had lost their morale and routed. The real difference between the two forces, however, was the leadership. Only one SS leader had any morale bonus and two had combat bonuses, that was it. The NKVD leaders were quite strong and permitted the RKKA to survive many M1 and M2 results unscathed. The Russians don't care whether you are an NKVD, Guards or RKKA leader, they all work, unlike the Germans whose loyalty was to service first. The impact was a steady stream of SS men running away. I give this one a 4 because it gives your early was Russians a chace to attack and do well. Plus, if you like chaos, this one will do the trick. There were more red (disrupted) and black (demoralized) topped stacks than you could shake a stick at. |
||||||||||||
| 0 Comments |
| Neat scenario, but lopsided victory conditions | ||||||||||||
|---|---|---|---|---|---|---|---|---|---|---|---|---|
In this scenario, an outnumbered SS force with a minor morale disadvantage and limited leaders must guard the entire length of road against a large Soviet force, all while exiting troops every turn or suffer giving additional losses to the Soviets for victory condition purposes. The Soviets have a good NKVD contingent with better morale than the Germans, plus a large army contingent with equal morale to the Germans. Victory is determined by a combination of whether the Soviets have a good order unit occupying even one road hex combined with minimums for inflicting losses, ten for the Soviets and twenty for the Germans. For every turn (15) which the Germans don’t exit a combat step the Soviets receive the equivalent of inflicting one step loss. The Germans must deploy on the road, so they stretch out the entire length holding every hex. The ATGs, which are not of much value, start on the extreme north with the intent of filling the exit criteria on the first couple turns. The IG is also on that end, intending to be step three. The 105s set up with the intent of moving to the edge of town to provide fire support. The mortar teams are all together on the south end behind the fields to support the defenses on the German left. The ACs are on the extreme southern end, with their mobility capable of supporting wherever needed as the scenario plays out. MGs are all with SPW250s to provide strong defensive positions. All other units are stacked with a carrier and distributed evenly. The strategy is to move west a couple of hexes as quickly as possible to place a wall between the Soviets and the road. The Soviets are large in number, but slow without transport. The arty sets up in town to support the drive against the northern end of the road, which will be attacked by NKVD. Another mixed force of NKVD and army, supported by one ATG, will attack the German center. A large army contingent with two ATGs and all the mortars (with a leader that can combine their fire) will attack in the south. All goes well for the Germans for the first six turns. It takes a while for the Soviets to move forward. The Germans shrug off Soviet indirect fire, while German indirect fire causes some confusion on the Soviet advance, but not enough to slow the masses. The German ATGs move off board on the first two turns, but the IG does get disrupted after a couple turns and ends up never exiting (but it does manage to cause consternation to the Soviets). The German arty is set up in town and starting to make itself felt. On the south end, one Soviet ATG dies very quickly. The second one lasts quite a while, but fails to have an effect on any German unit. The Soviet advance goes very poorly, and the Germans inflict huge losses. The Soviet mortars are the only force in the south that has any success against the Germans, and a total collapse of the offensive ensues. The Germans mop up everything except the mortars (two eventually die by indirect fire from the town based arty) and one Inf platoon. The high point is when a leader in the Soviet center spots the German mortars (who are beginning to direct against the center) and the Soviet mortars wipe out the German mortars. This is what forces the German arty to spend two turns against the Soviet mortars (finally spotted) to kill two of them. But the destruction of German mortars comes too late for the southern Soviet advance, and the ACs leave around turn 10 to support the German center, while the German infantry forces consolidate and begin moving to the center by turn 13. In the center the Soviets find themselves channeled and have trouble advancing. Casualties are high on both sides. German MG/250 positions anchor the ends and provide solid defense barriers that the Soviets cannot move around without receiving heavy fire. The Soviets eventually go in for the assaults to tie the Germans down, and pay a heavy price to get there. But it pays off, as eventually a few units can get around the German defenses and get on the road. German reinforcements from the south can’t get most of those units off or disrupt them, but continued Soviet hammering opens more paths and those reinforcements stem the tide that threatens to break out onto the road. Still, the Soviets have three road hexes with good order units in the center at scenario’s end. In the north the Soviet attack goes well. The slight morale benefit pays dividends. By turn seven the Soviets threaten a breakthrough, and by turn eight they are on the road. German losses are high, but the Soviets are paying as well. What small amounts of force that can be spared from the center go north. The German arty can self spot the road, and this has a devastating effect on the Soviets. The Soviets seize five road hexes, but obliteration by arty combined with a strong force of one MG, one 250, and two Inf takes back three of those hexes. Still, when it’s all over, the Soviets hold two road hexes in the north with good order units. When the scenario ends, the Soviets have lost six leaders and 33 steps, but they hold five road hexes with good order units to take the victory. German losses are three leaders and 18 steps, plus provide 12 more “steps” due to a failure to exit units (one isolated one step inf also ran off the edge). The Soviet leader losses weren’t too bad considering their force size had collapsed to a point where there was always enough leaders for the size of the force remaining. The German leader losses, however, were devastating. Several units were limited in their ability to try and take back the roads. The Germans really should never try to exit steps. The losses are coming anyway, so retain your force structure to try and hold the road. I rate this one a 2. The action was good, but I never really felt there was hope to hold the road. While the Germans were able to counterattack and prevent the road count from being in the area of a dozen hexes, there was never really any chance to prevent that many Soviets from taking a single road hex. As a multiplayer scenario it would be a measure of frustration for a German player. Perhaps a decent scenario for a newbie to practice attacking against a seasoned defending player, but without that disparity this is not a competitive scenario. It was fun, but any German player is really being dealt a losing hand from the start. |
||||||||||||
| 0 Comments |