
|
Overlooking Radio Road Saipan 1944 #26 |
||
|---|---|---|
| (Attacker) Japan | vs | United States (Defender) |
| Formations Involved | ||
|---|---|---|
| Japan |  |
9th Tank Regiment |
| United States |  |
2nd Marine Regiment |

| Total | |
|---|---|
| Side 1 | 3 |
| Draw | 0 |
| Side 2 | 9 |


| Overall Rating, 5 votes |
|---|
|
3.6
|
| Scenario Rank: 338 of 913 |
| Parent Game | Saipan 1944 |
|---|---|
| Historicity | Historical |
| Date | 1944-06-24 |
| Start Time | 18:30 |
| Turn Count | 10 |
| Visibility | Day |
| Counters | 11 |
| Net Morale | 0 |
| Net Initiative | 1 |
| Maps | 1: 83 |
| Layout Dimensions | 43 x 28 cm 17 x 11 in |
| Play Bounty | 117 |
| AAR Bounty | 159 |
| Total Plays | 12 |
| Total AARs | 3 |
| Battle Types |
|---|
| Exit the Battle Area |
| Inflict Enemy Casualties |
| Scenario Requirements & Playability | |
|---|---|
| Saipan 1944 | Base Game |
| Introduction |
|---|
|
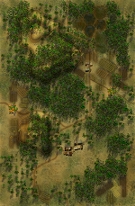
Marines of the 3rd Battalion, 2nd Marines had advanced to a spot overlooking Radio Road just outside of Garapan. The Japanese began ill-considered attempts to eject the Marines. First, a doomed platoon sized banzai charge attempted to drive back the regiment's 1st Battalion. Then as 3rd Battalion began to dig in for the night seven Japanese tanks charged from the ruins of the town unsupported by infantry. |
| Conclusion |
|---|
|
The pair of Sherman tanks and 75mm armed halftracks destroyed six of the seven Japanese tanks in short order, without losing any of their own. The seventh Japanese tank skedaddled back the way it had come. The 2nd Marines would remain in their positions for the next several days. |

|
|
|---|
| AFV Rules Pertaining to this Scenario's Order of Battle |
|---|
|
| Imperial Japanese Army |
|---|
|


| Marine Corps |
|---|
|


| 1 Errata Item | |
|---|---|

|
The 8-3 Marine Infantry counter appears in most of the Saipan 1944 and Marianas 1944 scenarios, replacing the 10-3 DF valued Marine counters for those scenarios and is currently published in the most recent Saipan printing. (JayTownsend
on 2015 Dec 26)
|
| Saipan, scenario 26: Overlooking Radio Road | ||||||||||||
|---|---|---|---|---|---|---|---|---|---|---|---|---|
Saipan, scenario 26: Overlooking Radio Road Trying to simulate small actions at PG Level can be a hit or miss proposition but sometimes they are just fun. I setup the Marines in set defensive position trying to cover all the area I thought the Japanese might try and slip by. The Marines are NOT dug-in, so I must figure the best way to spread them out but without giving that away I’ll let gamers have the fun of trying this for themselves. Next I must decide how to approach from off board as the Japanese and what victory conditions to go for; exit points and avoiding contact or destroying enemy steps? This is so small of a scenario, that I quickly had 8 plays in, using a set Marine defense that I thought best covered the map but trying 8 different Japanese attack strategies and approaches. I’ll list all 8 plays as one AAR but post 8 game plays.
I think if you played this 20 times, the Americans would win 15 out of 20 but it’s still fun trying. |
||||||||||||
| 0 Comments |
| Tanks? I didn't see no stinking tanks! | ||||||||||||
|---|---|---|---|---|---|---|---|---|---|---|---|---|
Gads, the scenario didn't last long enough to put 4th edition to the test. A nice little 10-turn scenario with 3 steps of Japanese tanks that have to get across the length of board 83 with 4 steps of Marine infantry, an M3/75 tank destroyer and a reduced Sherman. Japanese have a little bit of a lead in initiative, which my die rolls enhanced for 2 activations as I started turn 1. Looking at the game map, there is a fairly clear line of hexes if I drive up the south edge of the board, but that seemed gamy to me so I figured I'd drive down the trail like any good tank command. Right up to the outskirts of the first town on the trail where the Marines holed up with a full platoon and one reduced platoon, a 9-0-1 Liuetenant and an excellent sergeant (whose numbers slipped my mind, but he sort of reminded me of SGT Rock from the numbers - all the Marine leaders came out excellent with a 10-1-1 LT I left in charge of 2 reduced squads a bit further back along the road). Anyway, as the Japanese full platoon of Type 95 tanks came to a stop on the edge of the village, the halftrack opened OP Fire, claiming a step right off the bat. The Japanese Shin reduced platoon came along on the next activation and stopped just inside the jungle, still on the trail but out of sight of anyone who could do it harm. Marine Sherman activates, and having the advantage of shooting after the halftrack shot, gets the crossfire modifier. Bang, there goes the second step. Thus ends turn 1. Turn 2 starts as did turn 1, with the Japanese getting 2 activations and the US 1. The Shin moves forward one hex into the open with the idea of skirting the village through the fields to his left, when the halftrack again OP fires. Bang. There goes another and final step of Japanese armor. Getting second thoughts about what is gamy and what isn't. I want to try this gain face to face with somebody who might just do that end-run sort of thing, making me as the Marine spread out a bit more to catch him wherever he might head. |
||||||||||||
| 0 Comments |
| tough for the Japanese | ||||||||||||
|---|---|---|---|---|---|---|---|---|---|---|---|---|
This is a neat little tactical puzzle playable in minimal time. Like Jay I noodled through more than one play, and in the process I realized that the optional overrun rule also seems essential to the Japanese chance to win. It also seemed after reading Jay's AAR that I wasn't doing everything correctly; turns out I had incorrectly interpreted regular jungle as heavy jungle. This is very meaningful because heavy jungle is prohibited terrain to tanks, and the Japanese would have no chance at all. What follows is my final play. I set up two Yank infantry units on the north edge and two on the south edge. The Shermans occupied the first town on the main road, and the halftracks the village in the south middle of the board. Japs had a choice to approach the edge infantry or run up the gullet into the Shermans. The latter seemed futile, so I had them enter along the south edge. The Yanks retreated and pivoted the infantry. They also moved up the halftracks, occupying both potential exit hexes of an overrun of the full strength forward-positioned platoon. On the second turn, without an overrun option, the Japs tried to flank the Yanks by moving adjacent but into the jungle. The halftracks took a shot when they could without success. Meanwhile the Shermans arrived and now occupied the village where the halftracks originally set up. At this point the Japs best play, I thought, was to go for step losses. They won initiative. The Shins took a shot at the halftracks but missed. Meanwhile the Type 95 tanks assaulted a half platoon again unfortunately for the Japanese without success. The Shermans shortly thereafter blasted the Shins, and full-strength platoon joined the assault with the Type 95s. Before long the Type 95s were also out. |
||||||||||||
| 0 Comments |