
|
Slopes of Fina Susu Saipan 1944 #16 |
||
|---|---|---|
| (Defender) Japan | vs | United States (Attacker) |
| Formations Involved | ||
|---|---|---|
| Japan |  |
43rd "Honor" Infantry Division |
| United States |  |
23rd Marine Regiment |

| Total | |
|---|---|
| Side 1 | 2 |
| Draw | 0 |
| Side 2 | 5 |


| Overall Rating, 8 votes |
|---|
|
4.13
|
| Scenario Rank: 69 of 913 |
| Parent Game | Saipan 1944 |
|---|---|
| Historicity | Historical |
| Date | 1944-06-18 |
| Start Time | 10:00 |
| Turn Count | 14 |
| Visibility | Day |
| Counters | 31 |
| Net Morale | 0 |
| Net Initiative | 1 |
| Maps | 1: 83 |
| Layout Dimensions | 43 x 28 cm 17 x 11 in |
| Play Bounty | 127 |
| AAR Bounty | 147 |
| Total Plays | 7 |
| Total AARs | 5 |
| Battle Types |
|---|
| Cave Control |
| Conditions |
|---|
| Caves |
| Scenario Requirements & Playability | |
|---|---|
| Saipan 1944 | Base Game |
| Introduction |
|---|
|
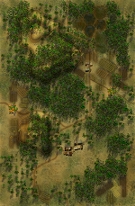
With 4th Marine Division preparing for a general attack to sweep across the island to its east coast, the strongly-fortified Japanese positions on Mount Fina Susu first had to be cleared. The 23rd Marine Regiment formed a composite battalion led by Lieutenant Colonel Cosgrove of the 3rd Battalion to spearhead the attack. Deep within their caves, the Japanese awaited them. |
| Conclusion |
|---|
|
The assault was stalled by accurate Japanese machine-gun and mortar fire. Later in the day, while firing into a cave with the 75mm halftrack, a picric acid cloud was produced. The high explosive fumes started a small panic among the Marines, but they returned once the cloud evaporated. |

|
|
|---|
| AFV Rules Pertaining to this Scenario's Order of Battle |
|---|
|
| Imperial Japanese Army |
|---|
|


| Marine Corps |
|---|
|


| 1 Errata Item | |
|---|---|

|
The 8-3 Marine Infantry counter appears in most of the Saipan 1944 and Marianas 1944 scenarios, replacing the 10-3 DF valued Marine counters for those scenarios and is currently published in the most recent Saipan printing. (JayTownsend
on 2015 Dec 26)
|
| Cave to Nowhere | ||||||||||||
|---|---|---|---|---|---|---|---|---|---|---|---|---|
This looks like a fairly simple scenario, lots of Marine firepower, lots of jungle to maneuver around and through and about half the number of Japanese troops with some service and weapons thrown in. I figured the M3/75 would run the game. Alas, I was wrong. The US managed to make it about halfway across the board before getting stung by long range Japanese mortar gunnery, but to little effect. Just an annoyance for a bit. But then Japanese outposts started finding the range and the 20mm AA gun started getting shots at the halftrack. Not very successful shots, but just enough to make the crews a bit cautious. At the halfway point through the game, the Marines take the Japanese outposts into assault. Finally, taking out one outpost at a time, the Marine LTC and a strong force make it to the cave, along with the halftrack, but the cave's first strike ability took out one step and demoralized half of the remaining force. The Marine attack only succeeded in demoralizing one Japanese infantry element in the cave in return. So, one turn of both sides trying to rally and at it again. Marines switched out good order units for demoralized units and tried again. And again the Marines lost, this time 2 steps, and another demoralized unit. And Japanese managed to hold out with no additional losses. Another round of Marines switching out good order for demoralized, and here we are, last turn, and alas, the stacks of Marines all around the cave once again fail to do any damage while most of them are demoralized again. Japanese win. This is a much more exciting little fight than it looks like it will be and much more challenging. Great game. |
||||||||||||
| 0 Comments |
| Bloodied but victorious | ||||||||||||
|---|---|---|---|---|---|---|---|---|---|---|---|---|
The second of Saipan to see how the new cave rules worked out, and I was not disappointed. Given the size of the scenario is was a good one to try. It is mostly an all infantry scenario save the American M3/75. The Japanese get to hold up on a hill with a cave and jungle for the Marines to content with. The Marines do have a FLM unit to content with the cave, but that will always draw fire from the Japanese. For the setup the Japanese make it hard, placing the cave in the jungle hex on top of the 40m hill. This will require the Americans to either try to slog through the dense jungle to the west of the hill or approach from the road/town from the south. The later will be covered by the HMG and 20mm as well as INF's. The mortars are placed to the north east in light jungle out of the Americans sight. For the Americans, they enter from the west along the road and the hexes to the south. Moving up they encounter a Japanese LT acting as a spotter for the mortars. The mortars are able to disrupt a Marine INF before the LT is captured by the Marines. After a brief interrogation, the Marines discover the fact that the hill is well defender by fanatical troops bent on stopping the American advance. At this point the Marine LT Col. decides to send a company on a flanking move to the north and see if they can get around the dense jungle and attack from a possibly weaker side, while the main force moves up the road on in the south. Both groups move out, the southern force gets up the road but comes under fire from the Japanese 20mm as soon as it clears the jungle before the town. A Marine INF is hit with a step loss and is demoralized. Followup the M3/75 races into the town for cover from the 20mm. Other Marine INF's move to the south of the town just out of rifle range of the defenders. To the north it takes several turns before the flanking company can get to the light jungle on the north side of the hill. The Marine Captain and LT bring up their men but are spotted by the mortars to the north-east and one platoon is disrupted before another can go after the mortars. The Captain orders the Lt to recover the platoon and attack the hill while he goes after the mortars. This forces the Japanese to shift two infantry units to met the advancing Marines. At the cave hex the Japanese INF open fire disrupting the other American Marine INF. But to the south more action is going on. The Marines have established themselves in the town and can now fire on the hill. They start to get some effects with a step loss to a Japanese INF. But the Japanese 20mm has effect on advancing troops as the LT. COL comes under fire when his accompanying INF is reduced. He temporarily demoralizes and recovers as the Japanese cannot take advantage with any other fire. Meanwhile, Marine INF's to the south of the town move to attack an INF and SER on a spur of the hill to the south east. Heavy OP fire from the Japanese reduce another Marine INF, but other follow in and are in position for an assault. Just to the west of that the Japanese HMG is positioned to fire on them but the M3/75 and 2xINF are able to demoralize it first. Force to flee it runs to the cave hex, opening a window of opportunity for the Marines. They push two INF's into the vacated hex under fire from the 20mm and are in position to assault the spur with the other Marines as well as threaten the cave. With the LT COL. coming back online other reduced and support Marines move to advance on the cave. The Japanese try to consolidate around the cave and the jungle and hope to hold out as time is running out for the Marines. For the final act, first the Marines assault the INF and SER on the spur. After demoralizing the INF the Marines move in for the kill, but the wiley Japanese get a first fire kill on the Marines, luckily the morale holds. The counter and destroy the SER and double demoralize the INF. Second, the Marines storm the 20mm on the top of the hill, killing it quickly. Third, the flanking Marine company goes for the cave hex. But this will be a tough one with 2xINF outside and a disrupted HMG on the inside. (At this point another note, this assault used First fire for the HMG in the cave, but this has later been clarified that caves do not first fire.) The HMG fires on the Marines and misses, so the Marines and the INF's go at it. The Marines score a M2 but the Japanese score a step loss forcing the Marines out, but demoralizing both an INF outside and the HMG inside. After recoveries, they are disrupted. One the next turn another group of Marines from the south go it to the caves. Again a miss by the HMG, and the Marines score a step loss while the Japanese score a morale check. This seals the fate of the Japanese as they are forced out of the hex and given the 30 firepower in the hex the Japanese will not be able to take it with there reduced units. This gives the Americans the win. A good scenario and one that I would recommend as a FtF rather than a solo effort. This could be a very tense and dramatic little battle under those conditions. As for the cave rules, they are working well after some clarifications and updates. See the errata postings for the latest updates. |
||||||||||||
| 0 Comments |
| Saipan, scenario sixteen: Slopes of Fina Susu | ||||||||||||
|---|---|---|---|---|---|---|---|---|---|---|---|---|
Disclosure, I am the Designer and feel all my scenarios fall into the range of 4-5, 90-100% or I wouldn’t have created them, so take my ratings with a grain of salt! The only reason any are a 4, is because they are more difficult to make from design to development. Saipan, scenario sixteen: Slopes of Fina Susu Yes finally a small cave scenario! I setup the Japanese cave counter on the far hill thinking the Americans would have to waste 3 or more turns getting there, which they did. The tactics the American used was hitting the hill from two open area flanks, first taking out the units surrounding the cave hex, than the one unit on the cave, then the cave itself with two units and a leader inside. I like the fact that the after each assault the side that losses the most casualties must exit the hex and there is no fire-first for cave hexes. The Americans cleared the cave with very few casualties and were able to get the ENG-FLM unit into the assault and had at least two stacks of infantry to assault the cave if the first stack failed. The Americans won this scenario but it is a very good cave assault learning scenario. Learning how to approach and line up the attacks after taking out the blocking forces. I really enjoyed it. |
||||||||||||
| 0 Comments |
| Caves are tough to dig out the IJA | ||||||||||||||
|---|---|---|---|---|---|---|---|---|---|---|---|---|---|---|
This scenario was easier to close in with the Japanese. Need to ask some question what is the losing side in assault in a cave. I had to peel some units in front of the cave. Then had 3 turns of assaulting the 3 Japanese units in the cave. Move through the light jungle and east side. Use the ridge blocking the main hill on the north end to split the IJA units. There are only 2 hexes of jungle so moving through is 3 turns. Remember this scenario has 20 turns. Need need to move in the open. This keeps the mortars from OP your units. Another on that is good for solitaire. |
||||||||||||||
| 0 Comments |
| Tough Japanse but bad initial placement | ||||||||||||||
|---|---|---|---|---|---|---|---|---|---|---|---|---|---|---|
My Initial placement of my only anti-armor unit. I should have put in on the hill overlooking the main road, but I figured Dan would try and sneak up the other side of the board. His initial move looked like I was correct and my mortars blasted a stack of marines. But this was a head fake and i had to shift to my left and leaving the dug in protection to slow the advance of the marines. For most of the rest of the games the Marines advanced and on my troops. Dan did make a miss-step when he move next to a stack of inf who jumped into Assault with them and I rolled a 12. This took out his flanking attack so he just kept attacking straight a head. we both had some pretty tough Assaults and it came down to the final turn with the Marines assaulting the units in the cave. We both rolled and got the same M1 check but I survied and was not kicked out of the cave. Any time a game comes down the final turn with the outcom in doubt I consider it a great game. |
||||||||||||||
| 0 Comments |