
|
Third Time's A Charm? Saipan 1944 #14 |
||
|---|---|---|
| (Defender) Japan | vs | United States (Attacker) |
| Formations Involved | ||
|---|---|---|
| Japan |  |
25th Antiaircraft Artillery Regiment |
| Japan |  |
47th Independent Mixed Brigade |
| United States |  |
23rd Marine Regiment |

| Total | |
|---|---|
| Side 1 | 2 |
| Draw | 0 |
| Side 2 | 3 |


| Overall Rating, 5 votes |
|---|
|
4.2
|
| Scenario Rank: 39 of 913 |
| Parent Game | Saipan 1944 |
|---|---|
| Historicity | Historical |
| Date | 1944-06-17 |
| Start Time | 15:00 |
| Turn Count | 12 |
| Visibility | Day |
| Counters | 26 |
| Net Morale | 0 |
| Net Initiative | 2 |
| Maps | 1: 83 |
| Layout Dimensions | 43 x 28 cm 17 x 11 in |
| Play Bounty | 127 |
| AAR Bounty | 165 |
| Total Plays | 5 |
| Total AARs | 2 |
| Battle Types |
|---|
| Entrenchment Control |
| Conditions |
|---|
| Entrenchments |
| Scenario Requirements & Playability | |
|---|---|
| Saipan 1944 | Base Game |
| Introduction |
|---|
|
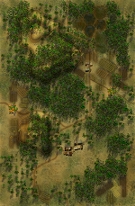
The Marines continued their advance around the Aslito Airfield and Nafutan area, and the Japanese responded with increasing resistance. They reinforced the area with still more antiaircraft units and elements of the 47th Independent Mixed Brigade. The Marines fighting against this force were not helped by friendly fire from their own terrifying 4.5 inch rockets either. |
| Conclusion |
|---|
|
Caught in the open by both their own fire support and Japanese rifleman, the Marines fell back with 53 casualties. The MK7 Multiple Rocket Launcher Truck would be the new close support weapon for the Marines, starting with Saipan and going forward for the rest of the Pacific campaigns. Used correctly it was a very effective tool. The men called the MK7 the Shoot & Scoot, as once it fired, all the smoke it created usually highlighted its position and brought fast counter-battery response from enemy artillery. |

|
|
|---|
| AFV Rules Pertaining to this Scenario's Order of Battle |
|---|
|
| Imperial Japanese Army |
|---|
|


| Marine Corps |
|---|
|


| 1 Errata Item | |
|---|---|

|
The 8-3 Marine Infantry counter appears in most of the Saipan 1944 and Marianas 1944 scenarios, replacing the 10-3 DF valued Marine counters for those scenarios and is currently published in the most recent Saipan printing. (JayTownsend
on 2015 Dec 26)
|
| Saipan, scenario fourteen: Third Time’s A Charm? | ||||||||||||
|---|---|---|---|---|---|---|---|---|---|---|---|---|
Disclosure, I am the Designer and feel all my scenarios fall into the range of 4-5, 90-100% or I wouldn’t have created them, so take my ratings with a grain of salt! The only reason any are a 4, is because they are more difficult to make from design to development. Saipan, scenario fourteen: Third Time’s A Charm? Another interesting puzzle of a scenario to play both for setup defenses and attack approaches! With only 12 turns it took the Marines almost 4 turns just to make contact with the Japanese but luckily they stuck to main road and open areas or light jungle, while moving. The objective was not so much to engage every enemy unit but to take out the two entrenchment hexes. They also setup their MK 7 Multiple Rocket Launcher Truck to provide support. The first entrenchment was taken without too much difficulty but the second was as close as it ever gets. The Americans softened it up with direct & bombardment fire then assaulted, it went back and forth with both sides reinforcing it. Finally the Americans controlled it on turn 11 but the Japanese last Infantry unit in the area re-assaulted it trying to deny Marines victory at the last hour but became demoralized. On turn 12 the Americans couldn’t get the Japanese demoralized unit out of the hex until the Japanese rolled for recovery and failed having to leave the hex on the last roll of the game giving the Americans a victory. I don’t remember too many games where the scenario came down to the last dice roll. Very fun and this little scenario really could have gone either way. Maybe my Japanese setup could have been better but I thought it was good? I’ll have to try this one again! |
||||||||||||
| 0 Comments |
| Down to the Wire | ||||||||||||
|---|---|---|---|---|---|---|---|---|---|---|---|---|
This short little game has Japanese AA guns with a company of infantry holding the airfield, with two entrenchments. Marines have about 3 companies of troops, including 2 HMGs, a Flame unit and the M-7 rocket launcher truck. I placed Japanese light AA with the HMG and a leader north of the town hex in light woods where they would logically have set up to protect the airfield and could also protect themselves from approaching enemy. The larger 75mm AA gun I placed south and east of the field, also in light jungle, for the same reason, supported by the Service platoon. The Japanese infantry company I placed in the town hex, something of a quick reaction force for wherever the shooting started. Marines enter from the west in 3 groups, first the Major stacked with 2 infantry and the Flame unit, with an LT, another infantry and an HMG, entering nearest the hill mass so they could go as directly as possible towards the northernmost Japanese entrenchment. The rocket launcher truck with an LT entered and moved across the width of the board to park in light jungle ready to deploy, and the Captain and another LT took the rest, the Captain taking a company of Marine infantry, the LT taking the last Infantry and the last HMG, and these Marines took the road towards the southernmost Japanese entrenchment. It took a couple of turns for the Marines to get to within striking distance, and the rockets were called in on the northern entrenchment as soon as they could be spotted. The combination of rockets and Marine direct fire eliminated the light AA gun fairly early, but this gunfire brought the Japanese infantry company to their aid. Marines got in the first shots nearly every turn, and with some really good shooting by both the Major and the LT in the adjacent hex, they eliminated one step and demoralized the rest right off. This had the bad effect of distracting the Marines from their goal, the entrenchment, but it kept them from being assaulted by the Japanese infantry. While this went on, the rockets were shifted to the southern entrenchment as the rest of the Marines headed through the jungle for a few turns to attack from the southern flank of the entrenchment. Again, more luck was with the Marines, and their first shots demoralized the Service outfit. Another turn of rocket and close range HMG/Infantry fire, and the Marine Captain was ready to pounce in a great assault, eliminating or pushing out the last of the survivors, and forcing the Japanese officer to depart. First target hex conquered. In the north, the surviving Japanese infantry failed morale checks and fled back to the town, while the Marine Major made his move on the northern entrenchment. And again, luck was with them. It took 2 turns but the Japanese defenders were eliminated to a man, and the last Japanese leader was displaced to head towards the troops slowly regaining their morale in the town, too late for them to do any good. Second target hex taken, and not a single Marine loss. Great game, and right up to the last turn for that last entrenchment hex to fall. |
||||||||||||
| 0 Comments |