

| Total | |
|---|---|
| Side 1 | 2 |
| Draw | 0 |
| Side 2 | 1 |


| Overall Rating, 4 votes |
|---|
|
4
|
| Scenario Rank: --- of 913 |
| Parent Game | Road to Dunkirk |
|---|---|
| Historicity | Historical |
| Date | 1940-05-29 |
| Start Time | 15:00 |
| Turn Count | 16 |
| Visibility | Day |
| Counters | 64 |
| Net Morale | 0 |
| Net Initiative | 1 |
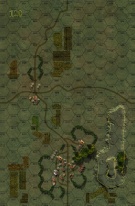
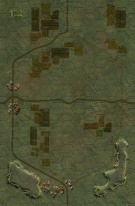
| Maps | 2: 120, 122 |
| Layout Dimensions | 56 x 43 cm 22 x 17 in |
| Play Bounty | 158 |
| AAR Bounty | 171 |
| Total Plays | 3 |
| Total AARs | 1 |
| Battle Types |
|---|
| Inflict Enemy Casualties |
| Urban Assault |
| Conditions |
|---|
| Smoke |
| Terrain Mods |
| Scenario Requirements & Playability | |
|---|---|
| Road to Dunkirk | Base Game |
| Introduction |
|---|
|
The 1st Welsh Guards supported by Brigadier C.W. Norman’s 1st Light Armoured Reconnaissance Brigade set out for Rexpoede in response to German threats against the western flank of the corridor through which the BEF was withdrawing to Dunkirk. Roads choked by transport and streams of soldiers seeking the coast made it a difficult trip. The battalion held a triangle-shaped position, the base of which faced south-west. |
| Conclusion |
|---|
|
In the early afternoon, German tanks and infantry attacked West Cassel from the south-west, scattering the defenders. For a time troops desperately fighting from the grounds of a moated chateau behind the village church held off the Germans. Tanks entered the village after a heavy mortar barrage, surrounding and pinning down the British in and around the chateau. Meanwhile in Vijfweg, the Guards stemmed the tide with the help of light tanks and a battery of Royal Horse Artillery. The 1st Fife and Forfarshire tanks faced the panzers at short range while the Bren carrier crews used their anti-tank rifles. At about 1800 the defenders were ordered to move to the coast for evacuation. |

|
|
|---|
| AFV Rules Pertaining to this Scenario's Order of Battle |
|---|
|
| Army |
|---|
|


| Heer |
|---|
|


| 5 Errata Items | |
|---|---|

|
All Bren carriers should have a movement value of 7. (Shad
on 2010 Dec 15)
|

|
Two British infantry have their full strengths printed on the back. They should both be "2-3" when reduced. (Shad
on 2010 Dec 15)
|

|
Ignore the direct fire values. (Shad
on 2010 Dec 15)
|

|
The reduced direct fire value of the Heer HMG became 5-5 starting with Fall of France. (plloyd1010
on 2015 Jul 31)
|

|
The morale and combat modifiers of German Sergeant #1614 should be "0", not "8". (Shad
on 2010 Dec 15)
|
| We kind of, sort of think I won | ||||||||||||||
|---|---|---|---|---|---|---|---|---|---|---|---|---|---|---|
This game was played over 5 sessions using my rules rewrite and playing double-blind. Victory was determined by a relative point count of town control and body counts. My opening was fairly conventional. A motor infantry company with armor support secured the large town on board 120 while my main force moved against the towns in the center of the map. The watergands forced some channelization, but not really detrimental. The large 120 town was quickly secured as I deployed for the real fight. As I moved on the 2 small towns in the middle of the map. The Fife and Forfar's tanks engaged my light panzers by extended assault The battle lasted for 3 turns as the PzII's 20mm cannon eventually prevailed. My infantry closed on the towns. There was some disruption due to harassment by the field piece in the northern town. The first hex of the small 120 fell quickly, but the Welsh Guards rallied in the second and held their ground. The Welshmen deployed to prevent the small 122 town from being surrounded. I created a large fire group to attempt to subdue it. Those attempts were largely unsuccessful due to an inspiring officer (turned out to be a lieutenant) in the town. The bren, with the major riding, knocked out a PzI with a lucky roll and misinterpretation of the rules. I sent an couple infantry platoons on a run to the large 122 town in an attempt to disrupt the field gun firing from it. The limey major, with his bren, tried to run around into my back field. The watergands restricted his approach and I was able to block him on a road that ran between the obstacles. My fire line against the small 122 town was not having the desired effect. When the opportunity presented itself, I ran infantry in between the small towns of 120 and 122. Enough force made it in good order to start prying the Welshmen out of their positions. Meanwhile, the larger 122 town was revealed to be better garrisoned than expected and my infantry was run off. Eventually, and rather belatedly, I began my infantry assaults against the center town hexes. It was not quite enough to take them. I wasn't expecting to get the town on 122, but the last hex on 120 was a disappointment. In the end I had 24 points to my opponents 19 (after redress of the misinterpreted rule). A victory by the slimmest margin and open to interpretation. |
||||||||||||||
| 0 Comments |