
|
Situation Under Control Romanian Soil #5 |
||
|---|---|---|
|
(Attacker)
Germany
(Attacker) Romania |
vs | Soviet Union (Defender) |
| Formations Involved | ||
|---|---|---|
| Germany |  |
Grossdeutschland Division |
| Germany |  |
Grossdeutschland Fusilier Regiment |
| Germany |  |
Grossdeutschland Panzer Regiment |
| Romania |  |
7th Infantry Division |
| Soviet Union |  |
202nd Rifle Division |

| Total | |
|---|---|
| Side 1 | 2 |
| Draw | 1 |
| Side 2 | 0 |


| Overall Rating, 3 votes |
|---|
|
4
|
| Scenario Rank: --- of 913 |
| Parent Game | Romanian Soil |
|---|---|
| Historicity | Historical |
| Date | 1944-04-10 |
| Start Time | 07:30 |
| Turn Count | 30 |
| Visibility | Day |
| Counters | 160 |
| Net Morale | 1 |
| Net Initiative | 2 |
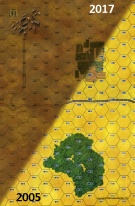
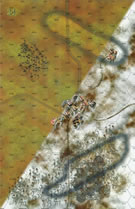
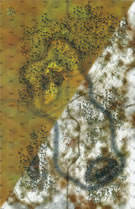
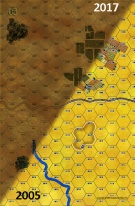
| Maps | 4: 1, 24, 25, 5 |
| Layout Dimensions | 112 x 43 cm 44 x 17 in |
| Play Bounty | 191 |
| AAR Bounty | 165 |
| Total Plays | 3 |
| Total AARs | 2 |
| Battle Types |
|---|
| Exit the Battle Area |
| Urban Assault |
| Conditions |
|---|
| Off-board Artillery |
| Terrain Mods |
| Scenario Requirements & Playability | |
|---|---|
| Eastern Front | Maps + Counters |
| Elsenborn Ridge | Maps |
| Romanian Soil | Base Game |
| Road to Berlin | Counters |
| Introduction |
|---|
|
With his engineer battalion fighting for control of Targu Frumos, Gen. Hasso von Manteuffel needed to get the rest of his Grossdeutschland Division there without delay. On the morning after the engineers took the town, he brought the rest of Grossdeutschland into action along the Podu Iloaie-Targul-Frumos road. |
| Conclusion |
|---|
|
The Soviets had been so absorbed in their own offensive that they ignored the signs of an imminent counterstrike. Grossdeutschland took full advantage of this by securing Podu Iloaie and continuing westward to secure Targu Frumos, pocketing a large number of Soviets in the process. But the Germans lacked the infantry to properly seal the pocket, and throughout the night trapped Soviet troops filtered back northward through enemy lines to reach safety. |

|
|
|---|
| AFV Rules Pertaining to this Scenario's Order of Battle |
|---|
|
| Heer |
|---|
|


| Army |
|---|
|


| Army (RKKA) |
|---|
|


| 7 Errata Items | |
|---|---|
| Scen 5 |
PzVIe should be PzIVe (mike perryman
on 2011 Jan 29)
|

|
The reduced direct fire value of the Heer HMG became 5-5 starting with Fall of France. (plloyd1010
on 2015 Jul 31)
|

|
All SS PzIVH tanks should have a movement of 8. (Shad
on 2010 Dec 15)
|

|
The morale and combat modifiers of German Sergeant #1614 should be "0", not "8". (Shad
on 2010 Dec 15)
|

|
Liberation 1944's Tiger movement and armor ratings are backwards. They should be Armor 7 and Movement 5. (petermc
on 2014 Feb 14)
|

|
The reduced direct fire value in Kursk: Burning Tigers is 4-4. (plloyd1010
on 2015 Jul 31)
|

|
Kommissars never get morale or combat modifiers. Ignore misprints. (Shad
on 2010 Dec 15)
|
| Serial composition (solo play TBC ...) | ||||||||||||
|---|---|---|---|---|---|---|---|---|---|---|---|---|
As this scenario is a large one and I am not certain whether I would be up for a single, long AAR, I propose to submit this in segments to keep it palatable. I'll edit the victor/rating when completed. General: Boards set up with each long axis N-S, but set W->E as 1-24-25-5(f). f = "flipped". Soviets are in defense vs. a Grossdeutschland (GD) combined arms assault entering from east, moving west. There is also a Romanian infantry company (reduced) holding a hill on the south part of board 24, overseeing a key town. SU&S: Rom: set-up is fairly prescribed. Key elements here are: (1) forces Soviets to garrison the large town on that board; (2) forces Soviets to guard their artillery parks and/or place them to the north sides of the boards; (3) ROM units cannot spot for OBA, however. Soviet: The Soviet commander disposes of essentially six companies of infantry (3xRIF + 1xHMG each); a smattering of 2xSMG + 3xATR; and significant on and off board artillery (3x82mm + 1x120mm + 4x45mm + 3x76.2mm + 2x122mm + 2x10 OBA). Having been involved in the earlier Botosani action, the Soviet commander is aware of flanking possibilities here (see AAR). The Soviet dispositions then roughly are as follows: 3xATR in LT on board #5: intention, harry any lorry-borne GD grenadiers. 3xcompanies on the boards #25/5 border covering north flank; south flank; and road center. 2x45mm sit dug-in between the infantry to provide x-fire on the road and/or cover to board edges. 1xcompany on the large hill of board #25 blocking the road. Also 2x45mm flank the road here along with the 3x81mm mortar set. 3x76.2mm + 2xRIF (0.5Cop) occupy reverse slope near the road (so they can be withdraw if need be). I considered an "up-front" placement of the 76.2mm's to take advantage of their AT role, particularly by forcing the Germans to off-load their trucks; however, I figured that the GD commander would then choose to push an observer forward and pummel those gun positions with OBA or direct fire. It was a question of causing the GD forces an awkward 3-4 turns in the beginning for loosing 3x10 artillery shots for the remainder of the game. 2xSMG hold the hamlet on board #24 (a VC hex). 1.5xcompanies hold the town on board #24 (all VC hexes + guarding vs. ROM force). The 2x122mm guns are held in a light woods north of the road on this board. {I originally had them even farther back, but this position allows them to cover all of the GD entry-board #5. The can limber and be moved by wagons as GD advances. German: North Prong: PzIVE (note errata) + 1 company of Gren. South Prong: 4xStuGIII + 1 company of Gren (with one additional Gren platoon). Center Prong: The rest. German strategy: try to avoid initiating assaults on board #25 - at least force the Soviets to move out of their dug-in positions to initiate assaults to pay the move-adjacent OF penalty. When possible, take advantage of combined arms as a single armored unit + Gren + ldr will give as a min a 13-col + shifts for ldr + morale + AFV/INF. So make the initial assault attack work in GDs favor. Germans do not have to clear the road, the need primarily to take and hold the town hexes on board #24 and exit 20+ steps off the W. board edge. Killing Soviet steps will, I suspect, take care of itself. One early objective for the south prong force is the small 40-m hilltop on the south end of the large 20-m ridge on board #25. The Soviet player (me) either didn't note that feature or had insufficient force to occupy it: the German player (me) thinks it a good spot for a leader to control counter-battery artillery (as the Soviet positions initially will not be spot-able. TBC ... |
||||||||||||
| 0 Comments |
| Goin' Fishin' | ||||||||||||
|---|---|---|---|---|---|---|---|---|---|---|---|---|
My girls really love fishing. Not because they want to catch fish, but because they want an excuse to be outdoors for a few hours, talking, enjoying the breezes, loving the scenery without any guilt because they are "fishing". Bait is an integral part of that process. If you go fishing without bait you lose the illusion that you are trying to catch anything and the guilt comes back. As a result, the girls will spend a lot of time looking at lures, spinners, specially "scented" hooks, etc. You see the bait has to be selected with a particular prey in mind so getting small mouth bass bait when looking for trout is a bad choice, apparently. In this scenario, the prey is the 202nd Infantry Division and the bait is an understrength company of the Romanian 7th Division. If you are the Russians don't take the bait! I let the Russians try to wipe out the Romanians and found that 1) The Romanians can give some punishment and 2) It leaves you totally out of position when the GD division tops the rise and looks down on you. I tried, I really did, to set up a tank trap for GD along the top of the hill but the crossfire setup was too obvious along the road so the Germans just skirted to the south of the road, crushed the emplacements there with infantry and OBA and then rushed the town. By turn 13 the Germans were already in the town, having met the Soviet losses condition. However, the Germans had taken 10 step losses already and were gambling their armor in unsupported town assaults. Immediately after that, however, the dice turned on the Soviets and in the next 6 turns the Soviets lost 28 steps to the German loss of 2 steps (both of which were to OBA). The Soviets must have had a least 15 AT shots of 0 or -1 without a hit during that period. At the end, the Soviets were reduced to a smallish mass of demoralized men trying to find woods off the road and the Germans were bringing the trucks up to speed their trip to the next town (Targu Frumos) where the engineers were fighting. This was a German major victory and it is likely to be a German victory anyway but with care the Soviet player can probably cause enough losses to take one victory condition away and with a determined defense which is not caught up in trying to kill Romanians who have no part in the ultimate victory conditions, the Soviets can delay the Germans enough to make the "exit" condition difficult to attain. Realize that the key is the town hexes on Board 24 and plan your defense accordingly. Well, of course, you say, its obvious that you should ignore the Romanians. They can't spot for the German OBA so their position while annoying is no more than that. Screen them and concentrate on the Germans if you want to win. Correct, they are simply bait to get the Soviets on the wrong foot. On the other hand, if you want to understand how GD was so effective in this battle it helps to play the game the way the Soviets fought the battle. IF, the Soviets take the bait, they will be, and should be, slaughtered. Great presentation of the vulnerability of a Soviet infantry force on the assault to a flank attack by a mobile force. Once you set the hook with the Romanians that fish is caught. On the other hand, as an enjoyable experience for the Soviet player, this one presents some problems. Kind of a mixed bag although very instructive. I toyed with a "3" due to the lack of success of the Soviets but I ultimately had to give it a "4" due to the simulation value and the tactical situation. If you want to play the game like it happened and want the Soviet player to have a reason to hit the Romanians I would suggest that the Soviets can reduce the German number of victory conditions by 1 if they are able to eliminate 5 steps of Romanians. This is harder than it looks but will at least give the Soviet player a reason to attack. |
||||||||||||
| 0 Comments |