
|
Following On River Fleets #6 |
||
|---|---|---|
| (Attacker) Austria-Hungary | vs |
Romania
(Defender)
Serbia (Defender) |
| Formations Involved |
|---|

| Total | |
|---|---|
| Side 1 | 1 |
| Draw | 0 |
| Side 2 | 0 |


| Overall Rating, 1 vote |
|---|
|
3
|
| Scenario Rank: --- of 913 |
| Parent Game | River Fleets |
|---|---|
| Historicity | Alt-History |
| Date | 1940-09-11 |
| Start Time | 04:45 |
| Turn Count | 22 |
| Visibility | Day |
| Counters | 27 |
| Net Morale | 0 |
| Net Initiative | 1 |
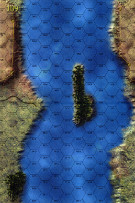
| Maps | 1: 109 |
| Layout Dimensions | 43 x 28 cm 17 x 11 in |
| Play Bounty | 160 |
| AAR Bounty | 171 |
| Total Plays | 1 |
| Total AARs | 1 |
| Battle Types |
|---|
| Inflict Enemy Casualties |
| River Control |
| Conditions |
|---|
| Terrain Mods |
| Scenario Requirements & Playability | |
|---|---|
| River Fleets | Base Game |
| Introduction |
|---|
|
Recent overflights of the Iron Gates region had confirmed that a few Serbian boats had managed to slip downstream to join forces with the Romanian river fleet in a move apparently designed to deny the Austro-Hungarians access to the Black Sea. What exactly the Austro-Hungarians would do if they reached the Black Sea wasn't too clear but one thing was certain, that the accumulation of sufficient strength downstream could represent a force sufficient to disrupt the Austro-Hungarian plans to deal with Serbia. The same overflight indicated that, for some reason, the Serbian boats had anchored near Berzasca, while the Romanians were based out of Orsova. The 20 miles of swiftly-moving river seemed to provide the Austro-Hungarian boats with the opportunity to catch the Allied fleet divided and vulnerable. On the morning of the llth of September, Trapp released a large portion of the fleet to scour the middle reaches of the Iron Gates and dispatch the Serbian portion of the fleet. While air supremacy inhibited the Allied reconnaissance craft, it should be noted that the Iron Gates were in their entirety located within Allied territory. It was no surprise when the phone rang in the middle of the night in Orsova and the Romanian fleet slipped out for a rendezvous with the Serbs shortly thereafter. |
| Conclusion |
|---|
|
The action at Berzasca was a logical follow-on operation to the capture of the western edge of the Iron Gates. It was highly supported by the staff in Pola. Trapp subsequently mentioned that he should have known it was a bad idea for that reason alone. Trapp wrote later, "Every operation urged by Pola during that time was overborne by hubris and a keen misunderstanding of the realities along the Danube." |

|
|
|---|
| AFV Rules Pertaining to this Scenario's Order of Battle |
|---|
|
| Kaiserliche undKkönigliche Kriegsmarine |
|---|
|


| Forțele Navale Române |
|---|
|


| Army |
|---|
|


| River Fleets #6 | ||||||||||||
|---|---|---|---|---|---|---|---|---|---|---|---|---|
Played this scenario using the Illumination Optional Rules which benefited both sides when a star shell was used, put the fighting at range instead of close quarters, one hex. Both sides have similar firepower the big difference was the armor values of the two sides, advantage went to the AH monitors who took lees damage than their Serb and Romanian counterparts. This battle played fast. |
||||||||||||
| 0 Comments |