|
Polieni Town Panzer Lion #4 |
||
|---|---|---|
| (Defender) Germany | vs | Soviet Union (Attacker) |
| Formations Involved | ||
|---|---|---|
| Germany |  |
24th Panzer Division |
| Germany |  |
97th Grenadier Regiment |
| Germany |  |
Kampfgruppe W |
| Soviet Union |  |
15th Motorized Rifle Brigade |
| Soviet Union |  |
16th Tank Corps |
| Soviet Union |  |
3rd Guards Airborne Division |

| Total | |
|---|---|
| Side 1 | 0 |
| Draw | 0 |
| Side 2 | 1 |
| Overall Rating, 1 vote |
|---|
|
3
|
| Scenario Rank: --- of 913 |
| Parent Game | Panzer Lion |
|---|---|
| Historicity | Historical |
| Date | 1944-05-02 |
| Start Time | 12:00 |
| Turn Count | 24 |
| Visibility | Day |
| Counters | 197 |
| Net Morale | 1 |
| Net Initiative | 1 |
| Maps | 4: 10, 11, 25, 9 |
| Layout Dimensions | 86 x 56 cm 34 x 22 in |
| Play Bounty | 207 |
| AAR Bounty | 171 |
| Total Plays | 1 |
| Total AARs | 1 |
| Battle Types |
|---|
| Hill Control |
| Rural Assault |
| Urban Assault |
| Conditions |
|---|
| Off-board Artillery |
| Reinforcements |
| Terrain Mods |
| Scenario Requirements & Playability | |
|---|---|
| Battle of the Bulge | Maps |
| Eastern Front | Counters |
| Elsenborn Ridge | Maps |
| Panzer Lion | Base Game |
| Red Warriors | Counters |
| Road to Berlin | Counters |
| Introduction |
|---|
|
Despite their meager armor, Kampfgruppe W was expected to secure Facuti and also relieve the pressure on Polieni (where a battalion of the 97th Infantry Regiment was struggling to hang on). This involved driving the newly arrived guardsmen off Hill 192, where they were already in the process of creating a strongpoint. With all of his armor assigned to securing Facuti, Colonel von Waldenburg ordered all available artillery to support the northern effort. |
| Conclusion |
|---|
|
Upon arriving the Germans decided that Hill 192 was already too strong to take without armor. Therefore orders were issued to stop the enemy from reinforcing the hill or Facuti itself. When the rest of 16th Tank Corps attempted to answer the 109th Tank Brigade's cry for help they were ambushed by these forces in addition to the victorious panzers at Facuti. The remnants retreated until reaching the relative safety of Hill 192 for the night. |
| AFV Rules Pertaining to this Scenario's Order of Battle |
|---|
|
| 7 Errata Items | |
|---|---|

|
The reduced direct fire value of the Heer HMG became 5-5 starting with Fall of France. (plloyd1010
on 2015 Jul 31)
|

|
All SS PzIVH tanks should have a movement of 8. (Shad
on 2010 Dec 15)
|

|
The morale and combat modifiers of German Sergeant #1614 should be "0", not "8". (Shad
on 2010 Dec 15)
|

|
All SPW 251s have an armor value of 0. (Shad
on 2010 Dec 15)
|

|
The movement allowance on the counters in Airborne is misprinted. It should be "3." (rerathbun
on 2012 Jan 30)
|

|
The reduced direct fire value in Kursk: Burning Tigers is 4-4. (plloyd1010
on 2015 Jul 31)
|

|
Kommissars never get morale or combat modifiers. Ignore misprints. (Shad
on 2010 Dec 15)
|
| Soviets in a Landslide | ||||||||||||
|---|---|---|---|---|---|---|---|---|---|---|---|---|
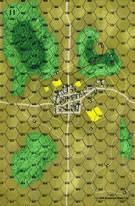
My fifth Panzer Lion scenario en route to my ribbon. The Germans start with 6 VP hexes in their control while the Soviets start with 21. To have any chance at all to win, the Germans must prevent 15 Soviet steps from exiting south on map 9 (15 VPs) and take control or at least contest several 40-meter hill hexes of board 11. The Germans on map 10 (NE) deploy west of the town as they will need to move forward to help contain the Soviets. The other group which enter on board 11 quickly spread out to prevent the Soviet reinforcements from having a quick path south. The Germans scored a few hits with their OBA early on the game and had enough time to move into position as the Soviet reinforcements only arrived on turn 5. Unfortunately, this was a thin line with very few units in reserve. The Soviets decide to push the infantry forward on turn 6 to shut down the German's powerful AT guns, helped by artillery bombardment. The guns are silenced one by one and on turn 15 the Soviets make a big push forward. They quickly punch a huge hole in the German defenses and it's quickly over; the Soviets are 50-60 points ahead by turn 21. Soviet Major Victory. While I enjoyed the scenario and rated it a "3", this is a scenario which I believe the Germans cannot win. The Soviets have the stronger force and they control enough victory point hexes at the start to win by 15 VPs if there were no casualties and no unit escaped south; just too big an advantage. |
||||||||||||
| 0 Comments |

 PzLi003


