
|
Samurai Stalingrad Power of the East #12 |
||
|---|---|---|
| (Defender) Japan | vs | Soviet Union (Attacker) |
| Formations Involved | ||
|---|---|---|
| Japan |  |
72nd Infantry Regiment |
| Soviet Union |  |
127th Rifle Regiment |
| Soviet Union |  |
149th Motorized Rifle Regiment |
| Soviet Union |  |
24th Motorized Rifle Regiment |
| Soviet Union |  |
293rd Rifle Regiment |
| Soviet Union |  |
5th Rifle Regiment |

| Total | |
|---|---|
| Side 1 | 2 |
| Draw | 0 |
| Side 2 | 0 |


| Overall Rating, 3 votes |
|---|
|
2.67
|
| Scenario Rank: --- of 913 |
| Parent Game | Power of the East |
|---|---|
| Historicity | Historical |
| Date | 1939-08-28 |
| Start Time | 18:00 |
| Turn Count | 15 |
| Visibility | Day & Night |
| Counters | 141 |
| Net Morale | 2 |
| Net Initiative | 4 |
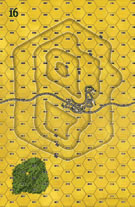
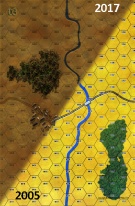
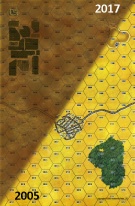
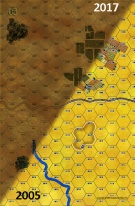
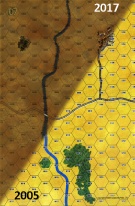
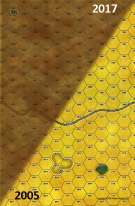
| Maps | 6: 16, 3, 4, 5, 7, 8 |
| Layout Dimensions | 86 x 84 cm 34 x 33 in |
| Play Bounty | 206 |
| AAR Bounty | 165 |
| Total Plays | 2 |
| Total AARs | 2 |
| Battle Types |
|---|
| Hill Control |
| Inflict Enemy Casualties |
| Conditions |
|---|
| Terrain Mods |
| Scenario Requirements & Playability | |
|---|---|
| Eastern Front | Maps + Counters |
| Guadalcanal | Counters |
| Power of the East | Base Game |
| Road to Berlin | Counters |
| Introduction |
|---|
|
Several Japanese attempts to break through the encirclement failed, but despite their hopeless situation several Japanese formations in the cauldron continued to offer fanatic resistance. The last pocket of defense held Hill 739 in the center of the defense that the Russians named "Remizov Height" after a major who had been killed there during a previous battle. Since the defenders refused to give up, it had to be taken by force. But this time neither aircraft nor indirect artillery fire could support the attackers because of the possibility of hitting their own troops. Only after a savage fight that lasted throughout the whole day and into the evening hours were all the gutsy defenders eliminated and the Red Banner set atop the hill. Thus ended all organized Japanese resistance in the disputed area between Nomonhan and Khalkhin-Gol. |
| Conclusion |
|---|
|
The Khalkhin-Gol conflict remains almost unknown in the West; yet it is hard to overestimate its effects on world history. The "lessons" of Nomonhan led to a complete re-orientation of the Japanese expansion policy, shifting towards the southern direction, and Singapore, Dutch East Indies and Pearl Harbor where resistance was less stout. Their drubbing at Nomonhan also left the Japanese leadership reluctant to fulfill Hitler's demands to attack the Soviet Union from the east. This allowed Stalin to divert Siberian elite troops from the Far East to the Battle of Moscow in the most critical moment of the war in winter 1941, thus contributing significantly toward the foundation for the Allied victory in the Second World War. |

|
|
|---|
| AFV Rules Pertaining to this Scenario's Order of Battle |
|---|
|
| Imperial Japanese Army |
|---|
|


| Army (RKKA) |
|---|
|


| 5 Errata Items | |
|---|---|
| Scen 12 |
The Japanese "2 x 82mm" should be 2 x 81mm (mortar). (rerathbun
on 2011 Aug 21)
|
| Scen 12 |
In the Order of Battle and Special Rule 5, the Soviet "OT-26" should read "OT-130." (rerathbun
on 2011 Aug 21)
|

|
The reduced direct fire value in Kursk: Burning Tigers is 4-4. (plloyd1010
on 2015 Jul 31)
|

|
Kommissars never get morale or combat modifiers. Ignore misprints. (Shad
on 2010 Dec 15)
|

|
The Direct Fire values should be in red (flame unit). (rerathbun
on 2011 Aug 20)
|
| Power Of The East, scenario # 12: Samurai Stalingrad | ||||||||||||
|---|---|---|---|---|---|---|---|---|---|---|---|---|
Posting #1 *Power of The East was back up on the playing table tonight as it’s nice to finally be playing more Nomonhan scenarios. This is the last scenario in the supplement and is the end of the Japanese attempt to control this area from the Soviets. *In this scenario the Japanese are surrounded on just about all sides and just need to holdout 15 turns with one unit that is undemoralized and they win, the opposite is true for the Soviets. The Soviets cannot wait until the visibility goes down to one hex on turn 12 to move in close as there is only 15 turns total but they have more then twice the forces and on board artillery, armor and those special OT130 Flamethrower tanks with that 3 column modifier but still the high morale of the dug-in Japanese and time factor will make this a bloodbath in short order. The Soviet Artillery must spot their own targets so must move close as the visibility goes down. This should be interesting. Posting #2 *It’s going kind of like I thought it might. The Soviets took a lot of lumps trying to close with the Japanese, now they are using their numbers to assault the higher morale Japanese and paying a large price but time is not on their side so casualties do not matter. The OT130 Flamethrower tanks have a nice punch but usually become demoralized themselves after the first assault and have to roll for flame-fuel every time they assault. The Soviets have a lot of units to feed into the assaults but still, do they have enough units and enough time? Some more game play will tell. Posting #3 *I thought this would be a slam-dunk for the Soviets but it turned out to bloody affair. Attacking with tons of weak morale Russian against high morale Japanese is difficult, especially once your flamethrower tanks loss steps, run out of fuel or limp off demoralized. The Japanese get a column modifier in assaults for higher morale, being Japanese, having a leader usually and in one case with an engineer unit as well. Also, the Japanese get fire-first in assaults for being dug-in. The Soviet artillery is only useful when their units are not in assaults and they have to spot the enemy units themselves, so once the visibility decreases all those units become useless. *I kept feeding Soviet units into the assaults hexes right away but maybe I should of held off on the assaults a few more turns and just fired adjacent a few more turns but with only 15 turns I felt under pressures to assault right away in order to eliminate or demoralize all the Japanese units within that time period. With my weak Soviet morale units the major attacks became very disorganized and scattered. The end to my surprise was a Japanese victory. I think if this was a 25 turn scenario the Soviets would win but this is what makes this scenario interesting, you cannot just sit back and pound your targets and then assault, you have to go right at it. Next time, I’ll concentrate on one side with the Soviets at a time and hit the other side with artillery but still, I am uncertain even then who would win. A strong 3 on this one! |
||||||||||||
| 0 Comments |
| No guns! This is a knife fight. | ||||||||||||||
|---|---|---|---|---|---|---|---|---|---|---|---|---|---|---|
Pertinent house rules: Presumed crests, fast mechanized movement, no hill modifier when firing on lower elevations, & improved direct bombardment accuracy.We played with anonymous leaders too. The Japanese deployed mostly on the southern peak on board 16. The exceptions being the reduced platoons, these were deployed as pickets to keep Soviet deployment away from base of the hills. The Japanese mortars were deployed west of the crest of the southern peak. The Soviets deployed around the hill as expected. I made a blunder deploying the artillery of the south-eastern Soviet force 10 hexes away from the Japanese mortars. The battle opened with the Japanese pickets pulling back to the main position and the Soviets advancing to the hill. The Japanese mortars began bombarding the 76mm guns of the 5th Rifle Regiment a couple lucky rolls destroyed 2 batteries and rendered the remaining useless for a a few more turns. The prohibition on Soviet indirect fire prevented retaliation. Otherwise the Soviet proceeds up the side of the hill unimpeded. The first Japanese response occurs as the Soviets reach the pass on board 16. Soviet tanks deploy on the end of the Japanese line and begin firing. Luck in a resulting morale check demoralized on Japanese defender, and disrupted the other. The tanks, being the only force adjacent, jump in to assault the corner of the Japanese defenses. Luck turns against the Russians as first fire from the defenders demoralizes all 3 tanks. The armor is successfully extracted on the next turn and is replaced by an infantry force led by one Lt. Pavlov. While a competent officer (10-1-1), he and his company never take the hex. The arms of the attack wrap around the hill. The eastern side breaks into the Japanese position. The western side is gaining a lodgement but otherwise is not making much progress otherwise.The game ends with Soviets having taken heavy casualties, but still far from having annihilated the Japanese interlopers. The most serious problem for the Soviets being the lack of artillery effectiveness and a severe time constraint. If the Soviets had been allowed to play to their strengths, rather than piling Russian bodies in front of Japanese foxholes, the outcome might have been different. |
||||||||||||||
| 0 Comments |