
|
Battle of Baintsagan Power of the East #6 |
||
|---|---|---|
| (Attacker) Japan | vs |
Mongolia
(Attacker)
Soviet Union (Attacker) |
| Formations Involved | ||
|---|---|---|
| Japan |  |
71st Infantry Regiment |
| Japan |  |
72nd Infantry Regiment |
| Mongolia |  |
6th Cavalry Division |
| Soviet Union |  |
11th Tank Brigade |
| Soviet Union |  |
24th Motorized Rifle Regiment |
| Soviet Union |  |
7th Armored Car Brigade |
| Soviet Union |  |
8th Armored Car Brigade |

| Total | |
|---|---|
| Side 1 | 2 |
| Draw | 0 |
| Side 2 | 0 |


| Overall Rating, 3 votes |
|---|
|
3.67
|
| Scenario Rank: --- of 913 |
| Parent Game | Power of the East |
|---|---|
| Historicity | Historical |
| Date | 1939-07-03 |
| Start Time | 04:00 |
| Turn Count | 28 |
| Visibility | Day & Night |
| Counters | 176 |
| Net Morale | 1 |
| Net Initiative | 2 |
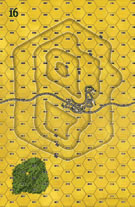
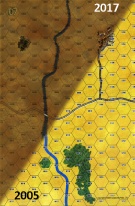
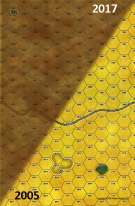
| Maps | 3: 16, 7, 8 |
| Layout Dimensions | 84 x 43 cm 33 x 17 in |
| Play Bounty | 203 |
| AAR Bounty | 171 |
| Total Plays | 2 |
| Total AARs | 1 |
| Battle Types |
|---|
| Bridge Control |
| Exit the Battle Area |
| Inflict Enemy Casualties |
| Meeting Engagement |
| River Crossing |
| Conditions |
|---|
| Off-board Artillery |
| Reinforcements |
| Terrain Mods |
| Scenario Requirements & Playability | |
|---|---|
| Eastern Front | Maps + Counters |
| Guadalcanal | Counters |
| Power of the East | Base Game |
| Road to Berlin | Counters |
| Introduction |
|---|
|
After the destruction of Azuma's force, only aerial attacks continued in the Nomonhan area throughout the whole of June. But the Soviet build-up continued west of the Khalkhin-Gol River. Not willing to admit defeat, the Japanese high command decided one time more to evict the Russians. Once again the main strike would come from the north, but this time west of the river thus violating the Mongolian border even from the Japanese point of view. Initially the several regiments of Major General Kobayashi's task force easily overwhelmed the Mongolian cavalry screening units and successfully stormed the Baintsagan Hill on the west bank of Khalkhin Gol after crossing the river via a constructed pontoon bridge. The newly arrived Soviet commander, the later Hero of the Great Patriotic War, Georgy Zhukov threw all armored reserves available against the Japanese bridgehead from three sides without waiting for the infantry. A furious meeting engagement ensued. |
| Conclusion |
|---|
|
Once again the Japanese expected an easy victory and once again found themselves completely defeated by a well-led and determined Soviet force. The Soviet high command reacted immediately to the Japanese foray, sending the first tank units available into combat without any infantry support. The modern Soviet tanks proved far superior to anything the Japanese could throw against them, forcing the Japanese to retreat back across the river suffering heavy casualties. The single pontoon bridge also proved insufficient to support an offensive of such scale, and by July 5th the last Japanese soldiers were dislodged from the west bank. |

|
|
|---|
| AFV Rules Pertaining to this Scenario's Order of Battle |
|---|
|
| Imperial Japanese Army |
|---|
|


| Army |
|---|
|


| Army (RKKA) |
|---|
|


| 3 Errata Items | |
|---|---|
| Scen 6 |
Errata, Power of The East. *One more small one but on scenario #6, Battle of Baintsagan, the second Japanese victory condition listed should be... west of the river.... not south of the river, other wise it wouldn't make sense. (JayTownsend
on 2011 Sep 18)
|
| Scen 6 |
Victory point condition for Japanese units to exiting the south edge of Board 8, should be "... Japanese unit which manages to exit the south edge of Board 8". (plloyd1010
on 2013 Apr 28)
|

|
The reduced direct fire value in Kursk: Burning Tigers is 4-4. (plloyd1010
on 2015 Jul 31)
|
| Power of The East, scenario #6: Battle of Baintsagan | ||||||||||||
|---|---|---|---|---|---|---|---|---|---|---|---|---|
Power of The East, scenario #6: Battle of Baintsagan Errata, Power of The East. *One more small one but on scenario #6, Battle of Baintsagan, the second Japanese victory condition listed should be... west of the river.... not south of the river, other wise it wouldn't make sense. Posting #1 *This looks like the Soviets have too many forces at first but these are spread out into four different reinforcement groups, coming on in mostly different locations on the map on different turns as well. The only Soviet forces that starts on the map, are: Elements of the 6th Mongolian Cavalry Division with a FAI armored car as well. The Japanese must dispense the Mongolians, get a pontoon Bridge across the river and achieve some victory conditions or set them up to be achieved before too my Soviet reinforcements arrive, and the first group arrives on turn #5, which is all armor, so the Japanese tanks & AT guns with have their hands full. After that, turns 13, 14 & 16 brings on even more Soviet forces of all types. The first four turns are night. This should be a fun scenario. Posting #2 *After the Japanese pretty much wipeout the Mongolian Cavalry units, they went forward and setup a pontoon Bridge and had one little scare when a Mongolian FAI armored car took a shot at the Japanese Engineer unit setting up the pontoon bridge, but soon it head to the rear demoralized and missing a step of AC’s. *My strategy is now to get as many Japanese units as possible to the West side of the river, as that is where the action and victory points are and if the Bridge/Engineer unit is destroyed before the Japanese cross, the game is over. So I have speed up this process, but the Soviet first reinforcements of 10 units of BT-5’s have entered from the North, which equals 50 tanks. The Japanese have Type 95, Type 89 tanks to block this and some Infantry as well. The Type 94’s will have to try to stay out of this battle, as they no AT values or gun. *The Type 95’s are a stronger tank than the bigger Type 89’s which has the same fire-power and the Soviet BT-5’s have a much better gun but also a weak armor defensive value. Both sides lose some armor and the Soviets got too close to a stack of three Japanese Infantry units plus a leader which put a serious hurt on that group of Soviet armor. *Next around will be stage two of the armor battle, and it has to happen before turn 13 where large groups of Soviet Infantry start coming on. A few units of Japanese Infantry are trying to flank the tank battle and head west and exit for some victory points, so the Soviets will have to disengage some of the Armor and head that off. Posting #3 *Soviet Turn 13 Infantry reinforcements have arrived and none too soon, as BT-5’s are starting to get fewer in number, too many got mixed up at close range with Japanese Infantry, AT guns and armor and the few that pulled out to block the Japanese force heading west have too much to chase, as one Type 94 light tank unit has already exited the map and a whole convey of the Japanese army not involved with trying to finish off the Soviet BT-5’s still over on the Eastern side, are headed down the dirt-road to exit for victory. *Fortunately the one step of Mongolian FAI armored cars and three steps of Soviet BT-5’s have put a road block on the dirt road and the Soviet Infantry loaded in trucks is head there is well.
Posting #4 *After turn 16, where the Soviets last reinforcement of BT-7’s, Ba-10M’s, Ba-6’s, 45mm AT guns, 76.2mm guns and more Infantry & HMG entered from the West side of board nine, this plugged the Japanese exit points, but not before another 4 units or 8 steps of Japanese Infantry exited the west side. Turns 17-18 see the battlefield really strung out from the dirt road on board #8, through board #16 and on to board #7 at the Pontoon Bridge. Now The Soviet must destroy as many Japanese steps as possible and maybe capture the pontoon bridge to get some points back and not lose too many of their own. *The major problem for the Japanese; is defending with a weaker force, from those that exited or were eliminated earlier. The Japanese do not have very much armor left but do have a little on board artillery but the Soviet now have both on-board & off board artillery. Still too close to call at this point! Posting #5 *The Japanese are now having to fall back from the map board #8 and establish a new position on the 20 & 40 meter hills on map 16 and this new position is shaping up pretty good considering the mess a few turns ago. They also have a smaller group on map 7 around the pontoon bridge and a few stragglers scattered here and there but Soviets are also forming a human wave of Infantry, support weapons and armor that is looking pretty formative as well. *This should be the last phase of the battle, for control of territory and eliminating enemy units for the finally victory count. I have not been keeping track, because I want to play these last 6 turns or so not knowing, so playing both sides will be much more interesting. The only armor the Japanese have left is one step of Type 89. Posting #6 *The Final report! The Japanese and Soviets kind of stagnated in the hills around map 16 and it became difficult to force the issue either way. The Soviet Flank units tried to hit the pontoon bridge engineer unit on map 7, toward the rear of the battle but the Japanese engineer had the support of one Infantry unit, one 37mm AT gun and the last Type 89 tank unit which was taken out by a Soviet BT-7 and they did disrupt the Japanese Engineer unit but not in time to do anything about it, no victory points for taking the pontoon bridge this time. *Now the complicated part, to see who won this battle, the Japanese only get points for total destroyed Soviet units, not steps, and it doesn’t mention Mongolian into the factor either, where the Soviet get points for Japanese step losses and control of the pontoon bridge. The Japanese also get points for units that exited map 8, units on maps: 8, 16 & 7, but as I stated before, on map 7 it should be west of the river, not south of the river, as the river runs north to south. The victory conditions also didn’t mention if Japanese counter demoralized or not count for being on the mentioned maps at the end of play. *So according to the point totals, the Japanese won by 26 points, giving them a Major Victory in this effort but by looking at the map, it sure doesn’t look like a Japanese victory. Two errors the Soviets made, early in the battle, in stead of just blocking with the large BT-5 tank force, they engaged without infantry and lost too many units, which don’t count as step losses but still count as triple when a whole unit is lost, thus allowing too many Japanese unit, the opportunity to escape early. The second mistake was not coordinating better Soviet attacks to remove the Japanese units from the hill tops on map 16. *A fun scenario to play for sure and I know I can play better as the Soviets next time. I would rank this as either a 4 or 5 out of 5, just the victory condition error has me debating it but most likely I’ll give it a 5 on the PG-HQ, as I love the subject. |
||||||||||||
| 0 Comments |