
|
Nomonhan Power of the East #5 |
||
|---|---|---|
| (Attacker) Japan | vs |
Mongolia
(Defender)
Soviet Union (Defender) |
| Formations Involved | ||
|---|---|---|
| Japan |  |
23rd "Sunrise" Infantry Division |
| Mongolia |  |
6th Cavalry Division |
| Soviet Union |  |
11th Machine-gun Battalion |
| Soviet Union |  |
149th Motorized Rifle Regiment |
| Soviet Union |  |
175th Artillery Regiment |
| Soviet Union |  |
36th Motorized Rifle Division |

| Total | |
|---|---|
| Side 1 | 1 |
| Draw | 0 |
| Side 2 | 2 |


| Overall Rating, 4 votes |
|---|
|
3.5
|
| Scenario Rank: --- of 913 |
| Parent Game | Power of the East |
|---|---|
| Historicity | Historical |
| Date | 1939-05-28 |
| Start Time | 17:00 |
| Turn Count | 18 |
| Visibility | Day |
| Counters | 103 |
| Net Morale | 1 |
| Net Initiative | 0 |
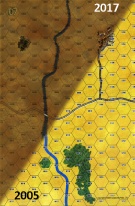
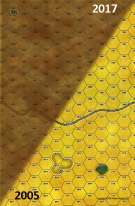
| Maps | 2: 7, 8 |
| Layout Dimensions | 56 x 43 cm 22 x 17 in |
| Play Bounty | 174 |
| AAR Bounty | 159 |
| Total Plays | 3 |
| Total AARs | 3 |
| Battle Types |
|---|
| Bridge Control |
| Inflict Enemy Casualties |
| River Crossing |
| Conditions |
|---|
| Hidden Units |
| Reinforcements |
| Terrain Mods |
| Scenario Requirements & Playability | |
|---|---|
| Eastern Front | Maps + Counters |
| Guadalcanal | Counters |
| Power of the East | Base Game |
| Introduction |
|---|
|
The next brew-up began in May 1939 with Mongolian and Manchurian cavalry skirmishing in the disputed border territory east of the Khalkhin Gol River near the village of Nomonhan. Both the Soviet Union and Japan subsequently sent regular troops to support their respective satellite. After some smaller clashes the Japanese high command recognized that a larger operation would be necessary to evict the enemy from the disputed area east of the river. They planned a company-sized diversionary attack to pin the enemy from the east, while the main attack from the north under Colonel Yamagata would destroy the Soviets. Meanwhile Lieutenant Colonel Azuma's reconnaissance group would seize the only bridge over the Khalkhin Gol River thus preventing the enemy escape. The Japanese expected an easy victory over the second-rate border infantry and Mongolian cavalry units. The Russians hoped to disappoint them. |
| Conclusion |
|---|
|
The Soviets counterattacked Azuma's force before it could reach the bridge with tanks and motorized rifle units, then surrounded and eliminated it with the help of artillery from the west bank of the river. The over-confident Japanese had neither artillery nor entrenching equipment, nor even enough ammunition with them. As a result, most of the men were wounded or killed, including Lieutenant Colonel Azuma. The Red Army had unceremoniously evicted the Japanese from the disputed territory, but it would not end there. |

|
|
|---|
| AFV Rules Pertaining to this Scenario's Order of Battle |
|---|
|
| Imperial Japanese Army |
|---|
|


| Army |
|---|
|


| Army (RKKA) |
|---|
|


| 3 Errata Items | |
|---|---|
| Scen 5 |
Change the 175th Artillery Regiment's leader to a Lieutenant. There are only 5 captains in the counter mix. (plloyd1010
on 2013 Apr 19)
|
| Scen 5 |
Daylight fades during the game, but the special rules don't mention how much from turns 9 to 12. I chose to drop from 12 to 10 on turn 9, and from 10 to 8 on turn 11, returning to the schedule as stated on turn 13. (thomaso827
on 2014 Nov 28)
|

|
The reduced direct fire value in Kursk: Burning Tigers is 4-4. (plloyd1010
on 2015 Jul 31)
|
| Power Of The East, scenario #5: Nomonhan | ||||||||||||
|---|---|---|---|---|---|---|---|---|---|---|---|---|
*This was the earliest Nomonhan clash and involved more Mongolian Cavalry, Soviets & Japanese so naturally I had to play this. *The problem with this scenario as historically the Japanese attacked with not enough forces expecting to face only border troops and Mongolians but the Soviet were ready for them with regular troops but the scenario had victory condition I thought either side could win. *The game started off pretty badly for the Japanese as believe it or not the Mongolians had a successful cavalry charge and the dug-in Soviet troops had some very nice dice rolls as the Japanese rolled up adjacent to them on both maps 7 & 8. Then the Soviets reinforcements kept coming on at a steady pace. Soon the casualty rate was about even but the Japanese also had four units that were surrounded giving the Soviets a minor victory by one point. |
||||||||||||
| 0 Comments |
| Daylight Leave and We Wanta Go Home | ||||||||||||
|---|---|---|---|---|---|---|---|---|---|---|---|---|
Japanese feign from the eastern edge while another force enters from the north, both on board 7 where the Russians have dug in and form a line, while another force has skirted the line and attempts to take a bridge. Russians dug in in depth with an engineer company dug in around the bridge and an artillery battery (2 platoons) set up west of the river. Lots of Russian reinforcements await entry from the south. As the Japanese entered from east and north, I immediately got sidetracked and started assaulting dug-in Russians. While not the goal, it seemed the samurai thing to do, that's my excuse and I'm sticking to it. This lead to the Azuma group coming in and getting hit by a cavalry charge of Mongolian cavalry, pinning him in place and exposing him to Russian artillery over open sights. With the majority of the Japanese infantry working their way down the line of dug in Russians, Azuma and his troops traded blows with the cavalry turn after turn. The Russian reinforcements were slow to come but by turn 6, all but one force had entered, and the Russian light armor headed immediately for Azuma to take up the slack as the Mongolian cavalry started to fade. Azuma's Captain and his stack of infantry faded away to nothing along with the Mongolian cav, but Azuma and the HMG and infantry he lead personally were enough to take out one step of the Russian BTs, and then as the sun started to fade, and being no closer to taking the bridge than when he first entered the board, Azuma and his survivors succeeded in breaking contact with the Russian armor and headed back to the north before running out of ammo. Game called on the end of turn 9 as neither side could achieve anything more than casualty points and those were being traded just about equally at that point. At the end, the Japanese lead 22 points to 13 for a minor victory. I'm not sure if I'm missing a piece or not but was short one Russian engineer platoon. I used one of the Rumanian Engineers knowing I had to reduce the values should it come into action. As the Japanese never made any real attempt on the bridge, they never did see action. |
||||||||||||
| 0 Comments |
| It worked last time | ||||||||||||||
|---|---|---|---|---|---|---|---|---|---|---|---|---|---|---|
This is a fairly good scenario. It looked brittle to me and events would bear that out. We were playing with 3 people, 2 on the Japanese side. Scenario modifications and pertinent house rules:
I deployed the forward group on the south side of the road. The Mongolian cavarly is in reserve, 2 hexes back incase a cavalry charge may be useful. The bridge group deploys north of the road, engineers in the river and extending east. My office corps is unimpressive apart from a 1-10-1 captain in the forward group and a 2-10-1 leutentant in the bridge group. The game opens with a random event of 2 Japanese planes hurtling out the sky at my artillery. Actually one gets lost (rolled a 1 on arrival), but the worst of the pair, a Ki-21/Sally hits hard enough to demoralize both batteries and their commander. I looks like my dark lick cloud is still hovering. I send 2 rifle platoons from the forward group to support the bridge group. Azuma & company is making a beeline toward the bridge. The Japanese relief force is angling to hit my forward group on 2 sides. Deja vous all over again! My reinforcements do not appear, and do not appear again. I lose the initiative roll (by a lot) as the Japanese move up. On the plus side, my OP fire does very well. Azuma has 3 platoons discombobulated, the relief force does even worse on the northern prong. I move some Mongolian cavalry into the potential assault hexes and cover a hole in my eastern flank with cavalry and the armored car. Now I get some very useful good luck, I win the initiative. The major (rather a wimp actually) shows what his 3 stripes are good for. I activate everyone I can in the forward group, and down the chain. The north prong is again savaged. Azuma jumps in with what is available to press the bridge, but does poorly in the exchange. (Did I just get more good luck?) The eastern Japanese force does better and assaults. The Azuma force is demoralized or disrupted (1 hex is completely demoralized). The northern relief force is pined in front of my troops. The my eastern side is barely holding on. I launch a weak counter attack at the bridge against the demoralized Japanese, doing tolerably well. I get the second reinforcement group, the first group is still AWOL. My reinforcements move in behind the bridge defenders as the first of my dug in troops are overrun in the center of the map. But things look pretty good. Azuma is on the ropes with a only an understrength company functioning. I bracket the just concurred assault hex with fire, before the attackers can disperse, some effect. A little more and the game is functional over. It is turn 9. If the Japanese are to win, they need to win early. The Russians (as usual) win by trading shots with the Japanese. I think my quite effective OP fire followed by the second punch is what sealed victory for me. The Japanese simply don't have a second chance for victory in this scenario. |
||||||||||||||
| 0 Comments |