
|
Horrors and Heroes Panzer Lehr #15 |
||
|---|---|---|
| (Defender) Germany | vs | United States (Attacker) |
| Formations Involved | ||
|---|---|---|
| Germany |  |
130th "Lehr" Panzer Division |
| United States |  |
2nd "Hell on Wheels" Armored Division |

| Total | |
|---|---|
| Side 1 | 1 |
| Draw | 0 |
| Side 2 | 0 |


| Overall Rating, 1 vote |
|---|
|
4
|
| Scenario Rank: --- of 913 |
| Parent Game | Panzer Lehr |
|---|---|
| Historicity | Historical |
| Date | 1944-07-27 |
| Start Time | 03:00 |
| Turn Count | 9 |
| Visibility | Night |
| Counters | 19 |
| Net Morale | 0 |
| Net Initiative | 1 |
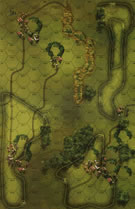
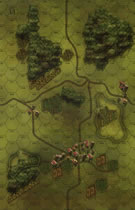
| Maps | 2: 26, 31 |
| Layout Dimensions | 56 x 43 cm 22 x 17 in |
| Play Bounty | 145 |
| AAR Bounty | 171 |
| Total Plays | 1 |
| Total AARs | 1 |
| Battle Types |
|---|
| Ambush |
| Delaying Action |
| Exit the Battle Area |
| Inflict Enemy Casualties |
| Urban Assault |
| Conditions |
|---|
| Hidden Units |
| Smoke |
| Terrain Mods |
| Illumination |
| Scenario Requirements & Playability | |
|---|---|
| Elsenborn Ridge | Counters |
| Fall of France 1 | Maps |
| Panzer Lehr | Base Game |
| Introduction |
|---|
|
Second Armored's men expected and wanted a rest after securing St. Gilles, but General Maurice Rose relentlessly pushed them southward. Enemy resistance was light and progress good but the Germans were not quite finished. As the Americans approached Le Mesnil-Herman Panzer Lehr awaited to ambush them. |
| Conclusion |
|---|
|
The German defenders were professionals who hadn't survived the carpet bombing to be displaced by a group of hastily advancing GIs. On the other hand Lieutenant George Wilson was in combat for the first time. While passing through St. Gilles he shot an enemy tank commander, and here burned his hands when a grenadier hit the tank he was riding upon with a panzerfaust. As the fight became embroiled, the supporting American tanks raced away leaving Lieutenant Wilson and the infantry on their own. He led his men, screaming and tossing hand grenades, through the night a quarter mile back to safety without losing a man. His men returned the favor by making sure he received a Silver Star for his efforts. |

|
|
|---|
| AFV Rules Pertaining to this Scenario's Order of Battle |
|---|
|
| 130th "Lehr" Panzer Division |
|---|
|


| Heer |
|---|
|


| Army |
|---|
|


| 1 Errata Item | |
|---|---|

|
All SPW 251s have an armor value of 0. (Shad
on 2010 Dec 15)
|
| Things That Go Bump in the Night |
|---|
|
Many times I have gotten up in the middle of the night and managed to walk into furniture or stumble over shoes, etc. These often leave bruises. One can only imagine the same kind of reception for the Americans as they stumble into Panzer Lehr in the middle of the night. The Americans are charged with approached Le Mesnil, a four hex town, well to the south of the American entry. If they can capture Le Mesnil (or control a good portion of it) and exit on the road to the east they will have done their job. Again, time is of the essence as this is only a 9 turn scenario. For those who worry about the hidden unit issue it is pretty much a non-issue in this one since it is night with a visibility of 1 (yes, I know that hidden units still don't show up on the board until you run into them but with some general tactics this won't be too much of a problem. The Americans enter with a single M3 carrying an INF to find the inital German units. They are found well down the road towards Le Mesnil. The Americans jump from the halftracks and the Germans vanish into the night. The Americans attempt to follow and stumble into some German PzIVF2s which destroy the halftracks and force the accompanying Shermans to advance with caution. Meanwhile the other American troops including some Shermans advance towards Le Mesnil. They put together a very powerful assault using tanks, engineers and infantry and promptly fail the assault badly losing a step and having the tanks demoralize. This coupled with losses from Op Fire as they approached Le Mesnil pretty much ended chances for an American victory. The Germans weren't done, however, they managed to send a GREN platoon into the woods after a Sherman platoon and knocked out all the Shermans as well. This gave the Germans a Major Victory in the scenario, despite a platoon of Shermans exiting the board and a hex of Le Mesnil being controlled by the Americans at the end of the game. There were three potential turning points in the scenario and all three went the Germans way. The losses on the initial approach to Le Mesnil, the spectaculary failed assault as they arrived and the destruction of the Shermans in the woods by a single GREN platoon. With that much going for them it was not surprising that they scored a major victory. The scenario, however, seems balanced and I would suggest it for ftf and solo play. I give it a "4". |
| 0 Comments |