
|
An Urban Legend is Born Panzer Lehr #12 |
||
|---|---|---|
| (Defender) Germany | vs | United States (Attacker) |
| Formations Involved | ||
|---|---|---|
| Germany |  |
130th "Lehr" Panzer Division |
| United States |  |
60th Infantry Regiment |
| United States |  |
746th Tank Battalion |
| United States |  |
899th Tank Destroyer Battalion |

| Total | |
|---|---|
| Side 1 | 0 |
| Draw | 0 |
| Side 2 | 1 |


| Overall Rating, 2 votes |
|---|
|
2
|
| Scenario Rank: --- of 913 |
| Parent Game | Panzer Lehr |
|---|---|
| Historicity | Historical |
| Date | 1944-07-12 |
| Start Time | 10:00 |
| Turn Count | 14 |
| Visibility | Day |
| Counters | 141 |
| Net Morale | 0 |
| Net Initiative | 2 |
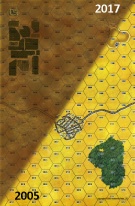
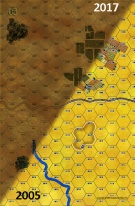
| Maps | 2: 4, 5 |
| Layout Dimensions | 56 x 43 cm 22 x 17 in |
| Play Bounty | 179 |
| AAR Bounty | 165 |
| Total Plays | 1 |
| Total AARs | 2 |
| Battle Types |
|---|
| Delaying Action |
| Exit the Battle Area |
| Inflict Enemy Casualties |
| Road Control |
| Urban Assault |
| Conditions |
|---|
| Hidden Units |
| Off-board Artillery |
| Randomly-drawn Aircraft |
| Reinforcements |
| Smoke |
| Terrain Mods |
| Scenario Requirements & Playability | |
|---|---|
| Battle of the Bulge | Counters |
| Eastern Front | Maps |
| Elsenborn Ridge | Counters |
| Panzer Lehr | Base Game |
| Introduction |
|---|
|
On the first day of Operation Cobra the U.S. 9th Infantry Division received the task of securing Marigny and the surrounding high ground. After studying the maps, Corps Commander Manton Eddy concluded his boys of the 9th — his former command, and considered by some the best-trained American infantry division — were in for a tough day. |
| Conclusion |
|---|
|
Despite another short drop by American bombers Operation Cobra went on more or less as planned. General Eddy quickly replaced his spearhead formations that had been devastated by the "friendly" bombing. Men like Captain Matt Urban, who escaped from a hospital despite a serious leg wound, led their men forward. Though still far short of Marigny, the Americans pushed a mile beyond the Periers-St. Lo road before digging in for the night. |

|
|
|---|
| AFV Rules Pertaining to this Scenario's Order of Battle |
|---|
|
| 130th "Lehr" Panzer Division |
|---|
|


| Heer |
|---|
|


| Luftwaffe |
|---|
|


| Schutzstaffel |
|---|
|

")
")

| Army |
|---|
|


| 5 Errata Items | |
|---|---|

|
Counter is mislabeled, this is actually a 75/41. (rerathbun
on 2013 Mar 06)
|

|
The morale and combat modifiers of German Sergeant #1614 should be "0", not "8". (Shad
on 2010 Dec 15)
|

|
All SPW 251s have an armor value of 0. (Shad
on 2010 Dec 15)
|

|
Reduce strength direct fire value be came 5-5 in Army at Dawn. (plloyd1010
on 2015 Jul 31)
|

|
The M18 has a special rule in Battle of the Bulge but it applies globally: "A two-step M18 unit can fire one anti-tank shot and move half its movement allowance (retain fractions) in a single impulse. The order in which it does these two actions is the player's choice." (Shad
on 2010 Dec 15)
|
| Sand Castle | ||||||||||||||
|---|---|---|---|---|---|---|---|---|---|---|---|---|---|---|
An entire regiment of US Infantry supported by extra mortars, OBA and armor attacks a mixed bag of German defenders, anchored by a battalion of Lehr troopers, a shattered Luftwaffe battalion and a company of SS troops who might reinforce the defense about halfway through the fight. The German force is well stocked with anti-tank guns (good ones, 74/41s and 88s and have a few tanks of their own, which will cause caution by the American tankers. There are plenty of fields in the area for cover and ta reasonably large town close by. The objective for the Americans is to destroy the German force, take the town and move further south. In this case move further south is defined as being south of the east west road. Given the frontage, both Daniel and I thought this would prove easy for the Americans and it did appear that way in play (thus the "2" ranking). Daniel set up his weakened Luftwaffe paras in a dug in line in front of the town to try to funnel the American advance. Most of the hiden units of the Luftwaffe contingent were held back in the town. The Lehr battalion sets up in the more open terrain to the west, also to try to funnel the American advance. The Americans advanced heavily against the Luftwaffe, sending two of three battalions in that direction and by the third turn in was apparent that the undermanned line could not hold and really wouldn't be delaying anyone in any substantial way. The line had all of the substance of a sand castle's outer walls when faced by the rising tide. The Lehr troopers began to move to the support of the Luftwaffe but became embroiled in a firefight with the third American battalion and, although they gave as good as they got it permitted the remainder of the regiment to proceed in its advance on the town. As they approached the town several of the remaining AT guns were spotted and the 88 was eventually subdued with artillery and massed mortar fire. A note about the American armor, it played virtually no role in the battle. It entered a field and after the M18s took out a couple of halftracks, the German armor and AT guns kept it pinned down. Of course, the fact that it remained there, close enough to make a run for it kept the German armor and AT guns from delaying the infantry racing towards the town. The SS support arrived as soon as it was able and immediately raced into the town to support the Luftwaffe defenders. It was apparent, even before the SS arrived that the Americans could not be stopped from moving south of the road so the Germans set a couple of "moral victory" goals, one to hold the town and one to keep the reserve American battalion from breaking through the Lehr lines. In the end the Americans didn't even challenge for the town but were able to get one half platoon through the Lehr battalion and had the better of the fight in that sector due to their preponderance of HMGs supporting the advance. In the end both Daniel and I felt that the scenario was clearly unbalanced. Looking back at the play it seemed as though requiring the Americans to exit the south of the board rather than merely be south of the road might have been a better requirement. In terms of victory points, exclusive of the points for steps south of the road, the Americans had a minor victory. I still believe that the troops could have made the edge of the board but if the SS focused on stopping the advance rather than holding the town it might have been more difficult for the Americans. One clear component of the victory was the stalemate of the American armor and the German AT guns and armor. If the Germans fought the American infantry with their armor the American armor could have engaged the Germans or passed them by. |
||||||||||||||
| 1 Comment |
| Luftwaffe is Synonym for Sieve? | ||||||||||||||
|---|---|---|---|---|---|---|---|---|---|---|---|---|---|---|
Played face-to-face against Matt W in 4 hours. I read the scenario the day before our encounter and I could not figure out a good defensive plan. My German troops must cover a wide front to prevent a much larger American force from simply walking south of the road. Half my troops are low morale Luftwaffe (7/6 morale) and I don’t think I can afford to stack the 8 reduced unit because the American have lots of bombardment capable units in addition to strong OBA. I decided to show two strong flanks and to hide most units in the center and in the town. The idea is to encourage the Americans to enter near the center so that I can collapse both flanks and hope it is enough to hold. The problem is my east flank is held by the reduced Luftwaffe units and the Americans just moved them down with much superior firepower and assault capabilities. I think only 2 of the starting half platoons were alive at the end of turn 5. The remaining Americans entered at the center and I was able to bring the units on my left flank to slow their advances. It was clear when my reinforcement arrived that counter-attacking on my right wing was just folly. Counter-attacking would leave the town vulnerable to the Americans and I needed the guns stationed there to keep an eye on their armor. The net result was the Americans were able to cross south of the road unopposed with many, many units. All was not lost because I set myself two goals: hold the town and prevent a breakthrough h in the center. The battle for the center was very bloody and it did not help that friendly fire rained on both sides. Whoever was directing the German OBA should have been shot the fifth or sixth time they hit German troops but that is just my opinion. The American managed a small breakthrough on the last turn with 1 unit reaching the road and another crossing it. The town did hold because the Americans did not try to attack it after the first wave was disrupted and demoralized. I don’t know the final score but it was certainly much more than the Americans needed for a major victory, not surprising as they were already in Major Victory range after 8 turns. I rated this scenario a “2”. Despite being fun to play (the mini goals helped in that regard), I don’t see how the Germans can hope to win. I see is no reason for the Americans to attack the town when crossing the roads is far less riskier and more rewarding in terms of victory points. Maybe changing town hexes to be worth 3 points or forcing the Americans to exit the map would help balance this scenario. |
||||||||||||||
| 0 Comments |
thanks