
|
Trash the Town to Take It Panzer Lehr #9 |
||
|---|---|---|
| (Defender) Germany | vs | Britain (Attacker) |
| Formations Involved | ||
|---|---|---|
| Britain |  |
50th (Northumbrian) Infantry Division |
| Britain |  |
56th Infantry Brigade |
| Britain |  |
8th Armoured Brigade |
| Germany |  |
130th "Lehr" Panzer Division |

| Total | |
|---|---|
| Side 1 | 1 |
| Draw | 1 |
| Side 2 | 1 |


| Overall Rating, 4 votes |
|---|
|
4.25
|
| Scenario Rank: --- of 913 |
| Parent Game | Panzer Lehr |
|---|---|
| Historicity | Historical |
| Date | 1944-06-18 |
| Start Time | 14:00 |
| Turn Count | 17 |
| Visibility | Day |
| Counters | 170 |
| Net Morale | 0 |
| Net Initiative | 1 |
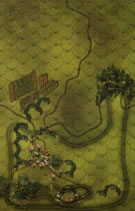
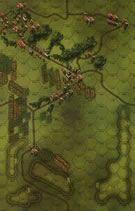
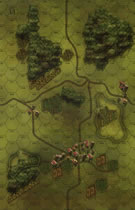
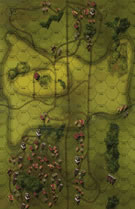
| Maps | 4: 27, 28, 31, 32 |
| Layout Dimensions | 86 x 56 cm 34 x 22 in |
| Play Bounty | 197 |
| AAR Bounty | 153 |
| Total Plays | 3 |
| Total AARs | 4 |
| Battle Types |
|---|
| Delaying Action |
| Exit the Battle Area |
| Inflict Enemy Casualties |
| Urban Assault |
| Conditions |
|---|
| Hidden Units |
| Off-board Artillery |
| Randomly-drawn Aircraft |
| Reinforcements |
| Smoke |
| Scenario Requirements & Playability | |
|---|---|
| Beyond Normandy | Counters |
| Fall of France 1 | Maps |
| Panzer Lehr | Base Game |
| Introduction |
|---|
|
On the evening of the 17th the British bombarded Tilly unmercifully. At dawn of the next day they started up again. Nineteen civilians died while the explosions reduced Tilly to rubble, but it remained unclear how much effect the barrage affected the defenders. When the bombardment lifted a strong mixed battle group moved forward to find out. |
| Conclusion |
|---|
|
After a long and bitter fight the British managed to force their way into Tilly. There they engaged the panzer grenadiers who had turned the rubble of the town to their advantage. Slowly the British pushed back the defenders until the Panthers counterattacked once again. This time it didn't matter, and the Germans fell back to form a new line running from Mantilly to Sagy. |

|
|
|---|
| AFV Rules Pertaining to this Scenario's Order of Battle |
|---|
|
| Army |
|---|
|


| 130th "Lehr" Panzer Division |
|---|
|


| Heer |
|---|
|


| 6 Errata Items | |
|---|---|

|
The "Optional Values" for the Achilles---and by extension the Archer---given in an Avalanche Press Daily Content piece on the 17-Pdr Anti-Tank gun (and printed on a replacement counter sheet Download) are now the Official Ratings, published in games like Cassino '44, Grossdeutschland 1946, and Indian Unity. These are: 8-5 / 8-8 Full Strength and 4-5 / 8-8 Reduced Strength. (caryn
on 2012 May 03)
|

|
All Bren carriers should have a movement value of 7. (Shad
on 2010 Dec 15)
|

|
The "Optional Values" for the Firefly given in an Avalanche Press Daily Content piece on the 17-Pdr Anti-Tank gun (and printed on a replacement counter sheet Download) are now the Official Ratings, published in games like Cassino '44, Grossdeutschland 1946, and Indian Unity. These are: 5-5 / 8-8 Full Strength and 3-5 / 8-8 Reduced Strength. (caryn
on 2012 May 03)
|

|
Counter is mislabeled, this is actually a 75/41. (rerathbun
on 2013 Mar 06)
|

|
The morale and combat modifiers of German Sergeant #1614 should be "0", not "8". (Shad
on 2010 Dec 15)
|

|
All SPW 251s have an armor value of 0. (Shad
on 2010 Dec 15)
|
| British hammer fails to nail home initial advantage | ||||||||||||
|---|---|---|---|---|---|---|---|---|---|---|---|---|
This is a meaty scenario depicting a British combined arms Brigade sized attack on a German held town. VP are awarded for town hex control, inflicting step losses and for the Brits units exiting the map to the south can also score VP's. The Germans have HIP to aid the defense and will be getting 4 x Panthers plus GREN support as reinforcements. The German set up is designed to slow the British advance on the main town and there is a minor force blocking the western road to try and stop the exit of British units. The Brits set up second and can either set up on the boards or enter on the first turn. They can set up quite close to the German lines so the German player has to ensure that he leaves no easy targets and vice-verse. The battle commences and the British juggernaut grinds through the German lines with casualties but relative ease, the western thrust threatens to have units exiting the board in quick time and after two of hours hard fighting half of the town has already fallen and Brit tanks are about to sweep off the board. However here come the cavalry of the Germans in the shape of 4 Panther tanks whose appearance seems so stall the British attack without even firing a shot. At the same time the German commander manages to extract his remaining forces from the northern half of the town and form a new line. In game terms the Germans won the initative and had two quick turns The last hour of the battle was bloody and exciting, the Sherman's and Firefly's tried to swarm the Panther and supporting PZIV which resulted in a step loss for the Panther for four step losses for the Sherman's. The flank attack was stalled, in the town the Brits were hit by successive German counter attacks which although costly succeeded in holding off the Brits from the major part of the town. At game end I had no idea which side had won but knew it was close. The final VP count had the Germans with just one more VP than the Brits so the result was a draw. This was a very exciting scenario with a good mix of units. The Brit ARVE is a monster in close combat and should be targeted by the German player as soon as it shows its ugly head. A cracking scenario |
||||||||||||
| 0 Comments |
| Panzer Lehr, scenario #9: Trash the Town to Take it | ||||||||||||
|---|---|---|---|---|---|---|---|---|---|---|---|---|
I started out wanting to play something from Beyond Normandy with Crab mine-clearing tanks in it but the BN scenario with them had too many maps in it to setup in my current space, so I ending up playing this scenario, from Panzer Lehr as it had Crab units but no minefields to clear. The Fall of France 1940 maps are nice to look at however and the Crab Tanks end up as burning wrecks! There is a lot of town hexes for the Germans to try and cover, so I setup two lines of defense, one up close to slow the British human-wave down and a second defensive line to pull back to. The battle goes back and forth, at first the Germans are winning with the British taking casualties in the initial town hex assaults but soon the numbers overwhelmed the Germans smaller numbers. Then the dreaded German reinforcements came on with Panther tanks on turn 9 as luck would have it and the Germans started winning again but after that the British huge numbers told and they waved over the Panther tanks and German Infantry controlling many more town hexes and in the end destroying more enemy steps as well for a Major British Victory! With so many town hexes on those four maps, it is difficult to control them with the lighter German number but this was and enjoyable scenario to play. I didn’t use the hidden rules playing this one solo. The British must push forward as fast as possible on this one, to be ready for the German reinforcements. |
||||||||||||
| 0 Comments |
| Truly Trashed | ||||||||||||||
|---|---|---|---|---|---|---|---|---|---|---|---|---|---|---|
A huge British force of a complete brigade with a large armored componentis attacking a medium sized Lehr force. I'm afraid that my mind was not appropriately set on managing my British troops in this one. I remembered a couple of scenarios back when I actually took Tilly and chased Lehr through the town, taking huge sections of the town and cutting the Lehr forces in two. It was a very gratifying win and one which reflected well on British arms. It was therefore with a certain amount of dismay to find that I had to start out farther back and that the defenders were substantially reinforced from the last time I took the town. I prepared to meet the expected immediate German forces and set up for some strong assaults on my front. Like the boxer who takes a mightly roundhouse swing at his opponent and misses, my assaults hit pure air as Daniel had wisely avoided setting up in the immediate front. Critically off balance, I lurched forward to the next set of towns expecting a battle and being gratified by the appearance of that defense I neglected to notice that a substantial component of my force had become disrupted or demoralized. Anxious to gain some traction I assaulted the urban terrain, with some strength and expectation of success. Instead my men took casualties and became disordered. Becoming completely punchdrunk I went at them with my true strength, including the AVRE, Sappers and good leaders and stunned, saw disaster after disaster befall my troops. After 5-6 turns I had lost 17 steps to the Lehr 2 and had taken exactly zero town hexes that were defended. The large force that I was sending across the hills to the east had to stop to defend the taken areas from a possible counterattack. This was a major blow to my plans. At this point I had to face the situation as if I was the commander of the brigade. I could have pressed home the attack but my men were already highly disordered. I had taken high losses and I had failed my morale check. At the same time I am playing PG I am also playing the Civil War, Brigade series from MMP/the Gamers. It includes a very well considered feature called "Attack Stoppage", the point at which an ordered attack has lost its impetus and the morale of the attackers is insufficient to impel the men forward. That is precisely what happened here. I apologized profusely to Daniel but the losses and position precluded any positive motion in my mind. I conceded and we moved on. This truly is a very good scenario and one worth playing again, with a better frame of mind. The Germans do need the hidden units as they permit their forces to consider ambushes, etc. I give it a "4" for the potential. I'm afraid my play and die rolling were only a two, but I can't penalize the scenario for my mistakes. |
||||||||||||||
| 0 Comments |
| Planning Ahead Paid Off | ||||||||||||||
|---|---|---|---|---|---|---|---|---|---|---|---|---|---|---|
Played face-to-face against Matt W. You can see my German setup in post 8 of this thread. I spent 90 minutes preparing my setup the evening the game because I did not want a repeat of our last scenario involving board 32; in that scenario, Panzer Lehr #05, my troops were unable to contain the British advance and Matt easily won a major victory. The idea was to be offer some resistance early while being to pull back towards board 32 under cover once the British commander committed his troop. The British suffered some back luck with early FoW rolls on the first two turns and by marching their troops from the empty town on the northwest board towards the town on the northeastern board. Time after time I would reveal one hidden unit and take opportunity fire. With the British rolling double-digits constanlt, I left a big sea of red and black markers just short of the town. The British advance from the North was slowed down by FoW and also by their first Sherman being caught in a crossfire. The British did extract a little bit of revenge when one of their planes reduced a PzIVH, the only loss I would take this game. I believe Matt was frustrated by the way the game is progressing and he committed important assets into two assaults. After both assaults went entirely my way, Matt asked if it was OK to stop and I agreed. We could not see how the British could recover quickly enough to mount a serious attack again before turn 10 (of a 15-turn game) and with them being so far behind in terms of victory points, it just an exercise in futility. German major victory! I was very pleased with my setup. Not only the British walked into several ambushes, I had already started shifting troops in better position by the time we ended the game. I gave this one a “4” because I believe it’s very well balanced, with the hidden units being critical to the German side. I enjoyed the time spent determining lines of retreat while considering my potential setup. |
||||||||||||||
| 0 Comments |