
|
Curtain Up at Ellon Panzer Lehr #1 |
||
|---|---|---|
| (Attacker) Germany | vs | Britain (Defender) |
| Formations Involved | ||
|---|---|---|
| Britain |  |
56th Infantry Brigade |
| Britain |  |
Sherwood Rangers Yeomanry |
| Germany |  |
130th "Lehr" Panzer Division |

| Total | |
|---|---|
| Side 1 | 2 |
| Draw | 0 |
| Side 2 | 3 |


| Overall Rating, 7 votes |
|---|
|
3.71
|
| Scenario Rank: 247 of 913 |
| Parent Game | Panzer Lehr |
|---|---|
| Historicity | Historical |
| Date | 1944-06-09 |
| Start Time | 10:15 |
| Turn Count | 15 |
| Visibility | Day |
| Counters | 81 |
| Net Morale | 0 |
| Net Initiative | 1 |
| Maps | 2: 27, 33 |
| Layout Dimensions | 86 x 28 cm 34 x 11 in |
| Play Bounty | 159 |
| AAR Bounty | 153 |
| Total Plays | 5 |
| Total AARs | 4 |
| Battle Types |
|---|
| Delaying Action |
| Exit the Battle Area |
| Inflict Enemy Casualties |
| Urban Assault |
| Conditions |
|---|
| Hidden Units |
| Naval Bombardment |
| Off-board Artillery |
| Smoke |
| Scenario Requirements & Playability | |
|---|---|
| Beyond Normandy | Counters |
| Fall of France 1 | Maps |
| Panzer Lehr | Base Game |
| Introduction |
|---|
|
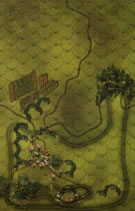
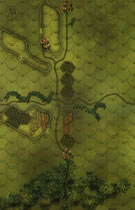
Bayeux sat in the center of the area's road net, making it the prime objective of I SS Panzer Corps. Panzer Lehr assembled in the Tilly-sur-Seulles area and then proceeded northward along both sides of the road leading to Bayeux. The recon battalion accompanied by General Bayerlein bypassed Ellon in order to set up the divisional command post in Arganchy, leaving its status unknown. Meanwhile, the assault group received an unmerciful shelling from several Allied warships during their approach march. On nearing Ellon the shelling lightened. |
| Conclusion |
|---|
|
It had been a long, grueling march for the grenadiers just to reach Ellon, made worse by the shelling that forced them to seek shelter in the dust behind the panzers. Upon reaching the village the German panzers spread out over a wide front seeking to envelop the village. The aggressive defenders quickly counterattacked with one squad of infantry proving particularly troublesome. They managed to pin down Panzer 604's supporting infantry and leapfrog their way to the tank for a close assault. Despite the British bravado the grenade attack failed to cause any damage, and the tide turned against them. Soon Ellon found itself in German hands. |

|
|
|---|
| AFV Rules Pertaining to this Scenario's Order of Battle |
|---|
|
| Army |
|---|
|


| 130th "Lehr" Panzer Division |
|---|
|


| Heer |
|---|
|


| 10 Errata Items | |
|---|---|

|
The "Optional Values" for the 17-Pdr given in an Avalanche Press Daily Content piece on the 17-Pdr Anti-Tank gun (and printed on a replacement counter sheet Download) are now the Official Ratings, published in games like Cassino '44, Grossdeutschland 1946, and Indian Unity, as shown in one of the two counter images. These are: 5-5 / 8-8 MA 0 (Towed). (caryn
on 2012 May 03)
|

|
The "Optional Values" for the Achilles---and by extension the Archer---given in an Avalanche Press Daily Content piece on the 17-Pdr Anti-Tank gun (and printed on a replacement counter sheet Download) are now the Official Ratings, published in games like Cassino '44, Grossdeutschland 1946, and Indian Unity. These are: 8-5 / 8-8 Full Strength and 4-5 / 8-8 Reduced Strength. (caryn
on 2012 May 03)
|

|
All Bren carriers should have a movement value of 7. (Shad
on 2010 Dec 15)
|

|
Ignore the direct fire values. (Shad
on 2010 Dec 15)
|

|
Leaders for the Panzer Lehr Division appear in the second release. Players with the first release should use the ILS for selection and substitute regular Heers leaders, if not using the Heers leaders originally specified. (plloyd1010
on 2016 Jul 13)
|

|
Leaders for the Panzer Lehr Division appear in the second release. Players with the first release should use the ILS for selection and substitute regular Heers leaders, if not using the Heers leaders originally specified. (plloyd1010
on 2016 Jul 13)
|

|
Leaders for the Panzer Lehr Division appear in the second release. Players with the first release should use the ILS for selection and substitute regular Heers leaders, if not using the Heers leaders originally specified. (plloyd1010
on 2016 Jul 13)
|

|
Leaders for the Panzer Lehr Division appear in the second release. Players with the first release should use the ILS for selection and substitute regular Heers leaders, if not using the Heers leaders originally specified. (plloyd1010
on 2016 Jul 13)
|

|
The morale and combat modifiers of German Sergeant #1614 should be "0", not "8". (Shad
on 2010 Dec 15)
|

|
All SPW 251s have an armor value of 0. (Shad
on 2010 Dec 15)
|
| Curtain up at Ellon or Exit stage right..... with a detonation! |
|---|
|
Allies set up on bd. 33 in the village and on the 20mm ridge line. Because of being pressed for time the Axis opt for a frontal assault leading with massed armor. The allied ATGs were quickly disposed of along with all but 1 Sherman platoon that did cause the Axis to loose on Mark IV step. The Achilles accounted for 3 full Mark IV platoons alone. They were each knocked out when the Axis failed to activate at key moments. Any one of these would have put the Achilles in a bad situation but each time the Axis failed...exit stage right. In the end the Allies gained a major win. The Axis did not exit any units and only controlled 4 town hexes on whole board. This was a really fun scenario but I doubt if a similar outcome would be had in any replay. Even if it would not I would still rate it a 4. The new lazer cut pieces are really great! |
| 0 Comments |
| Teachers get detention |
|---|
|
This was a dynamic, fast scenario. Panzer Lehr had a battalion of infantry, half gepanzert, and a battalion of Pz-IVs to try to take a town on a hill and exit off the far end of a narrow, two-board battlefield. The British had a battalion of infantry with a company of Shermans and an Achilles with which to stop them. The British set up a forward dug-in line of two infantry companies backed by an AT battery, with their armor and the rest of the infantry in and around the town on the hill farther back. The Germans sent half their infantry to take the west side of the British front, with the majority of their tanks on the east side hoping to blow past the British and quickly deal with the tanks behind the line. The rest of the German infantry, gepanzert, and a company of tanks, waited in the middle to break through and take the town. The game developed quickly, with the Germans attempting to overrun and cut off the British front rather than methodically reduce and eliminate them. Some of the German panzers advanced adjacent to two stacks of British infantry, hoping the massive DF would quickly dislodge them. Two platoons of British took the risky initiative to assault the panzers, wiping out 3 steps in a fusilade of PIATs. Meanwhile, the German panzers on the east flank took losses due to long range tank fire from the hill. Using a bounding overwatch they reduced some Shermans to flaming wrecks, but by the time they had reached the base of the hill their force was shattered, just 2.5 platoons left out of 6 that started out. In the center, the German reserves committed themselves, racing past the still grappling British and Germans in the front lines and using some fields as cover to advance on the town. A panzer company marched right up to the first town hex where the Tommies worriedly eyed them. Unfortunately, most of the gepanzert infantry was wiped out on the move by British AT fire. The remnants diverted to try to deal with this threat, leaving the panzers alone in front of the town. They in turn blasted the British infantry, but were caught in a deadly AT crossfire, including the last gasps of the British armor to the east of town. Suddenly in a precarious position, the tanks were then assaulted by British infantry from the town, who again wielded their PIATs to great effect. At this point the Germans had effectively lost, having sustained massive losses without anything to show for it. I played on for a few turns as the German leadership tried to round up a company or so of wounded and stragglers to try to bypass the town hexes controlled by the British in order to capture a few in the rear. Judicious artillery fire broke up this attempt and the Germans threw in the towel. Huge British victory. I think I was way too aggressive with my German advance. I had more time on the clock but I gambled that bypassing half the British force in isolated front line dugouts would work. Unfortunately they kept morale nicely and made an orderly retreat, mixing it up with the Germans as they fell back and preventing any kind of concentration of forces capable of taking the town. Nicely done, lads, pip pip! |
| 0 Comments |
| Fade to Black | ||||||||||||||
|---|---|---|---|---|---|---|---|---|---|---|---|---|---|---|
Yes, I know that is the name of a scenario in another game (EFDx #56 about a Romanian cavalry battle). I can't, however, think of anything more appropriate for this AAR. As the British I am charged with the need to hold several towns, one on a commanding rise, cause losses and stop a large armored force with accompanying infantry. I actually outnumber the German infantry but the tanks worry me considerably as each full strength tank unit that manages to exit the board represents 8 VPs. I construct my defenses accordingly in depth with my hidden units primarily as reinforcements to the seen units, along the road. The short (15 turn) scenario will help in my goal. Daniel is a deliberate commander and took the time to develop his attacks on my positions. For a time it felt as though my force in the hilltop town would prove to be his undoing, and in fact, did manage to hold him long enought to eliminate board exiting as a method of victory. Surprise after surprise of hidden units were waiting in that town including all of the British armor which played a very technical hide and seek game with the German massed armor for most of the game. I was helped by an incredibly accurate artillery fire including some massed on board mortars. While they didn't cause enough morale failures on the Germans (Daniel had two 9-1-2 leaders) they did cause outright losses which helped in the VP calculations. In addition Daniel decided to roll low throughout his die rolls, including assault rolls (through game turn 10 I saw more 1's on Daniel's assault rolls than in binary code, to which Daniel's T-shirt alluded). I therefore had a sense of security in the outcome. No Germans would be leaving the board and I maintained a 7 point lead. And then it all came apart. Daniel's 1's in assault combat turned to sixes and four town hexes became controlled by the Germans as the loss of my Achilles opened up the terrain for the Lehr tankers who crossed the high ridge and brought their firepower and mass to bear on the larger town. It may have been Curtain Up for Lehr but it was definitely fade to black for my forces as they were simply not up to the task of stopping the Germans once the hilltop town fell. I notice that fade to black is often used to keep the viewer from seeing a particularly gruesome scene. Would that it had been available to me in this scenario. In five turns I went from a 7 point lead to a double figure defeat. It was however, quite fun. The surprises of the hidden units keep this one competitive as the British armor is inferior in both numbers and quality and needs surprise to be effective. I enjoyed seeing my dispositions accomplish the goal I envisioned, keeping Lehr on board. So overall, I give this one a "4". I think it is vastly better as a shared play than as solo given the need for surprise to even out the tactical situation. All in all a good drama for a Saturday afternoon. |
||||||||||||||
| 0 Comments |
| Rule Britannia! | ||||||||||||||
|---|---|---|---|---|---|---|---|---|---|---|---|---|---|---|
This was a brisk & exciting 3-session play-through of a relatively short scenario. I played the British side against an aggressive and able Face-to-face opponent. The Germans presented with a balanced 2-battalion, combined arms force with the mission of taking a hilltop town, and then exit the rather narrow, 2-board map battlefield. The British were assigned their own, weaker combined arms task force consisting of an infantry battalion and a company of Shermans, plus an Achilles SPAT unit. This scenario placed a premium on well-sequenced attacks and the crucial presence of a mobile reserve on both sides. It was played without the fog of war rule, but with multiple British units hidden at the start, As others had successfully done, the British occupied a dug-in line of infantry companies backed by an AT gun platoon, with their armor closely arrayed just behind the front line. The balance of their force was set up in the immediate vicinity of the hilltop town. The eager German Commander directed a rather-pinched, right-flank (eastern) infantry attack. The majority of his armor was engaged in a left flank (western) advance with the apparent mission of bypassing Allied positions to get at the British armored reserve behind the main defense line. An infantry-heavy German "breakthrough" column with half tracks remained just behind in the center and was available to support either flank attack. Britsh opportunity fires from previously hidden units, took a serious toll on the German infantry and pioneer units as they advanced throughout this play-through Fierce and confused fighting ensued, and several Garman armor-supported close assaults aimed at getting behind the British infantry were vigorously pursued. The British counter-attacked in the center and on their right flank, and experienced a string of better-then average combat & morale rolls that eventually eliminated 3 platoons of Pz-IVs in close assaults. Germans advancing toward the hilltop town were thrown back but a a cost of 3 platoons of Shermans and 2 leaders. The well-positioned Achilles platoon proved itself deadly, using AT fire against the accompanying Pz-IVs. By turn 8, the Germans had made substantial, but very costly progress in the center after committing their reserves on turn 5. Beginning on turn 9, British counter thrusts were starting to catch isolated panzer units without supporting infantry formations as the hilltop town was approached by the Germans. The scenario devolved into a series of close assaults as the British slowly gave ground in the center, and the German flank attacks began losing momentum. Allied OBA (naval gunfire) inflicted numerous infantry and HMG losses on the German side in the allowed 3 turns of naval bombardment. By game end, the German force had absorbed major losses with very little to show for the cost as none of their units mad it to the north map edge. The result was a hard-fought British victory. |
||||||||||||||
| 1 Comment |