
|
A Dangerous Situation Panzer Grenadier #35 |
||
|---|---|---|
| (Attacker) Germany | vs | Soviet Union (Attacker) |
| Formations Involved | ||
|---|---|---|
| Germany |  |
18th Panzer Division |
| Soviet Union |  |
1st "Moscow Proletarian" Motorized Rifle Division |

| Total | |
|---|---|
| Side 1 | 0 |
| Draw | 1 |
| Side 2 | 1 |


| Overall Rating, 3 votes |
|---|
|
3.33
|
| Scenario Rank: --- of 913 |
| Parent Game | Panzer Grenadier |
|---|---|
| Historicity | Historical |
| Date | 1941-07-03 |
| Start Time | 11:00 |
| Turn Count | 24 |
| Visibility | Day |
| Counters | 141 |
| Net Morale | 0 |
| Net Initiative | 1 |
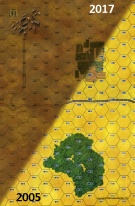
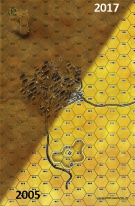
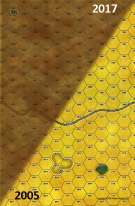
| Maps | 3: 1, 2, 8 |
| Layout Dimensions | 84 x 43 cm 33 x 17 in |
| Play Bounty | 165 |
| AAR Bounty | 171 |
| Total Plays | 2 |
| Total AARs | 1 |
| Battle Types |
|---|
| Inflict Enemy Casualties |
| Meeting Engagement |
| Urban Assault |
| Conditions |
|---|
| Off-board Artillery |
| Randomly-drawn Aircraft |
| Reinforcements |
| Terrain Mods |
| Scenario Requirements & Playability | |
|---|---|
| Panzer Grenadier | Base Game |
| Introduction |
|---|
|
ARMY GROUP CENTER: After capturing the Berezina bridge near Borisov, 18th Panzer Division drove for Orsha and the Dnieper River. Advancing to meet them came the 1st "Moscow Proletariat" Motorized Rifle Division, the showpiece unit of the Red Army of Workers and Peasants. Along the way the division picked up several tank training units. The elite division had to eliminate the German bridgehead; failure would mean disaster as the Dnieper line to the rear was poorly defended. The two formations met 6 miles west of Borisov. |
| Conclusion |
|---|
|
After fierce fighting the Soviets withdrew. In these first days of the war, even an elite formation had trouble coordinating armor and infantry. |

|
|
|---|
| AFV Rules Pertaining to this Scenario's Order of Battle |
|---|
|
| Heer |
|---|
|


| Army (RKKA) |
|---|
|


| 9 Errata Items | |
|---|---|
| Scen 35 |
Delete "2x82mm" from the German OOB. (rerathbun
on 2012 Feb 21)
|
| Scen 35 |
SSR indicates that an entry roll should take place but does not define what it is or how it should be conducted. I played this as 2d6 units could enter per turn based on similar rules for other scenarios, unit count, and turn count, but your guess is as good as mine. (triangular_cube
on 2017 Aug 06)
|

|
Two 105mms (ID#s 1204, 1205) have "16-31" fire values in black (direct fire), when they should be in white (indirect fire). (Shad
on 2010 Dec 15)
|

|
The reduced direct fire value of the Heer HMG became 5-5 starting with Fall of France. (plloyd1010
on 2015 Jul 31)
|

|
The Pz IVe appearing in the original Panzer Grenadier game had an Anti tank value of 4-7. As of Afrika Korps (2002), continuing onward through the 3rd and 4th edition games, the anti tank value has been 4-4. (plloyd1010
on 2016 Jul 25)
|

|
The morale and combat modifiers of German Sergeant #1614 should be "0", not "8". (Shad
on 2010 Dec 15)
|

|
All SPW 251s have an armor value of 0. (Shad
on 2010 Dec 15)
|

|
The StuG IIb appearing in the original Panzer Grenadier game had an Anti tank value of 4-7. As of Eastern Front Deluxe (2005), continuing onward through the 3rd and 4th edition games, the anti-tank value has been 4-4. (plloyd1010
on 2022 Jul 21)
|

|
The reduced direct fire value in Kursk: Burning Tigers is 4-4. (plloyd1010
on 2015 Jul 31)
|
| A Heck of a Fine Movement to Contact Battle, That Just Needs a Rewrite | ||||||||||||||
|---|---|---|---|---|---|---|---|---|---|---|---|---|---|---|
This was a 6-session, high maneuver, and very fun-to-play scenario with the hardworking & thoughtful, Sonora, handling elements of the fast-moving, 18th Panzer Division. I led the, suicidally-inclined elements of the Soviet 1st Motorized Division in what turned out to be a relatively wild, movement-to contact kinda game that needs a rewrite, but was a good time in play. We used the FOW, extended assault, excess initiative, tank riders, smoke/illum and consolidation optional rules, plus these two house rules: Road Movement for Mechanized & Foot Units All FOOT & MECHANIZED units may move on roads at the rate of 1/2 a Movement Point (MP) per road hex, just like MOTORIZED units, and Standardized Movement for Mechanized Units All mechanized units may move through clear hexes at a movement cost of only 1 movement point (MP) per hex, instead of 1 1/2. Add one to this cost if moving up, across, or down slopes hexes. We felt that these two house rules were well-suited to this scenario in shared online play. Needless to say, this crazy, movement-to-contact was a costly affair for both sides with multiple loaded truck units being shot to pieces by the armored spearheads of both sides. The Germans quickly grabbed nearly all of the big town on Map 2 (west 1/3 of the battle map), and the Russians occupied the 5-hex town on Map 1, soon after. Two successful Luftwaffe air strikes eliminated a pair of Russians leaders and their accompnying towed artillery & infantry. Russian artillery support was pretty much useless in this game, though the T-34s and KV-1s were lethal to nearly everything in their paths. Even the contingent of BT-7s had a relatively good day setting up crossfires against Pz-IIIs on clear hexes and snoopy SPWs that the T-34s ate like popcorn. Throughout the scenario, the German side suffered from not enough infantry, or engineers and were forced try to hold town hexes with fragile towed artillery, or AFV's. The first 9 game turns mostly belonged to the boys from the Third Reich, but things changed dramatically when the Germans attempted to assail the smaller 5-hex town that the Russians had pretty-well fortified by that point. With more landser infantry the Axis side would have prevailed in this one. Together, we threw more than 36, combat 7-die rolls. Nearly all at critical moments! The final step losses in this shoot 'em up were: 29 Soviet steps and 5 leaders eliminated, the Germans lost 34 steps and 6 leaders. At the end, the Soviets controlled 9 of the 27 town hexes on the battle map, there were 3 still-contested, and the Germans held 15 - all in the largest town - resulting in a costly, Russian victory. I give this one a generous rating of 4, since the "as published" scenario instructions need to be rewritten. We chose to let all our units on to the opposite edges of the battle map, at once, since the instructions and special rules were muddled and unclear. This made for a wild scramble to establish control over as many town hexes as soon possible on Maps 2 (22 town hexes) and 1 (5 town hexes). Much like the infamous, Oklahoma Settler Land rush! In spite of its flawed writeup, we enthiusiastically recommend this one for both SHARED and SOLO play. |
||||||||||||||
| 0 Comments |