
|
Homeland Security North of Elsenborn #4 |
||
|---|---|---|
| (Attacker) United States | vs | Germany (Defender) |
| Formations Involved | ||
|---|---|---|
| Germany |  |
9th Panzer Division |
| United States |  |
1st "Big Red One" Infantry Division |
| United States |  |
3rd "Spearhead" Armored Division |

| Total | |
|---|---|
| Side 1 | 3 |
| Draw | 0 |
| Side 2 | 2 |


| Overall Rating, 7 votes |
|---|
|
4
|
| Scenario Rank: 97 of 913 |
| Parent Game | North of Elsenborn |
|---|---|
| Historicity | Historical |
| Date | 1944-09-16 |
| Start Time | 07:00 |
| Turn Count | 24 |
| Visibility | Day |
| Counters | 81 |
| Net Morale | 1 |
| Net Initiative | 3 |
| Maps | 2: 22, 23 |
| Layout Dimensions | 56 x 43 cm 22 x 17 in |
| Play Bounty | 153 |
| AAR Bounty | 159 |
| Total Plays | 5 |
| Total AARs | 3 |
| Battle Types |
|---|
| Ambush |
| Delaying Action |
| Hill Control |
| Inflict Enemy Casualties |
| Rural Assault |
| Urban Assault |
| Conditions |
|---|
| Anti-infantry Wire |
| Entrenchments |
| Hidden Units |
| Minefields |
| Off-board Artillery |
| Reinforcements |
| Severe Weather |
| Scenario Requirements & Playability | |
|---|---|
| Afrika Korps | Counters |
| Airborne - IE | Counters |
| Eastern Front | Counters |
| Elsenborn Ridge | Maps + Counters |
| North of Elsenborn | Base Game |
| Introduction |
|---|
|
Nazi Germany poured vast sums of money, concrete, steel and labor into its "West Wall" defenses, but even the stoutest fortifications are useless with no one to man them. When the U.S. VII Corps began its attack on the first belt, known as the Scharnhorst Line, in some places the Landesschützen or "homeland security" battalions simply ran away rather than fight. But when they reached the second fortified zone known as the Schill Line, the Americans found a very different situation. |
| Conclusion |
|---|
|
After several days in which they displayed little fighting spirit, the Germans finally rallied to try to hold their fortified line. Hidden anti-tank guns knocked out half a dozen Shermans, and the Americans called in infantry reinforcements. Fighting raged among the pillboxes for the remainder of the day before the Americans finally broke through and declared the West Wall breached. |

|
|
|---|
| AFV Rules Pertaining to this Scenario's Order of Battle |
|---|
|
| Heer |
|---|
|


| Army |
|---|
|


| 6 Errata Items | |
|---|---|

|
The reduced direct fire value of the Heer HMG became 5-5 starting with Fall of France. (plloyd1010
on 2015 Jul 31)
|

|
Strongpoints are single step units and can be eliminated with X results like any other single step unit. (Shad
on 2010 Dec 15)
|
|
|
The standard mix of strongpoints may be downloaded from Avalanche Press: http://www.avalanchepress.com/German_Strongpoints.php This is the standard mix found in Airborne, Airborne-IE, and Edelweiss Expanded. The strongpoint mix in Cassino '44 is different from that of other PG games. (plloyd1010
on 2012 Feb 01)
|
|
|
Strongpoints are affected by the terrain in their hex just like any other unit.
Even though they can't move, they can attack using Assault Combat if an enemy unit moves into their hex.
They may not dig in or benefit from entrenchments.
(rerathbun
on 2014 Apr 21)
|

|
The movement allowance on the counters in Airborne is misprinted. It should be "3." (rerathbun
on 2012 Jan 30)
|

|
The M18 has a special rule in Battle of the Bulge but it applies globally: "A two-step M18 unit can fire one anti-tank shot and move half its movement allowance (retain fractions) in a single impulse. The order in which it does these two actions is the player's choice." (Shad
on 2010 Dec 15)
|
| Valient but Ultimately Doomed Defense | ||||||||||||
|---|---|---|---|---|---|---|---|---|---|---|---|---|
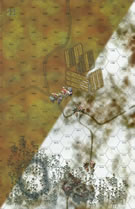
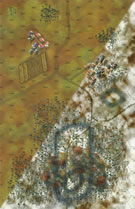
Vince & Wayne have written excellent narrative AARs so mine will be pithy. Playing solo with an entire side hidden required some "acting" and a few coin flips for direction. German set up has the mine-heavy line to the western side; wire-heavy side to the east just before the woods that front the large hill in the NE section of the two-map area. Not having Airborne, I used Cassino for the strongpoint draw. Strongpoints and entrenchments covered "holes" where, say: mine-mine-wire-mine-mine. Since the US could not be aware of the lack of German units in either the southern (entry) board 22 towns or the LT on the eastern edge, I had the 3rd Armored forces move northwards in three groups: INF+tanks to the west; INF+HMG in the center; INF + tanks to the east, skirting the woods. Once they approached the board 22/23 edge, the entire force swung to the west where I decided to punch through the two wire hexes that were gaps in the run of mines and which lay before a board 23 town and some fields. Because of the initial advance, this attack arrived in "waves." I kept a few M3's as holders for the towns against any German infiltrators. US tankers rolled over and cleared the wire only to run smack into a German AT nest and a lurking STuG-III platoon. Despite US loosing four steps of armor (1xM4 + 1xM4/76) and some INF/M3's to push through here, reinforcements - which are contingent on US losing tank steps - did not arrive. It was not until turn 9, with another M4 lost in a town assault, that the US took the '1' result again the tank to precipitate the arrival of a battalion from the Big Red One. So essentially, by turn 12, the US 3rd Armored has penetrated the German western line and ensconced itself into the SW 3-hex town and fields of Board 23. The reinforcing elements from 1st Infantry Division split up with a company moving to reinforce 3rd Armored and the rest moving north on the eastern side to make an attempt at the hill terrain on the eastern section of board 23. At turn 12, German VPs = 44 US VPs = 26 The remaining US armor decides they've done their part so they sit in the town (not particularly wanting to cross open terrain with more lurking German armor likely about); a US HMG, M3 and an INF hold the fields. This is used as a hinge as the US sends two companies of INF (mixed from both divisions) to attack the five-hex town in the NW section of board 23. Meanwhile, the other elements of the Big Red One engage blocking forces behind the eastern wire and, pushing forward, into the woods and slopes of the 40-m hill seeking out German strongpoints and entrenchments. A vicious assault and artillery battle ensues for the five-hex town. The outcome is not in doubt, but the US pays a price in blood and time to clear the town (Germans were the beneficiaries of one of those 1:6 assault roll outcomes that makes the other side tear their hair). AT turn 19, the score is: Germany 35, US = 31. Both sides feel a bit desperate. The US has the force edge, but are running out of time. The Germans are just plain running out of material. The last StuG takes a chance by uncovering in the middle board woods to kill an M3 step. The US armor, which had been idling for some time whilst the ground pounders did their dieing, charged forward to set up flanking shots. German initiative saw to it that the StuGs sold themselves for an M4/76 platoon. Ensuring turns saw US forces try to consolidate and launch further attacks/assaults. By game end, the Germans still controlled two entrenchments (another was in assault) one of which was on the large hill denying the US that bundle of VC points. Game End: German VPs: 31 US steps + 3 entrenchments + 0 towns (board 22) + 0 towns (board 23) + 5 (a unit on the hill) = 39 US VPs: 26 German steps + 6 entrenchments + 4 towns (board 22) + 5 towns (board 23; 3 pts each) + 0 for not controlling the 20/40-m hill = 51. Differential of 12 for a Minor US Victory (range of 5 - 15) Very enjoyable scenario with a lot of movement and "leap frogging," both positionally and with armor and infantry each taking the lead at different moments. |
||||||||||||
| 1 Comment |
| Reinforcements Swing The Balance - Great Scenario ! | ||||||||||||||
|---|---|---|---|---|---|---|---|---|---|---|---|---|---|---|
Game played against Wayne Baumber. Normally, I'd have rated this game a 3, especially with a loss, but it is going to get no less than a 4 and here is why. Readers of the CSW folders or APL site will probably be aware that MB, the games inventor wrote that he never plays through the scenarios he writes. That being the case, he is probably quite unaware of the little gem that this innocuous looking scenario is, and drawn, as it is from an even more innocuous download pack Here are the reasons I rate it so high. It has two Elsenborn boards, covered as that lower part of Germany is, with fir-tree woods as well as thick woods, hamlets, villages, farmland and rolling ground here and there. And yet, to defend this largish exapnse, the Germans have very sparse and an inconsistent quality of forces, half of which the infantry are disinterested Landeschutzen with a 5 morale. BUT, they have AT and Assault guns that can set up hidden, and are also equipped with defence materials of wire, mines and entrenchments. Where on the map should one put these forces ?, where will the GI's enter ? The south-east, the south-west or straight south ? So many options ! Then, as a real poser, the German has to consider this. American reinforcements, that the US player WILL need (150% more infantry) can only enter when they start losing their own AFV's. In fact, a 12 result, modified by +1 for every AFV step lost. So the German has to decide when he should knock out these guys if they come into view and just how many.... afterall, he can not have them roam untouched around the board. So there you have it, many, many variables that should make each play very different. For the record, I decided that no more than two US AFV's be knocked out until the game gets to the mid or later stages because he will not have enough infantry to capture the VC targets. In the event, his M18's stumbled right into my wood hidden StG's and the M18's were summarily wiped out. Wayne then rolled 2 x 6 for a 12 result and his reinforcements entered on turn 4.. WAYYYYYYYYY to early for this hotch-potch German force. Heres the AAR. I hope it conveys the fun we had with this one The Lie Of The LandOne part of this Schill Line, located not too far from Stolberg pitted elements of the US 3rd Armored Division against a hodge-podge of soldiers from the 9th Panzer Division and the aforementioned Landeschutzen units. This particular area was well wooded in the west, with small hamlets scattered about in the southern part of the battle area and two larger villages in the northern sector. Around here, the Germans plotted two platoons of StGIII’s (in the wooded area) and three batteries of 75mmAT guns in the northern villages. The hamlets to the south were given up as indefensible by the Germans due to their sparse numbers of manpower. These particular German forces had not been scouted by American forces at all. The Americans were only aware that some Panzer Grenadiers and ‘Home Guard’ units were in the vicinity and as such at 0700 hours, they sent forward a two company sized task unit supported by an M18 platoon and a squadron of M4’s. Early American Losses & ReinforcementsBy 0730, German OBA had spotted the invaders and began sending down regular barrages against the Americans. In short order, casualties were soon made of the US GI’s doing their best to get forward. In their support, some pretty reckless, albeit selfless support was given by the M18’s and M4’s pushing hard into the western woodland in an attempt to flush out any enemies. Unfortuantely for these brave tankies, they got more than they bargained for. Seeing them when as close as 200 yards, they bumped into the StG platoons at 0745 hours. Within minutes, all the M18’s and some M4’s were burning wrecks. Marching to the ‘Sound of the Guns’, the other American troops and AFV’s made for that area. The Americans soon overpowered the almost immobile German vehicles, though at the same time, losing a good few of their own M3’s in the process as well that also appeared to get ambushed. But the way through the wood now appeared clear. A huge benefit had also been gained for the Americans despite their early casualties. Learning how resolute the defenders were being, a whole battalion more of men from the Big Red One were now being sent forward as reinforcements so that the GI’s certainly now had numbers on their side. Slowly The Balance TipsBut, for the next hour, the Americans still lost infantrymen regularly. Losses came from artillery strikes, MG fire and close in battles and at this point, it seemed that the frontline of this attack would be decimated. However, once the 1st Infantry Division reinforcements got into the scrimmage, the pendulum swung the Americans way for the rest of the morning. By 0915 hours, they were able, when required to bring down plenty of suppression fire backed by good armour and APC support. The Germans, not only were unable to match such firepower, but were too thinly spread for what they were required to defend. One by one, German entrenchments were slowly winkled out in an attritional style but always to the American advantage. There was one entrenchment in particular in the central part of the battlefield that held out for some 3 or more hours. This had been well armed with HMG firepower and although it took early casualties, the grenadiers that remained fought for some time until the American commander finally threw some real heavy duty American industry at it. Infantry, MG’s, tanks and MG armed halftracks finally levered out the remaining resistance. The Hill Inspires HeroicsThe main focus of the battle really centred around a large area of high ground in the north east side of the battlefield. As well as the StG’s encountered earlier, German pillboxes, infantry and more entrenchments were scattered around its environs. For two hours fighting raged in this area, amongst the fir-tree covered trails and raised ground, Germans and Americans savagely fought to the death in the eerie humidity of the evergreens in their desperate attempts to claim or keep this hill. There was no doubting the winner here. Once more, sheer US firepower availability eventually punched the defenders away to seal the day for the attackers…. Almost ! Just before midday, a defiant German Major took a Grenadier platoon with him up the hill. They were fired on from literally all sides, as the Americans were shocked to see yet more outnumbered Germans trying to counterattack up this hill and control the high ground. Pushing some 600-800m through constant American attention with bullets and artillery, the brave grenadiers were finally stopped, stunned and then mercilessly finished off just yards short of their destination. This was the end of the German resistance in the sector, and the battle tailed off around 1215 hours. AftermathA close run thing it had certainly been and took just short of a full 6 hours of battle-time. In summary, it appears the quick appearance of US reinforcements was probably the saving grace for them. For had they waited 30-60 minutes longer, they probably, though not definitely may not have had the fullest of time to clear the Germans out of this sector. In fact, had the reinforcements taken any time longer to arrive, then, the outnumbered Americans that originally began the battle may well have been out-gunned ? So one would have to conclude, that this event was probably the most important of the battle. American combined arms operations was good overall in a tricy and testing situation and may also be given as reason for the victory. Germans losses were 25 step eqivalents and the Americans lost 20 step equivalents. The Americans gained another 33 points from entrenchments and town hexes taken and this included 8 points for clearing the hill of undemoralised Germans. Germans gained another 9 pomits for trenches and town hexes held. Total score US 53pts, German 29pts. American major victory. |
||||||||||||||
| 0 Comments |
| Excellent scenario | ||||||||||||||
|---|---|---|---|---|---|---|---|---|---|---|---|---|---|---|
This was played FtF against Vince Hughes. This scenario is a US attack against a small and strange mixture of German troops. The A/T guns and STUG's of the defenders are hidden and they have also mines,wire and entrenchments to assist in holding back the well armed GI's. Vince has written about the wealth of options available to the defender, its the Special rule reinforcements that make this scenario a interesting one from the US side. Simply you have to lose some AFV's to get any reinforcements and you have to lose them early. So off went the brave tankers in the vanguard hoping to flush out the German tanks and/or ATG's. Well I was lucky the tankers found the Stugs I lost 4 steps of tanks and 3 steps of M3s but Vince lost his entire tank force and I got my reinforcements early. A good job too because it was still a hard task to eliminate enough German units and entrenchments for victory, the sacrifice of those unwitting cardboard tank hero's was the turning point. The West Wall was breached! |
||||||||||||||
| 0 Comments |
PS Comment: Normally I would not give a '5' to a scenario with a random contingency for reinforcements (e.g. the iconic [i]St. Vith: the Fall [/i] in ER). This one, however, I thought was very cleverly done with the US actually needing to take tank step losses to precipitate the reinforcing infantry battalion. Together with the (somewhat psychological) desire to knock down some wire (who wouldn't enjoy this!) encourages a tank-leads-halftracks attack rather than a tanks-follow-infantry approach (which subsequently ensues).